• Contact Kim
  • Stay Connected
  • Shop Printables
  • Nav Social Menu

    • Facebook
    • Instagram
    • Pinterest
    • Twitter

Salvaged Living

Easy DIY home decor and craft projects for budget home decor

  • Home
  • Meet Kim
    • About KIM
    • Get Kim’s Look
    • Kim’s Bookshelf
    • Kim’s Home Tour
    • Get The House Look
    • Disclosures
  • DIY Projects
  • Faith
  • Home Decor
  • Grow Your Creative Business
    • Grow Your Creative Business Course
    • One on One Business Consulting
  • Classes
Home » DIY Projects » DIY Painted Terracotta Pots with a Shabby Chic Feel

DIY Projects

DIY Painted Terracotta Pots with a Shabby Chic Feel

This post may contain affiliate links.

I love to take a simple terracotta pot and make it fit into my vintage style decor. You know – make a plain pot rustic and aged, make it feel worn and broken in. Like it was taken from another place and time. When you see how simple this terracotta pot craft is you will be painting all the things, trust me!DIY painted terracotta pot idea for cute and easy rustic home decor. This new terra cotta planter goes to shabby chic instantly with this bubble wrap painting hack! Perfecr for spring decorating or a cuteorganization idea, making over a terracotta pot is so simple! #bubblewrap #burlapprojectidea #springplanter #rusticdecor

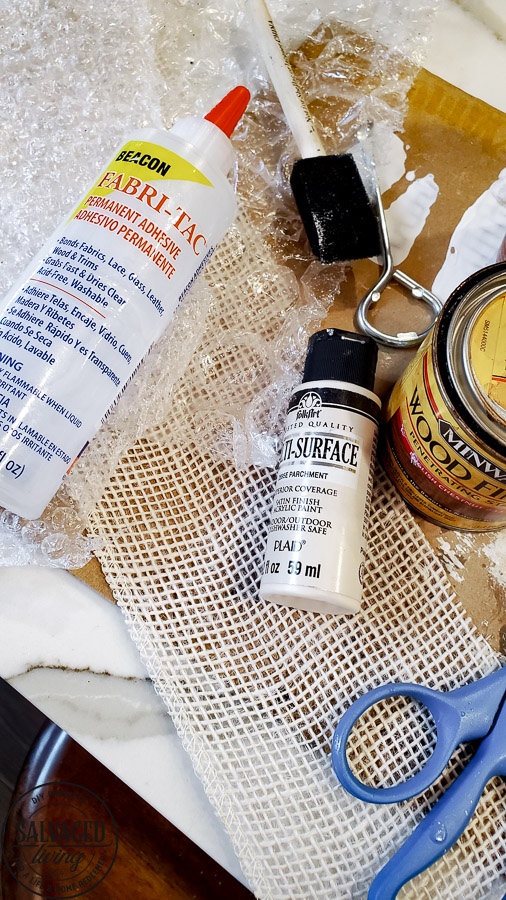
You can do this on any size terracotta pot, but since mine is for indoor use, I opted for smaller ones you can find at the dollar store or discount store in your area. I love to use pots for organizing, not just plants! Today I am showing you a secret crafting weapon you might not have thought of using. And it is a budget friendly craft supply for sure! Bubble Wrap and burlap!

DIY painted terracotta pot idea for cute and easy rustic home decor. This new terra cotta planter goes to shabby chic instantly with this bubble wrap painting hack! Perfecr for spring decorating or a cuteorganization idea, making over a terracotta pot is so simple! #bubblewrap #burlapprojectidea #springplanter #rusticdecor

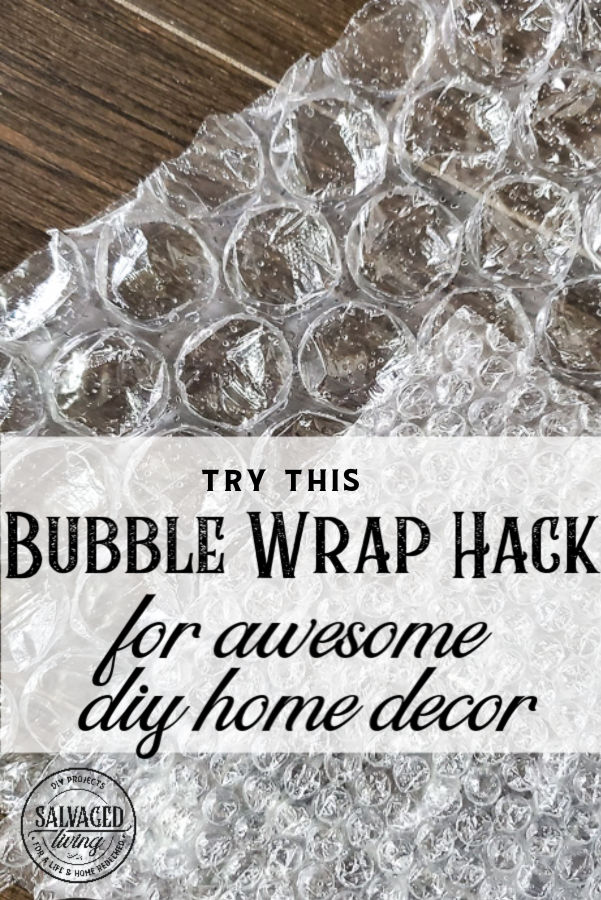
Bubble wrap? yep, you read that correctly. It’s perfect for a loos, forgiving, vintage throw back polka dot situation. Simple use so acrylic craft paint and a sponge brush and paint the bubble wrap – you can use as much or as little paint as you like. I like a softer, less defined pattern so I use less paint. Then stamp it onto your terracotta pot! Don’t worry about the pattern being perfect, the bubbles overlapping or any of that mess. Just let this be a free form project full of texture! DIY painted terracotta pot idea for cute and easy rustic home decor. This new terra cotta planter goes to shabby chic instantly with this bubble wrap painting hack! Perfecr for spring decorating or a cuteorganization idea, making over a terracotta pot is so simple! #bubblewrap #burlapprojectidea #springplanter #rusticdecor

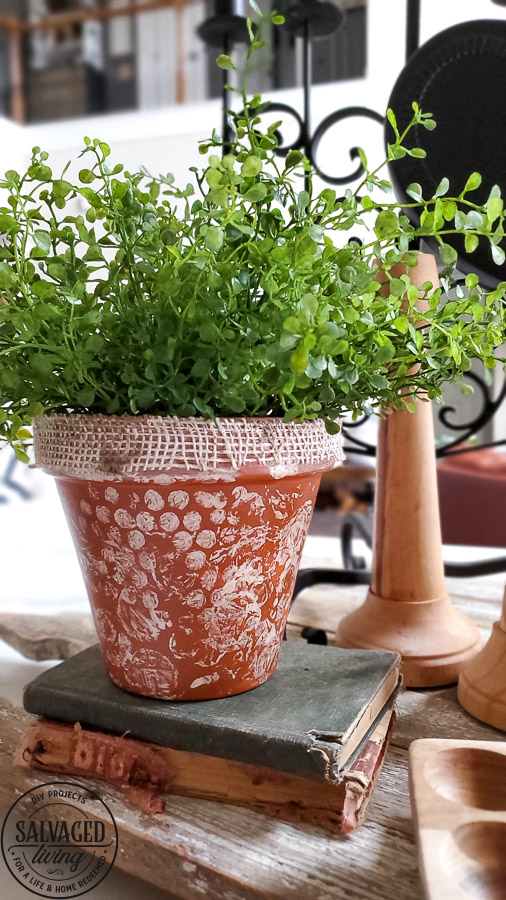
Use can use large bubble or small dot bubble wrap for this project, I actually used both and just layered them together! DIY painted terracotta pot idea for cute and easy rustic home decor. This new terra cotta planter goes to shabby chic instantly with this bubble wrap painting hack! Perfecr for spring decorating or a cuteorganization idea, making over a terracotta pot is so simple! #bubblewrap #burlapprojectidea #springplanter #rusticdecor

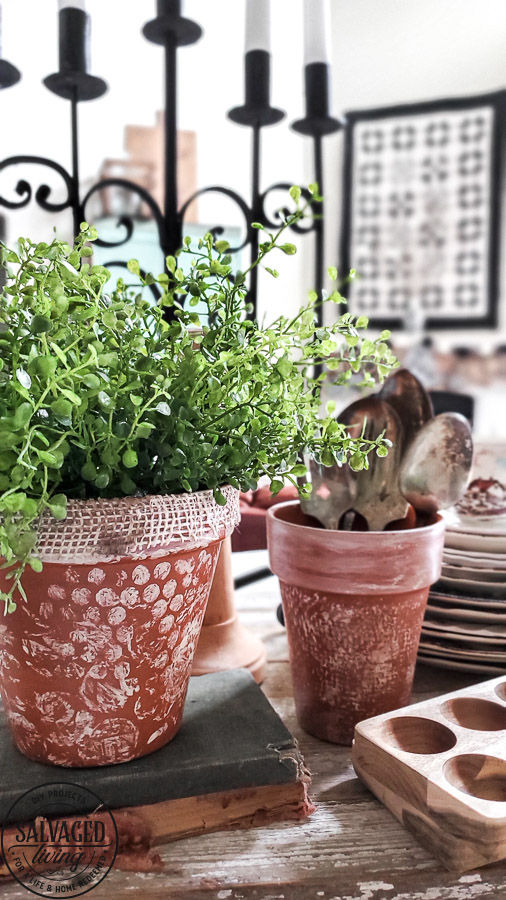
Another awesome way to add pattern and texture for a super shabby chic terracotta pot is to use burlap as a stamp or stencil. Either paint on your burlap swatch and press it onto your garden pot or lay the burlap on the pot and dab paint (I used a color called parchment) on top of it for a stencil. Either way this messy and light pattern is gorgeous. DIY painted terracotta pot idea for cute and easy rustic home decor. This new terra cotta planter goes to shabby chic instantly with this bubble wrap painting hack! Perfecr for spring decorating or a cuteorganization idea, making over a terracotta pot is so simple! #bubblewrap #burlapprojectidea #springplanter #rusticdecor

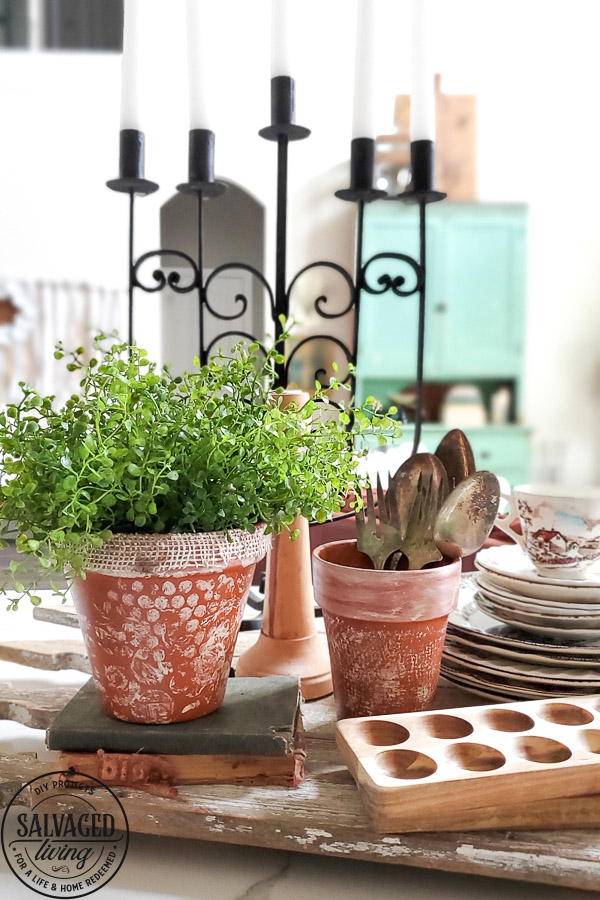
I aged the pots by layering a light wood stain on top – letting it soak in and then buff off. You can use any color stain for this slight tinting effect. DIY painted terracotta pot idea for cute and easy rustic home decor. This new terra cotta planter goes to shabby chic instantly with this bubble wrap painting hack! Perfecr for spring decorating or a cuteorganization idea, making over a terracotta pot is so simple! #bubblewrap #burlapprojectidea #springplanter #rusticdecor

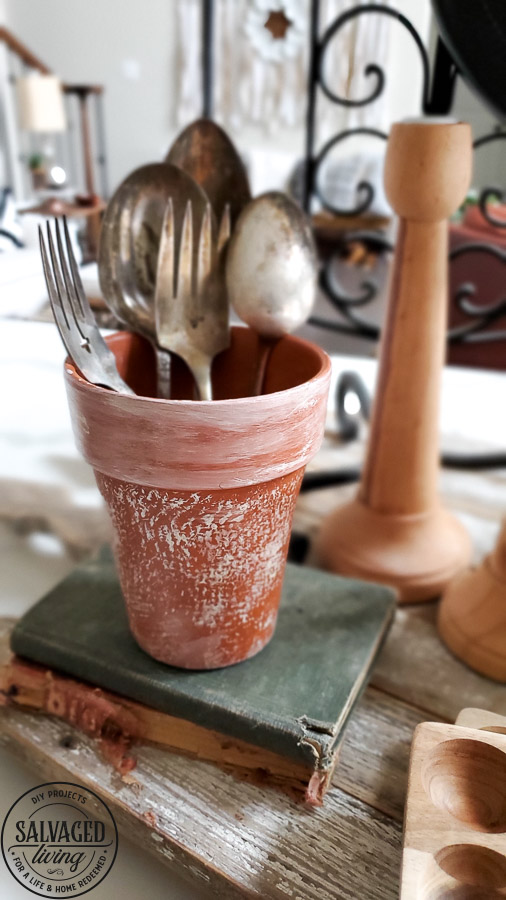
Lastly I took a strip of that beautiful burlap and glued it to the lip of one pot, then dabbed some stain on it for extra age. Filled with faux plants or miscellaneous treasures, these little DIY terracotta pots add some inexpensive glam to your decor! Tell me what you would use these pots for or if you have some extra decorating ideas, I’d love to hear them! DIY painted terracotta pot idea for cute and easy rustic home decor. This new terra cotta planter goes to shabby chic instantly with this bubble wrap painting hack! Perfecr for spring decorating or a cuteorganization idea, making over a terracotta pot is so simple! #bubblewrap #burlapprojectidea #springplanter #rusticdecor

Blessings, Kim from Hunt & HostConnect more here:

E-mail Subscription / Pinterest / Facebook / Instagram / Grow Your Creative Business


13 Comments

Stay connected

Don't miss out on the latest!

By being included in our newsletter delivery, you consent to receive new post updates and occasional promotional emails related to the Salvaged Living family. We promise not to over stuff your inbox!

Previous Post: « Interior Paint Colors From My Home
Next Post: Budget Shopping Tips for Home Decor Ideas and Inspiration »

Reader Interactions

Comments

  1. Sally says

    February 17, 2020 at 11:49 AM

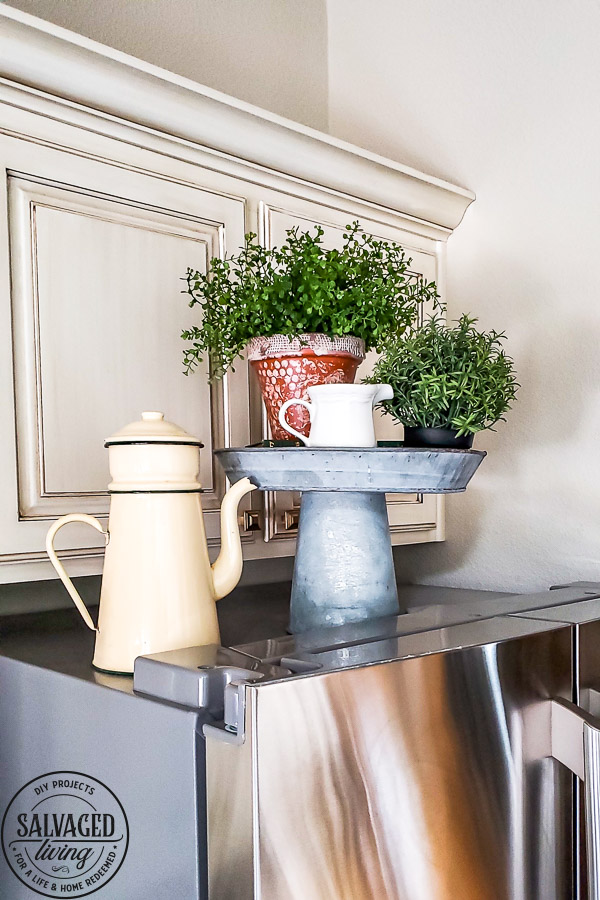
    Love, love, love this! So simple but with great outcome.

    Reply
    • Kim at Salvaged Living says

      February 18, 2020 at 9:05 AM

      i love an easy project 😉

      Reply
  2. Gilmer Gal says

    February 17, 2020 at 10:36 PM

    These are so cute! I was gifted with about 20 pots like this. Hmmmmm…
    And yes, God is the glue that mends our brokenness. So thankful

    Reply
    • Kim at Salvaged Living says

      February 18, 2020 at 9:06 AM

      sounds like you have a lot of fun projects on your hands!!!

      Reply
  3. Kim Gibson says

    February 20, 2020 at 8:36 AM

    I always love your decorating aesthetic! These are great little pots and give me wonderful ideas. Thanks for being an inspiration in both decorating and life lessons.

    Reply
    • Kim at Salvaged Living says

      February 20, 2020 at 8:48 AM

      thank you Kim – thanks for being here!

      Reply
  4. Anita Roth says

    February 22, 2020 at 12:22 PM

    So cute! Is their anything special you could do to use outside! What fun this looks like! Many was to use this!????

    Reply
    • Kim at Salvaged Living says

      February 23, 2020 at 5:52 PM

      i think you could use these pots outside just like this! They would just get prettier as they weathered!

      Reply
  5. KariAnne Wood says

    February 24, 2020 at 1:35 PM

    Love this so much! It’s such a fun project and such a clever use of bubble wrap!

    You are amazing friend!

    Happy day!
    karianne

    Reply
  6. Brigitte says

    February 29, 2020 at 2:38 PM

    I love these, they’re SUPER cute! Great project for my front porch, thank you so much!

    Reply
    • Kim at Salvaged Living says

      February 29, 2020 at 5:13 PM

      yay – have fun making some cuteness for your porch!

      Reply
  7. Tammy says

    April 13, 2020 at 10:36 PM

    that would really look nice with lightly painted burlap wrapped around the pot and then removed.

    Reply
    • Kim at Salvaged Living says

      April 14, 2020 at 9:50 AM

      yes! that would look great!

      Reply

Leave a Reply Cancel reply

Your email address will not be published. Required fields are marked *

This site uses Akismet to reduce spam. Learn how your comment data is processed.

Primary Sidebar

  • Email
  • Facebook
  • Instagram
  • Pinterest
  • Twitter

Hi! I'm Kim. I believe getting your hands dirty can be a way to get your heart clean. This blog is a decorating and DIY guide to seeing God in the details of your day, hobby and home. Read more...

Learn to grow a creative business with Kim from Salvaged Living!

Check these out:

  • DIY Projects
  • Faith
  • Home Decor
  • Lifestyle

Stay Connected

Don't miss out on the latest.

By being included in our newsletter delivery, you consent to receive new post updates and occasional promotional emails related to the Salvaged Living family. We promise not to over stuff your inbox!

Stay connected

Don't miss out on the latest.

Footer

You might also like

Think upcycle when it comes to adding a medicine cabinet to your bathroom decor. I updated this thrift store cabinet into an update medicine cabinet with my Wagner paint sprayer for a professional paint finish. Extra storage with a vintage vibe is always a fun addition to your home decor. #upcycle #furnitureupdate #medicinechest #bathroomstorage #thriftstoreproject #storageidea #bathroomdecor #vintagebathroom

Medicine Cabinet Makeover

Inspiration for YOU!

Quick & Easy DIY Farmhouse Decor

Grab these coffee table decor ideas for a cozy living room. This post is awesome, it has a list of must have elements for cozy coffee table styling plus a list of supply ideas for your cozy coffee table to be magazine worthy! #coffeetablestyle #coffeetabledecor #vignettestyling #decortips #decorating101 #decoratingtips #cozylivingroom #livingroomdecor #coffeetabledecorideas

Coffee Table Decor Ideas for a Cozy Living Room

How to save a broken chair. Don't toss that chair just because the back is broken. Try this easy makeover for a fast DIY save.

How to save a broken chair: Chair to stool makeover

© Kim Jones and Salvaged Living, 2019. Unauthorized use and/or duplication of this material without express and written permission from this blog’s author and/or owner is strictly prohibited. Excerpts and links may be used, provided that full and clear credit is given to Salvaged Living with appropriate and specific direction to the original content. Please only use one picture with a link back unless individual permission is given otherwise by Salvaged Living. Full disclosure here.

© 2021 Salvaged Living