DIY Herringbone Wood Floors with Fabric Wallpaper Dollhouse One Room Challenge, Week 2
Thank you so much for your welcome response to this dollhouse makeover. I thought it might be a bit strange, but you all seem excited to see how it unfolds. I can’t tell you how much that means to me! It’s been such a fun challenge and thank goodness I am completing this project as a guest participant of the One Room Challenge. Deadlines are good for me. Are they for you as well? Deadlines are a fantastic accountability partner. This week I tackled the floors and walls in the first floor of the dollhouse. You may remember last week the house started out like this: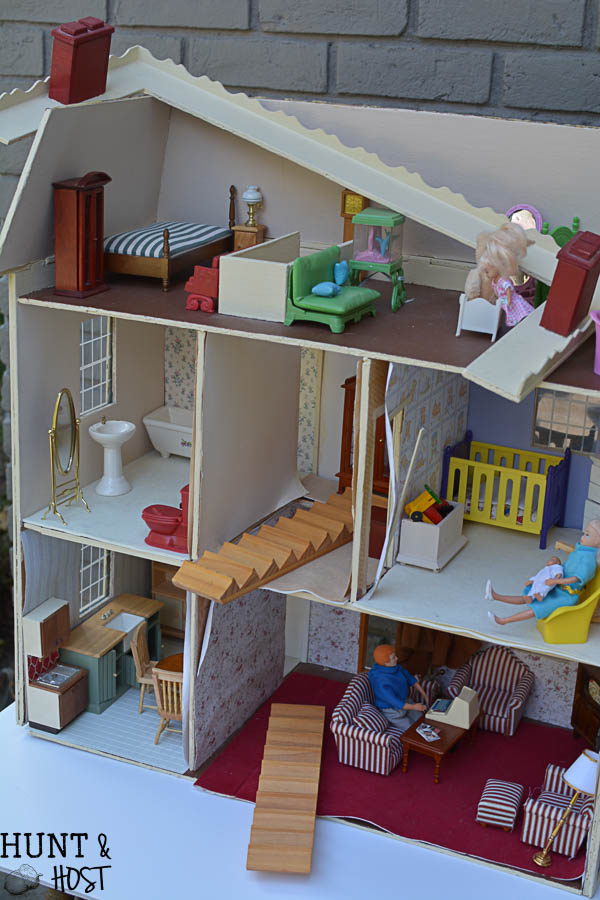
Demo day was so much easier on the dollhouse than any I’ve experienced in real life and while the projects I tackled this week were big ticket items in the reno, they were totally different than if they were going on in a full sized house! I’m not sure how some people are doing this challenge with a real deal room! Props to them. Just a reminder this dollhouse makeover is sponsored by Miniatures.com, all selections and thoughts are mine!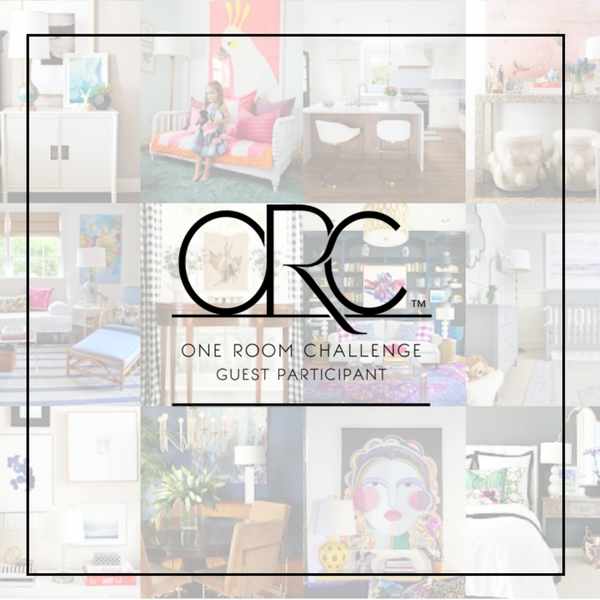
I told you guys this house was going to be a mix of what I dream of and what we actually live in, so I am treating this house as if we bought it and were moving in! First thing I did was “repair the foundation”. The floor was separating from the walls and layers of glue blocked the pieces from even fitting together like intended. I had to peel of layers of glue!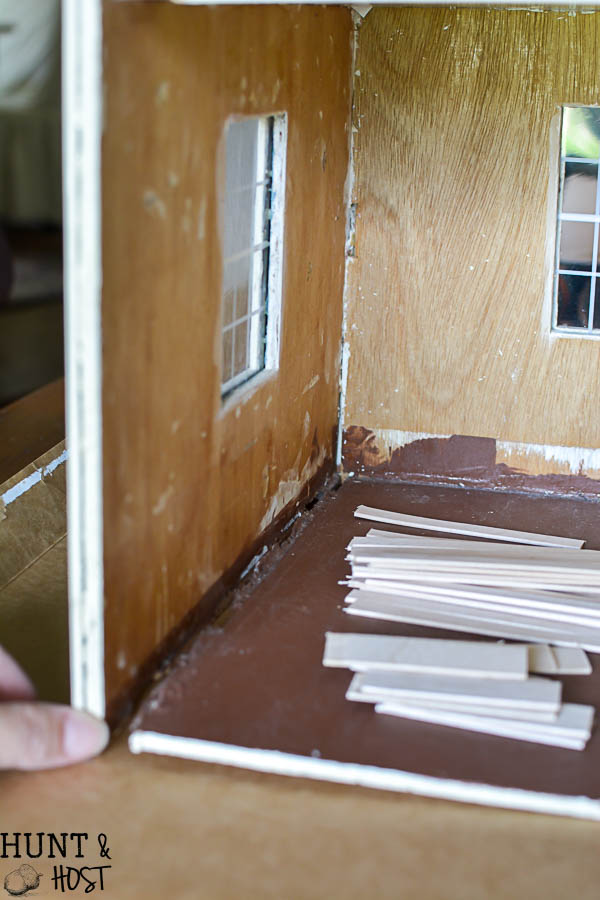 Luckily I could rest the house on it’s side, glue and add some heavy books for weight while the glue dried! I also knocked out a wall. The kitchen was to teeny tiny for me! Opening up the bottom room is really going to give more room to move for this little family!
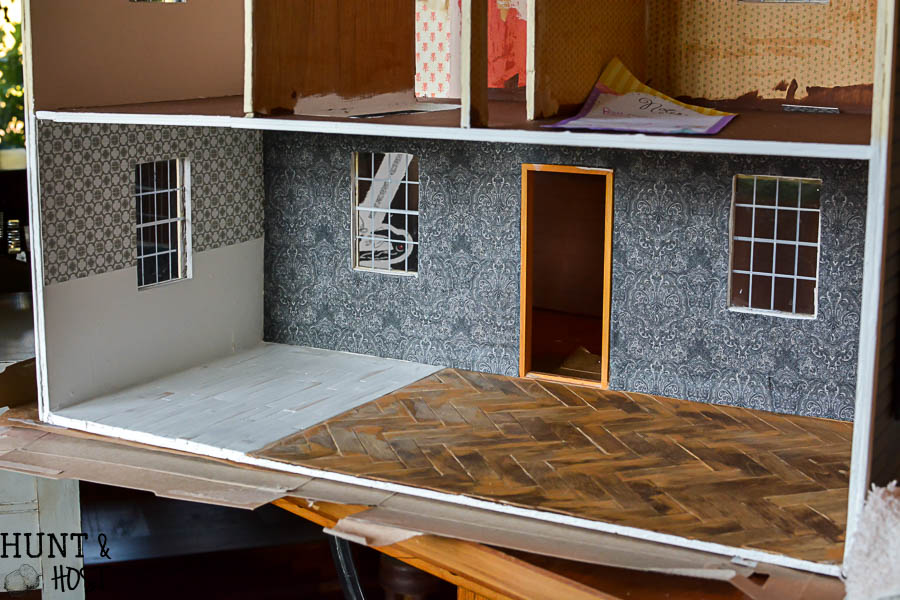
For the living area floors I chose to go with a modern take on tradition and add herringbone wood floors. I made the floor out of fat popsicle sticks. It took me a while to figure out the best tool to cut the sticks down with. I started with a chop saw and it worked great on cutting a stack of popsicle sticks straight, when I tried to cut the 45° angle I needed for the walls it splintered the sticks. Plan B was a hand saw and miter box, that worked like a charm! The popsicle sticks all got cut down into equal lengths with the rounded end cut off. Next I cut enough sticks at a 45° angle to fit to the wall edge. I started in the back of the room and glued down one row at a time, laying the row out and adjusting before applying glue. I went quickly and glued down a few pieces at a time, one row at a time, leaving openings in the spots I needed to cut down wood to fit. (I will have a supply list at the end if you want to see the products I used for each task!)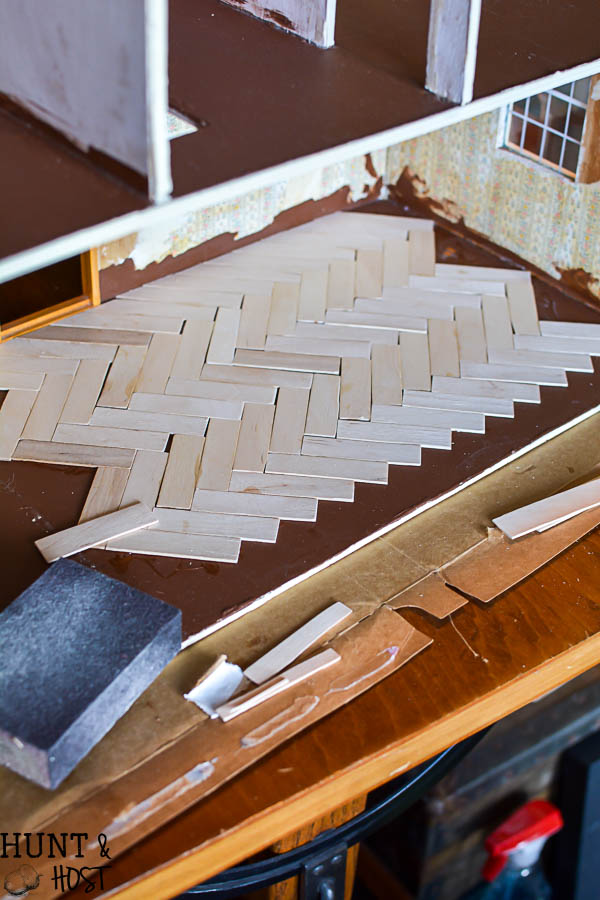 Once the main part of the floor was glues down I worked my way around the edges, measuring and hand sawing each piece to fit. It’s hard to get all the small lengths cut equal and a few pieces had to be sanded down to wedge into place, but you will see that gaps are ok.
 For the kitchen I moved on to small popsicle sticks with the round ends cut off. I laid them in a traditional wood floor pattern, I really wanted the house to feel like an old house that had been remodeled and updated over the years. Once the kitchen wood floor was all in place and glued down I went back over the entire floor with wood filler. (You can see the one I used and like in the supply list below) Using a spatula and my fingers I pressed the filler into all the gap and allowed to dry. The entire floor got sanded with a medium grit sanding block to rid any excess wood filler.
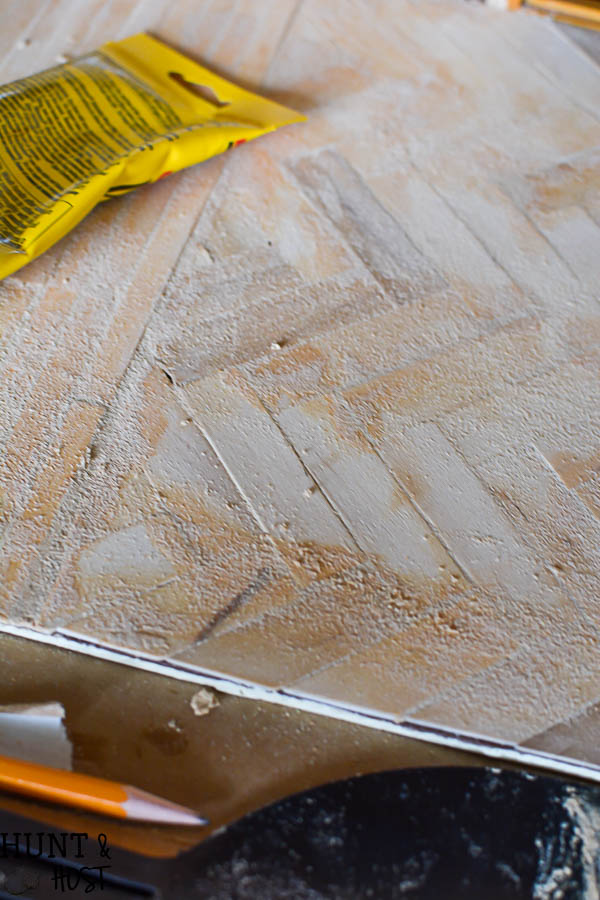 In the living room I stained the floors a warm Golden Oak color
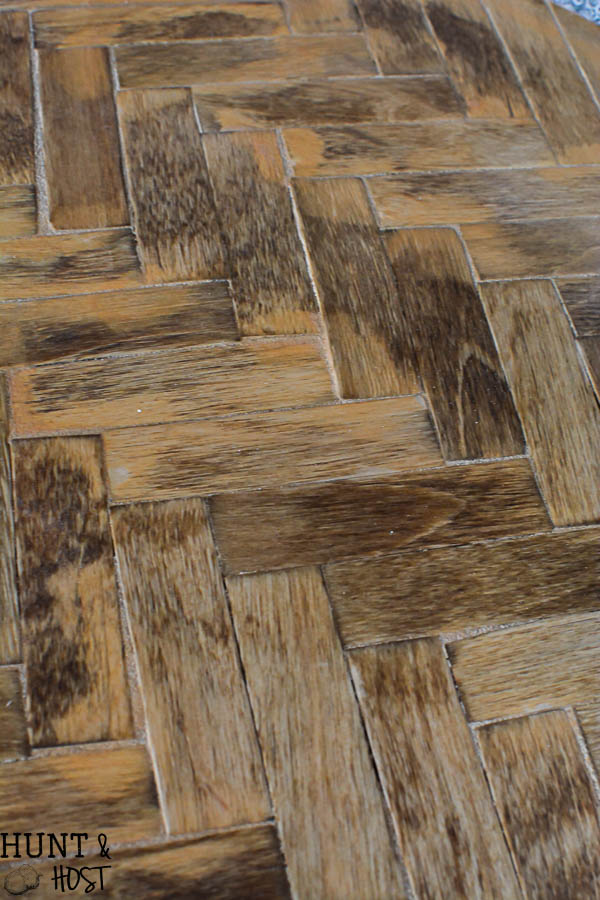 and the kitchen floors got painted white.
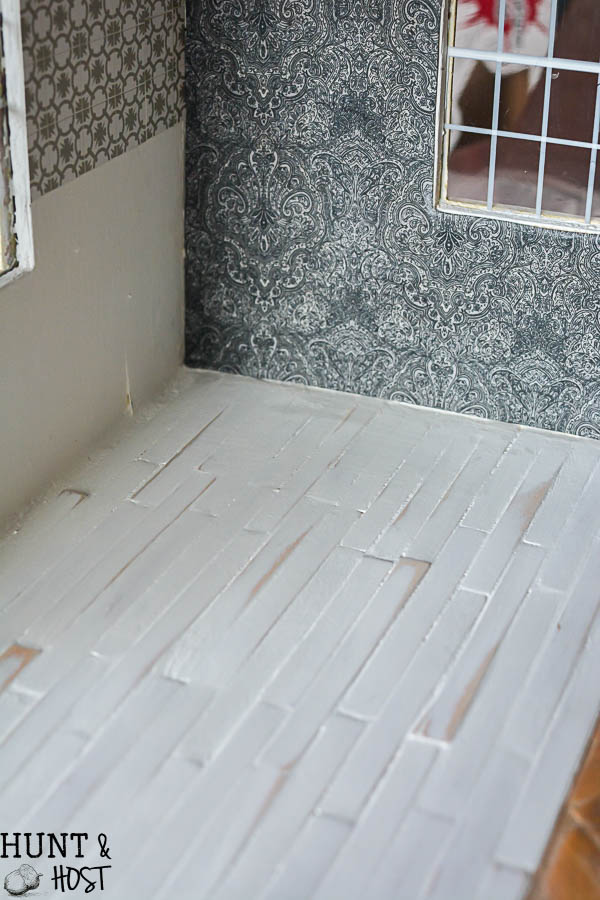
Next are the wall updates! The entire ceiling got a fresh coat of white paint. It was the easiest ceiling I’ve ever painted!!! I laid the house on it’s side, so simple! The two end walls got painted the same color. For the kitchen I added this precious tile backsplash from Miniatures.com. Again, laid the house on it’s side, glued the tile and sat a heavy book on it till it dried…so much easier than the real deal!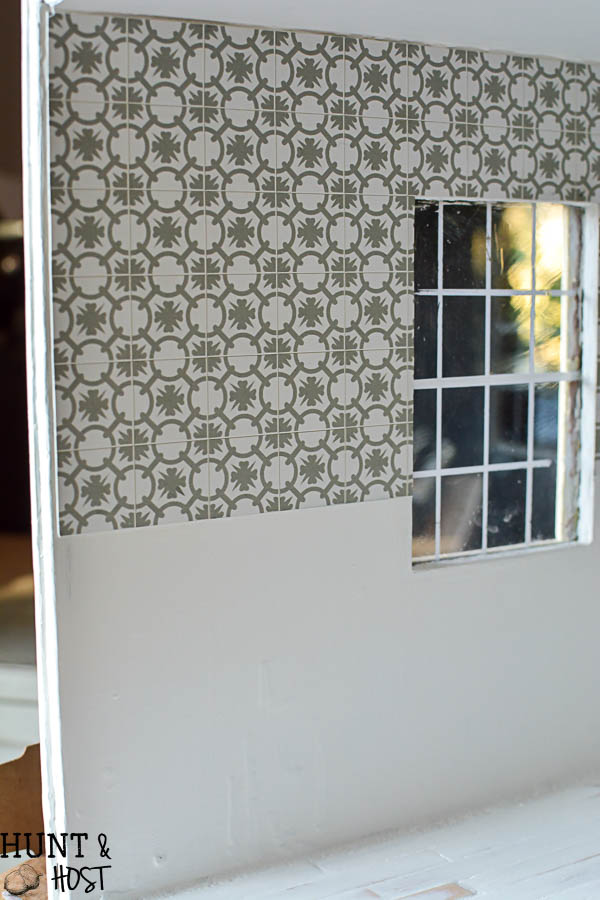
Possibaly my favorite aspect so far is the fabric wall I added along the back of the room. I am such a sucker for black and white, damask and houndstooh. I bought this scrap of fabric for $4, I thought the scale of the pattern was perfect for a subtle yet dramatic wall. I have been wanting to try a fabric wall in my house, but haven’t had the chance yet, it was way more fun to play with this little wall! I starched and ironed the piece of fabric after cutting it slightly larger than the entire wall. Next I folded the sides over to the exact measurement and ironed a good seam. I laid the fabric in the dollhouse and with a piece of chalk I traced out the door and window openings.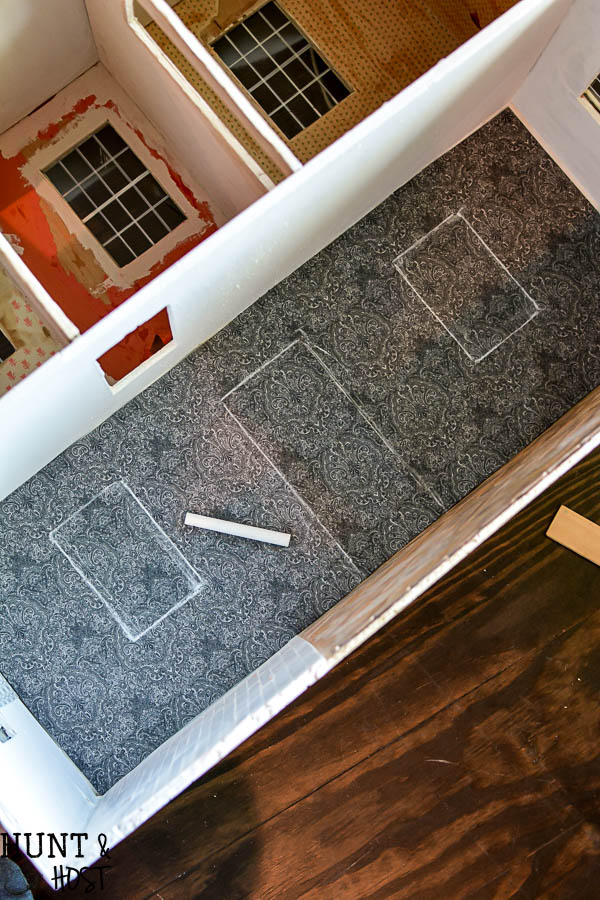 With an exacto knife I cut the square holes slightly smaller than the measurements and put a slice in each corner to the fold line then folded the fabric and ironed a seam like on the outer edges. With matte Mod Podge I painted the wall and stuck and flattened the fabric into place. The crown mold and baseboards still need to be installed, but I forgot to order them, so they should arrive soon and I will add them later. The trim out will really complete this portion of the makeover!
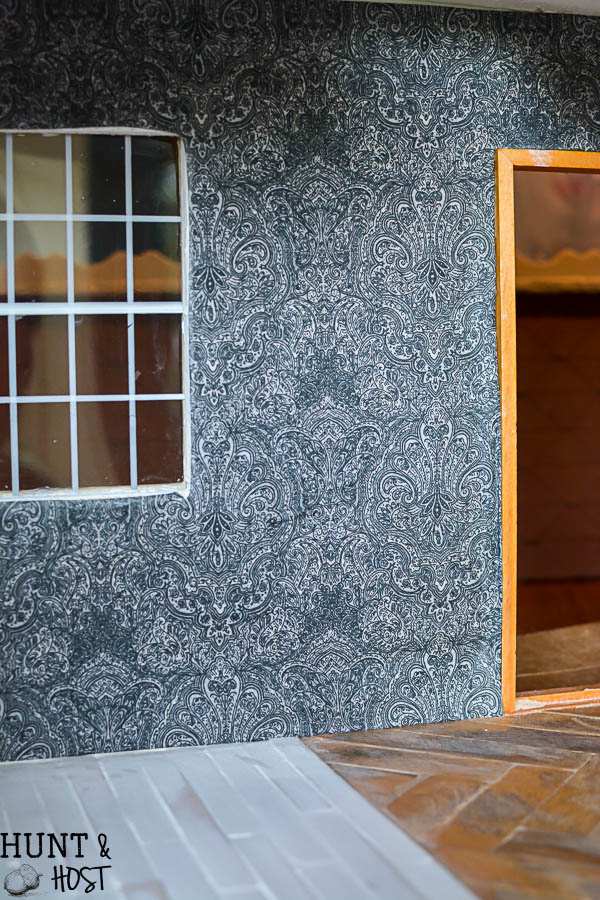 I wish a real room renovation was this easy! It is coming along nicely and really is so much fun . I can’t help but think about my Neena with every update and how pleased she would be with the progress. I can just see her working so hard all those years ago to make this for me. It really makes me feel so loved and special. This week I will be working on some sewing…y’all say a prayer for me! In the meantime here are some products I used for the makeover so far: plus a big after picture…
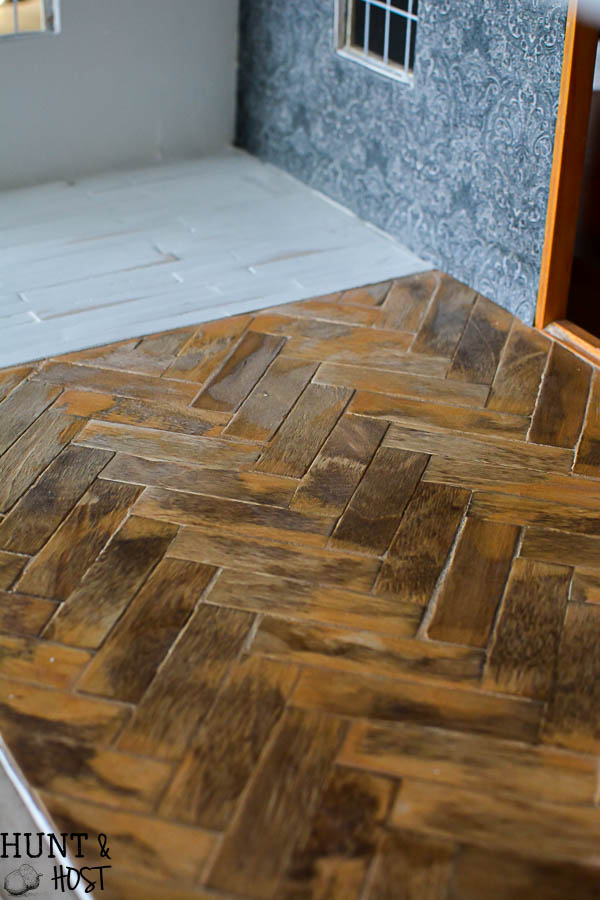
Dollhouse Makeover Tools and Supplies:
Hope you have a lovely weekend! You can see the rest of the dollhouse makeover posts here:


There no pictures of the house finished and set up. Why?
Hi Judy – this makeover is part of a six week challenge so I will be rolling out new projects to complete the room each week! I still have some furniture flips, wall art, curtains and more to create, it’s to much to do all at once! Hope you’ll check back in to see the progress!
How nice to have this special doll house from your Neena. The update is beautiful. Congratulations on the ability to work with such tint things. Can’t wait to see it completed
Thank you Amanda, it has really helped me remember her and it is so special!
I meant tiny things.
I was unable to see the link for the september Bible verse and now also October. I had looked for a way to contact you sooner but could not find.
The September and October printables are up now, so sorry for the delay!!! you can find them here
I love that you opened up that space so it isn’t so chopped up anymore! Your floor and wall is perfect too. I like where you are going with this. ????
Thank you – I figured that is probably what I’d do in a real house so it should work here too! 🙂
This makeover is going to be just beautiful when completed! I can agree, wish all renovations were this easy:)
thanks – it’s amazing how much time the little stuff still takes, but I know it is WAY less that a big room!
Hi Kim, such fun and sweet memories for you!! Blessings and smiles
thanks Emilou and yes, I am loving on my Neena is a whole new way through this project!
this renovation cracks me up- in a good way. i find myself eager to see the latest!
Beautiful work! How did you remove the wall on the bottom floor? I’ve purchased an older dollhouse and want to do the same thing. Thanks!