• Contact Kim
  • Stay Connected
  • Shop Printables
  • Nav Social Menu

    • Facebook
    • Instagram
    • Pinterest
    • Twitter

Salvaged Living

Easy DIY home decor and craft projects for budget home decor

  • Home
  • Meet Kim
    • About KIM
    • Get Kim’s Look
    • Kim’s Bookshelf
    • Kim’s Home Tour
    • Get The House Look
    • Disclosures
  • DIY Projects
  • Faith
  • Home Decor
  • Grow Your Creative Business
    • Grow Your Creative Business Course
    • One on One Business Consulting
  • Classes
Home » DIY Projects » Bread Box Makeover For Extra Kitchen Storage

DIY Projects

Bread Box Makeover For Extra Kitchen Storage

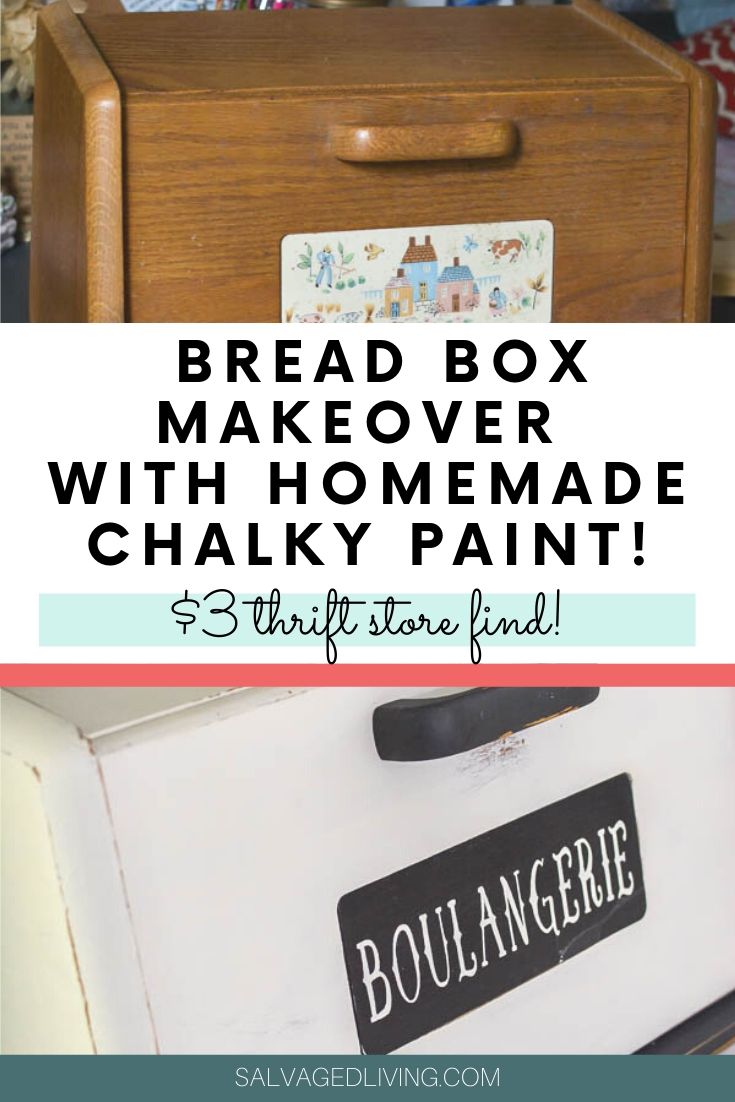
This bread box makeover is perfect for extra kitchen storage, a coffee bar station or a family charging station!

bread box makeover diy

This bread box makeover came to me on a whim. My sister was visiting from out of state and I had to run to the thrift store to hunt for something I needed on a different project.

This bread box makeover is perfect for hiding kitchen clutter, kitchen storage ideas, a great coffee bar or the perfect family charging station. 80's bread box to French Country Décor!

She doesn’t frequent thrift stores, so she was game to load up and tag along…along with my three kiddos and one of hers. We had so much fun, they all tried on heels and played with random kitchen items.

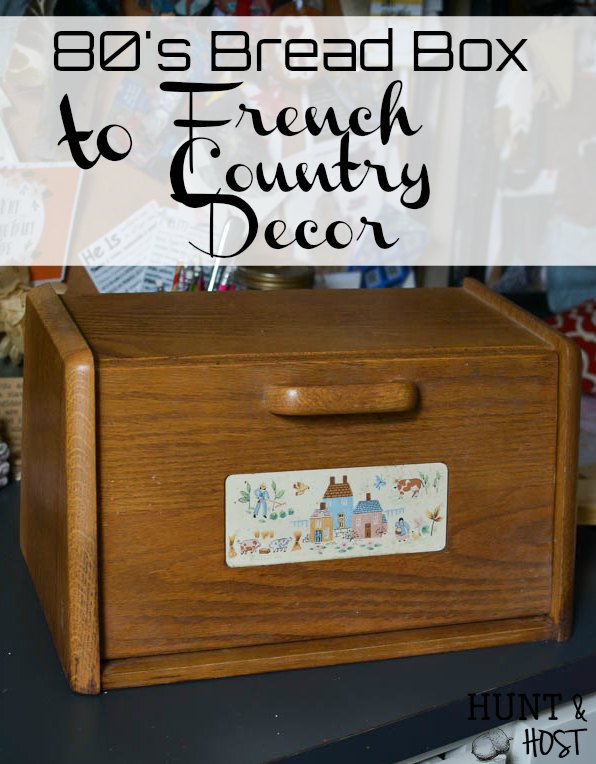
When I saw this old bread box for $3, I knew I had to have it. The 1980’s cornflower blue had to go, but the bread box itself was sturdy and clean.  This bread box makeover is perfect for hiding kitchen clutter, kitchen storage ideas, a great coffee bar or the perfect family charging station. 80's bread box to French Country Décor!
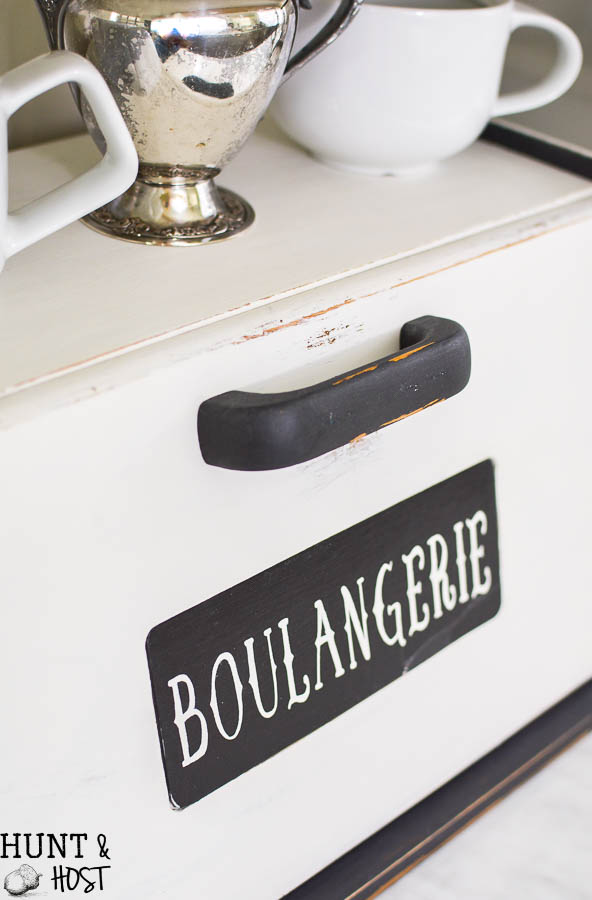
This post contains affiliate links, that means should you make a purchase I may receive a small commission, thank you! 
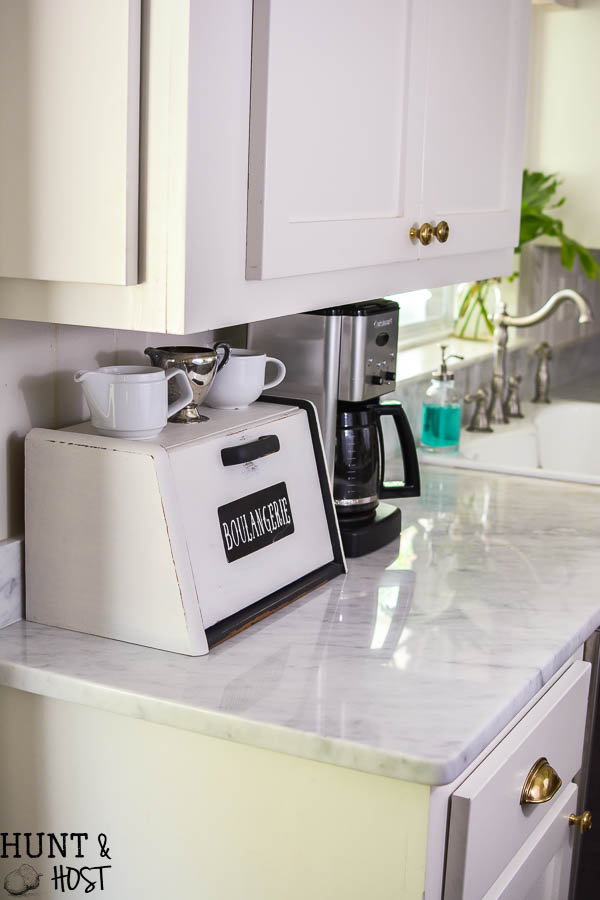
A bread box is the perfect way to hide kitchen counter clutter. For now I am using it as a mini coffee station. Coffee is a big deal in my mornings and I have a little spot with sugar, sweetener and tea bags that I have been looking to change up.
This bread box makeover is perfect for hiding kitchen clutter, kitchen storage ideas, a great coffee bar or the perfect family charging station. 80's bread box to French Country Décor!If this bread box doesn’t stay on as a coffee bar then it would be the PERFECT family charging station, especially since my kiddos are getting to that stage of burning up phone and iPad batteries.

Plus they aren’t allowed to keep them in their room at night, so this little storage solution is perfect. (If you need a family phone charging station I recommend searching for a box like this and then drilling a hole with a paddle drill bit in the back, large enough to slide an extension cord/multi-plug cord in through the back.)

Bread Box Makeover Supplies

  • Bread Box
  • Homemade chalky paint in your fav colors
  • I used my Cricut to cut my own stencils out of contact paper (best deal I found), but you could use regular stencils as well
  • High Gloss Clear Acrylic Craft Paint
  • Paint Brushes
  • Sandpaper
  • Gorilla Glue – they have this new product I LOVE!

This bread box makeover is perfect for hiding kitchen clutter, kitchen storage ideas, a great coffee bar or the perfect family charging station. 80's bread box to French Country Décor!

Depending on the type of box you get, decide on a color scheme and paint your box. I love using my homemade chalky paint in Sherwin Williams Pearly White and Caviar. I popped off the little plastic scene and painted the box inside and out.

Next, I put a few coats of black on the plastic sign to hide the sweet little 90’s farm motif. Using my Cricut I cut a one time use stencil out of contact paper, making sure the word would fit on my freshly painted sign.

Boulangerie is French for Bakery, I feel so fancy with a little French thrown around the house 😉This bread box makeover is perfect for hiding kitchen clutter, kitchen storage ideas, a great coffee bar or the perfect family charging station. 80's bread box to French Country Décor!
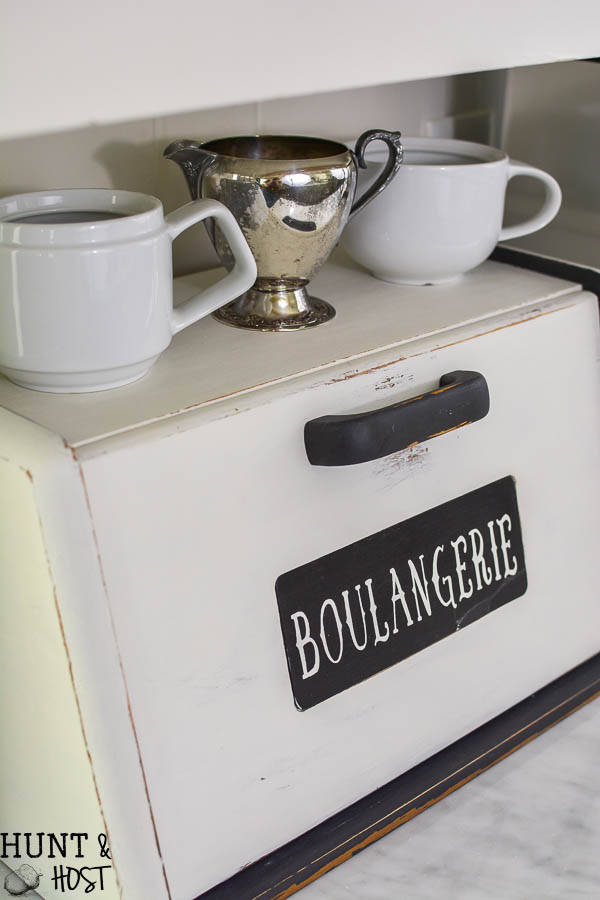
Once my stencil was cut I delicately placed it on the sign, making sure it was centered and straight then put two coats of the same white from the box over the words. Remove your stencil quickly after your second coat so it doesn’t completely dry in place. You may need to touch up some words with a fine bristle brush.

Once the label was dry I coated it with a high gloss clear acrylic to give the sign more of an enameled feel. Then I secured it back on the box with Gorilla Glue. If your box doesn’t have a sign like this you could either make one, or paint directly on the box.

I’d love to hear if you have a bread box storage idea I didn’t think of, or if you have a bread box makeover to share…show me in the comments. I love to see your projects!

If you are interested in joining a fun group on Facebook where you can see lots of upcycled makeovers and DIY ideas, plus share your projects and ask questions to a group of fellow DIY lovers then please come join the conversation here: Make It New Facebook Group. I’d love to chat with you over there too! Have a great week friend.Make It New: Upcycle, Repurpose and DIY: An exciting Facebook community to share and inspire. The best before and afters around!

This bread box makeover is perfect for hiding kitchen clutter, kitchen storage ideas, a great coffee bar or the perfect family charging station. 80's bread box to French Country Décor!
Yield: 1 Bread Box

Bread Box Makeover For Extra Kitchen Storage

Prep Time: 15 minutes
Active Time: 45 minutes
Total Time: 1 hour
Difficulty: Easy
Estimated Cost: $5-$10

Update an old bread box for extra kitchen storage. This $3 thrift store find was given a makeover with paint and a stencil and we love it!

Materials

  • Homemade chalky paint
  • Cricut stencil or regular stencil
  • High Gloss Clear Acrylic Craft Paint
  • Sandpaper
  • Gorilla Glue

Tools

  • Paint Brushes

Instructions

  1. Remove the plastic scene on the front of the bread box.
  2. Paint the entire box inside and out with chalky paint.
  3. Paint the plastic scene with a few coats of black paint.
  4. Add your stencil to the painted sign.
  5. I used the word Boulangerie, which is French for Bakery.
  6. Make sure the stencil is centered and then paint with the same white chalky paint as the bread box.
  7. Once dry, paint with a high gloss clear acrylic. Secure it back on the box with Gorilla Glue.

Recommended Products

As an Amazon Associate and member of other affiliate programs, I earn from qualifying purchases.

  • Gorilla Clear Glue, 1.75 ounce Bottle, Clear (Pack of 1)
    Gorilla Clear Glue, 1.75 ounce Bottle, Clear (Pack of 1)
  • Home-it Self Adhesive Shelf Liner, 18 by 16 Inch, Black Chevron, 2 Pack (Black Chevron)
    Home-it Self Adhesive Shelf Liner, 18 by 16 Inch, Black Chevron, 2 Pack (Black Chevron)

Did you want to save this idea?

Save this idea to Pinterest and follow along with me while you're there. If you make this creation be sure to tag me on Facebook or Instagram - I LOVE to see your creations! @SalvagedLiving

© Salvaged Living
Project Type: Home Decor / Category: DIY Projects

This bread box makeover is perfect for hiding kitchen clutter, kitchen storage ideas, a great coffee bar or the perfect family charging station. 80's bread box to French Country Décor!

You may also like these thrift store makeovers:

Think upcycle when it comes to adding a medicine cabinet to your bathroom decor. I updated this thrift store cabinet into an update medicine cabinet with my Wagner paint sprayer for a professional paint finish. Extra storage with a vintage vibe is always a fun addition to your home decor. #upcycle #furnitureupdate #medicinechest #bathroomstorage #thriftstoreproject #storageidea #bathroomdecor #vintagebathroom

Medicine Cabinet Makeover

Don't be scared to redo that out dated dresser you have in your bedroom. This simple little dresser makeover will give you a few important tips to paint furniture with ease. It saves money and looks fabulous to paint your own furniture so get that paint flying friend! #paintedfurniture #painttips #dressermakeover #bestpaintbrush #diyapinting #zibraweeklypick

Bedroom Dresser Makeover

Blessings, Kim from Hunt & HostConnect more here:

E-mail Subscription / Pinterest / Facebook / Instagram / Grow Your Creative Business


18 Comments

Stay connected

Don't miss out on the latest!

By being included in our newsletter delivery, you consent to receive new post updates and occasional promotional emails related to the Salvaged Living family. We promise not to over stuff your inbox!

Previous Post: « Concrete Countertops: My Bad Experience
Next Post: Farmhouse Lazy Susan: How to Add a Quilt »

Reader Interactions

Comments

  1. Fletcher says

    August 22, 2017 at 7:21 AM

    I LOVE this! What a great makeover.

    Reply
    • Kim at Hunt and Host says

      August 23, 2017 at 3:38 PM

      thank you, it was fun!

      Reply
  2. Teresa says

    August 22, 2017 at 8:36 AM

    Have one that was habersham and now might paint it. Thanks for the idea!

    Reply
    • Kim at Hunt and Host says

      August 23, 2017 at 3:39 PM

      that sounds pretty, I bet it will look great, you will have to share if you do!

      Reply
  3. anne says

    August 22, 2017 at 9:22 AM

    Looks SO much better! Love it Kim!

    Reply
    • Kim at Hunt and Host says

      August 23, 2017 at 3:40 PM

      thanks friend!

      Reply
  4. Marlene Stephenson says

    August 22, 2017 at 3:32 PM

    I love what you did with that bread box, looks so neat and tidy, besides much better. Thanks

    Reply
    • Kim at Hunt and Host says

      August 23, 2017 at 3:40 PM

      It is definitely more up to date 🙂

      Reply
  5. Lisa B says

    August 22, 2017 at 4:45 PM

    Great job! I never would have thought to do that! Awesome as always Kim!

    Reply
    • Kim at Hunt and Host says

      August 23, 2017 at 3:40 PM

      aww thanks!

      Reply
  6. oldiechic says

    August 23, 2017 at 9:10 AM

    I too have an old wood bread dbox. Thanks for the charging station idea!! I’ll post when it’s finished

    Reply
    • Kim at Hunt and Host says

      August 23, 2017 at 3:41 PM

      yes, please share!
      it encourages me when you do

      Reply
  7. Jauquetta says

    August 23, 2017 at 11:27 AM

    I tried to join your facebook group but had no luck. Any ideas what I can do? I’m always working on something so it seems like fun to share w a group.

    Reply
    • Kim at Hunt and Host says

      August 23, 2017 at 12:29 PM

      you have to request to join and then you will get added! It is closed to avoid spammers, but otherwise open to join, try again and let me know if you have problems! so sorry!

      Reply
  8. Barbara Smith says

    August 27, 2017 at 10:20 PM

    I don’t own a bread box but if I did, it would get this makeover!!!!! Nice idea!!

    Reply
  9. Alice Mullis says

    March 28, 2019 at 4:40 PM

    I ❤️giving bread boxes a makeover. I’ve painted and refurbished many of them and keep a steady supply in my stash. The choices are endless. Would love to share some of my pics with you if you are interested.

    Reply
    • Kim at Hunt and Host says

      March 29, 2019 at 12:37 PM

      I would LOVE to see them, feel free to share them on facebook or shoot me an email!

      Reply
  10. Ruth Bryant says

    July 26, 2019 at 11:21 AM

    This brought back sweet memories as I has that exact bread box when my children were younger. It is long gone but a sweet memory none the less!!

    Reply

Leave a Reply Cancel reply

Your email address will not be published. Required fields are marked *

This site uses Akismet to reduce spam. Learn how your comment data is processed.

Primary Sidebar

  • Email
  • Facebook
  • Instagram
  • Pinterest
  • Twitter

Hi! I'm Kim. I believe getting your hands dirty can be a way to get your heart clean. This blog is a decorating and DIY guide to seeing God in the details of your day, hobby and home. Read more...

Learn to grow a creative business with Kim from Salvaged Living!

Check these out:

  • DIY Projects
  • Faith
  • Home Decor
  • Lifestyle

Stay Connected

Don't miss out on the latest.

By being included in our newsletter delivery, you consent to receive new post updates and occasional promotional emails related to the Salvaged Living family. We promise not to over stuff your inbox!

Stay connected

Don't miss out on the latest.

Footer

You might also like

DIY moss letter tutorial

DIY Moss Letter

How to paint wicker the easy way. Painting rattan, wicker and cane furniture or accessories can be hard, but this tool makes it easy! DIY tutorial and instructional video for painting wicker here!

How to Paint Wicker Furniture: Video Tutorial

top ten posts of 2015

2015 Top Ten

DIY stained wood display block, this easy DIY is perfect for displaying fun prints or photos and makes a great budget gift idea!

Color Stained Wood Block Display

desk clock makeover

Time Change

© Kim Jones and Salvaged Living, 2019. Unauthorized use and/or duplication of this material without express and written permission from this blog’s author and/or owner is strictly prohibited. Excerpts and links may be used, provided that full and clear credit is given to Salvaged Living with appropriate and specific direction to the original content. Please only use one picture with a link back unless individual permission is given otherwise by Salvaged Living. Full disclosure here.

© 2021 Salvaged Living

We use cookies to ensure that we give you the best experience on our website. If you continue to use this site we will assume that you are happy with it.Ok