this DIY Bedroom Dresser Makeover is easy to achieve using paint and a little elbow grease!
Here are a few tips and ideas for the perfect DIY bedroom dresser makeover. When we moved into this house I found myself needing quite a few new pieces of furniture.
Not just to fill space but for storage. Our last house had tons of built in storage and this house had practically none.
Good thing dressers are all over garage sales, thrift stores and Facebook marketplace!
I was able to scoop up this heavy solid wood dresser for my son’s room at a fraction of the cost of a new one.
This dresser makeover is sponsored by Zibra Paint Brushes, all ideas, work and opinions are my own!

I knew the simple lines and heavy weight of this dresser was perfect for my son’s bedroom. He needed storage for clothes and a dresser that would give him extra display space if needed.
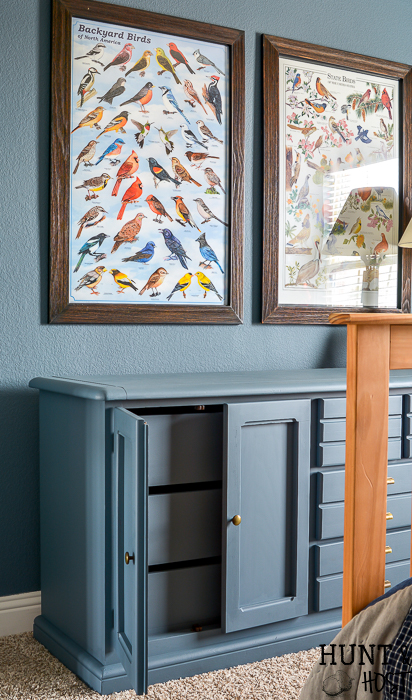
You might have seen me paint the room here. I chose a nice cool blue for the entire room to match his new bedding. I decided to go with the exact same color from the walls on the dresser.
I did this in our study and I adore the results. Painting furniture the same color as the wall can really help out a space. In my son’s room he has a lot going on!
Much like his mama, he’s a “stuff” magnet, so by painting the dresser blue, it just sort of fades away into the room and let’s his stuff do the talking.
This post also contains affiliate links for your convenience, should you make a purchase I may receive a small commission, your price stays the same!
This DIY dresser makeover ended up being one of the easiest furniture paint jobs I have ever done and that is saying a lot. I’ve painted a piece or two in my day!
I TRULY believe it had to do with these amazing Zibra Paint Brushes I used for this paint job. I will tell you about them because I am thinking you will need to get yourself a few.
I often hear excuses about why people can’t paint furniture…the weather, scared, not sure what paint to use or what brush, need to carry apiece outside and more so I am going to try and hit the main excuse points for you here.
This bedroom dresser if hefty. I mean she is a big girl, heavy solid wood and she resides upstairs! There is no way we were carrying this dresser downstairs and outside just to paint it!
That alleviates the weather issue. I’m the first to admit it is no fun painting in the Texas heat and if it’s super cold the paint thickens, takes a while to go on and dry, not to mention I just hate being cold.
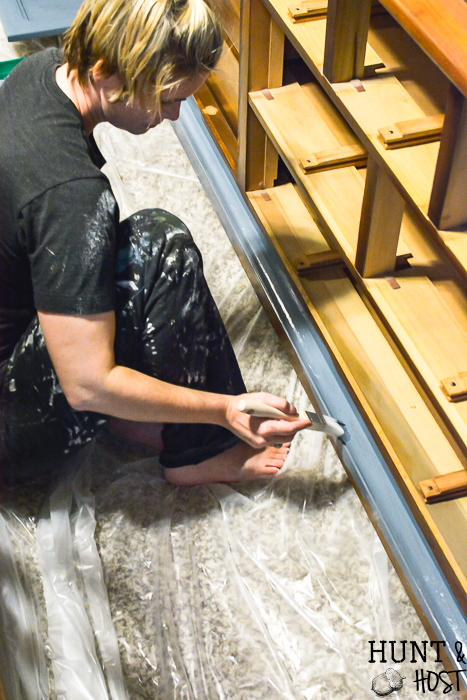
Solution? Paint your furniture inside. Most paint nowadays has a very low odor to it and if you open a window here and there, it’s no big deal at all.
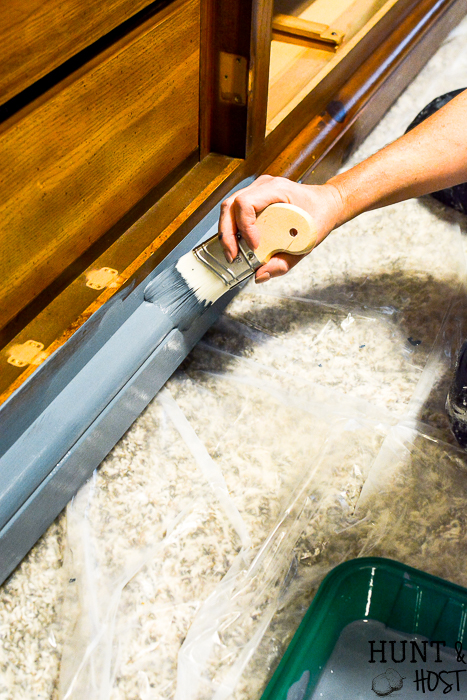
Just set up shop with cheap plastic drop clothes and you are good to go. My husband lifted this dresser up and we set it on wood blocks to elevate it so I could paint the bottom trim.
This would be great to do even if you move your furniture outside! It was so easy to paint this way.
Next – choosing the best paint type. There are a million paint brands and types on the market and so much depends on what you are painting and what you will be doing with it.
I am a fan of chalk paint, it goes on just about anything and there is little to no prep. When in doubt you can usually use chalk paint. Lately though, I’ve been painting my furniture with latex house paint and really liking the results.
I used HGTV by Sherwin Williams at Lowe’s brand paint (this is the exact can I buy, it is a satin finish!) in Smoky Pitch for the walls and dresser in my son’s bedroom (as well as in the study).
To get started I cleaned the furniture really well with Simply Green cleaner, it helped cut through the glossy varnish on the dresser.
You always want to clean a piece first, paint won’t stick for long to dust! I sanded a few rough spots on the dresser, but that was it.
I let the tacky clean finish fend for itself and painted straight on it. It’s good to remember that paint cures over time and your paint will get harder within a few weeks, so be careful with the finish in the beginning.
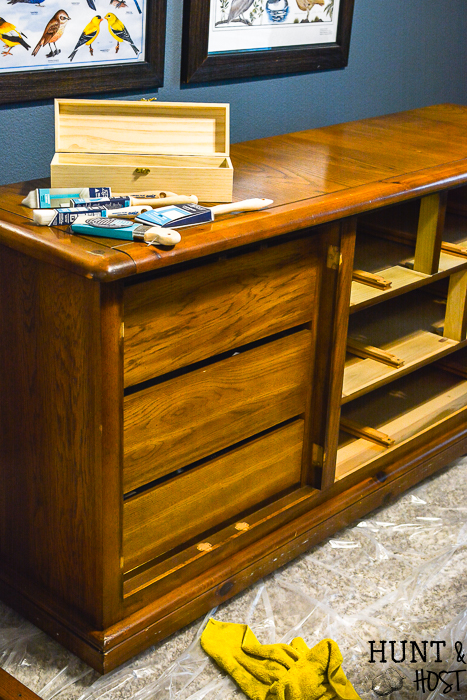
Of course to make life easier remove all the drawers, doors and hardware off your dresser first and line them up. Decide what parts of the dresser you will paint and what you will leave.
I followed the sight line of the dresser. If I could see the wood when the drawers were closed then I painted it.
If you will be replacing any hardware decide if you need to fill holes before you paint and take care of that task prior to paint.

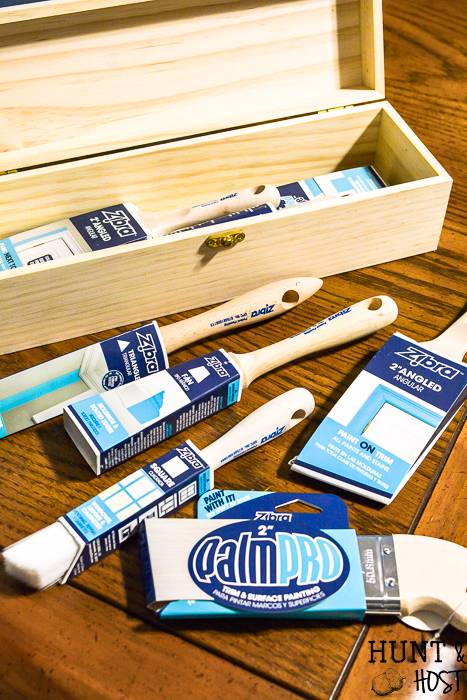
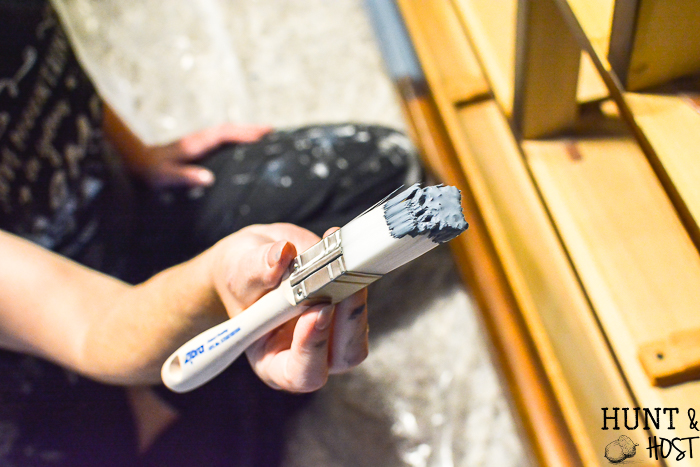
Use quality brushes when painting furniture. It can be tempting to grab a sponge brush or cheap chip brush, but your results will suffer with paint lines and bits of sponge stuck in the paint.
This was my first time using Zibra paint brushes and I am sold, they were buttery smooth, streak free and the shapes are dreamy.
It might sound corny to love a paint brush so much, but I have TONS of paint brushes in my craft room and these are by far the best I have tried for painting furniture.
The shape specific brushes are tailored for different uses and that saves time, effort and improves the results by miles.
They have a wide range of choices to fit a variety of paint jobs.
I used this handy little Zibra triangle brush for the deep crevices in the drawer fronts and dresser top detail.
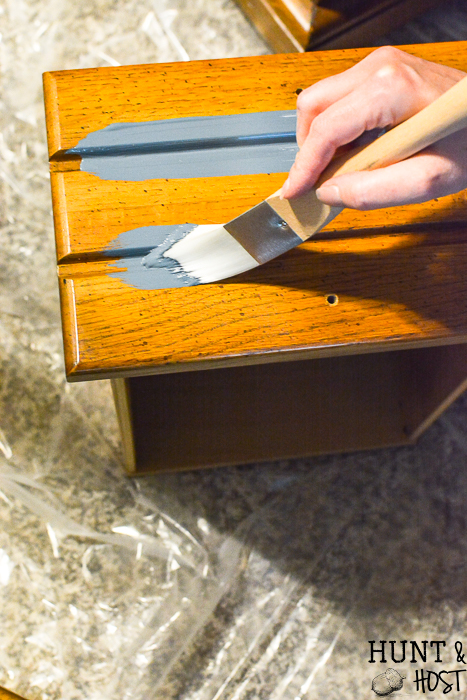
The Palm Pro brush was perfect for large flat spaces, it’s like an extension of your hand, easy to grip and control while painting.
The square Zibra brush was excellent for trim. I’m wishing I would have had these brushes when I was painting this room! It would have helped on the trim so much.
Next time! I have more painting to do in the house. I literally painted the entire dresser so fast my husband wanted to know where those brushes had been all my life, lol.
If you want to give a Zibra brushes a try you can find them on the Zibra website, Amazon, Lowe’s and Home Depot.
You can also visit my friends and check out their beautiful projects to gather some other awesome paint makeover ideas:
My Creative Days Glazed Blue Dresser Makeover
Seeking Lavender Lane Mudroom Makeover

As far as being scared to paint your furniture, girl, just jump in there. I learned by just doing it and making mistakes. You will too. Paint is your friend and I believe there isn’t much a girl can’t do with a bucket of paint and a good brush.
Contrary to our knee jerk thought – paint is not permanent and if you mess something up you can repaint it, sand it out or fix it.
So go line up your outdated furniture that needs a face-lift and get that paint a flyin’. You won’t regret it, promise!
[mv_create key=”28″ thumbnail=”https://salvagedliving.com/wp-content/uploads/2019/02/DIY-bedroom-dresser-makeover-paint-tips-12.jpg” title=”DIY Bedroom Dresser Makeover” type=”diy”]You may also like these furniture makeovers:


Wow! Looks great.
thank you Beth
That is amazing, I’ve never seen walls and dressers the same color!!!
did you see the piece in my study? you will love it!
Wow, this dresser looks awesome painted in this color! I really like how it looks in your son’s room!
thank you!!!
Glad to know ,that you aren’t afraid of painting, I love to paint, but hesitate every now and then ,your blog help me and I am sure others ,to go for it and you can accomplish alot in our home
I am so happy it encouraged you – don’t be scared just do it!!!
I love how it turned out. The color is beautiful!
Thank you, it really was so easy to do!
Beautiful!
🙂
Wow what a great color and an excellent job painting it. What a lucky kid!!
His room has turned out cute and he was ready – I never really did his last room!
Zibra brushes–wish I would have had a set of those last month when I painted 5 inside doors and casings. Bet it would have made the job a lot easier. I have an armoire to paint next and you can bet I’ll be buying those brushes to do that job..
Thanks for the pics–it turned out beautiful!
you have to – they are so silky smooth!!! Great finish, you will love them
I’ve been wanting to paint a piece of antique furniture but has glass fronts and have hesitated. These brushes just might inspire me to attempt it.
just tape off the glas an remember you can use a flat razor blade to scrap off paint if you get it on the glass, I say go for it!!!
Just curious, did you seal the dresser with anything?
no I didn’t, but I am a huge fan of using a wax sealer, for sure if I use chalk paint. I often use Annie Sloan wax to finish. This paint has a gorgeous finish as is though so I left it alone
Looks so professional! I have considered buying some of these brushes, but when my guy paints something, he just throws the brushes away! The only way I can keep a good brush is to ‘hide’ it from him. I do have a couple of good brushes, but they’re getting older by the minute.
Find yourself a good hiding spot!!! He might like these so much he won’t chunk them and they really aren’t too expensive, but I still wouldn’t throw them away!
I have the same problem with my husband and brushes. He hates cleaning up after himself so the brushes just dry up. If the job needs a nice finish using good brushes, I tell him that I will do the job (and clean up) rather than him ruin good equipment. Men just SMH!
????????????
Great find and gorgeous results!!
it was a great find! thanks
I love the color!! I’m ready to start a project.
well being ready is half the battle – it is a mental prep sometimes!!!
What an amazing transformation! Quite beautiful You have used a spray before to paint furniture with equally successful results. How do you decide whether you will spray paint or brush paint your project? What are the pluses and minuses of each method?
great question because I love my sprayer too! I didn’t spray this because I didn’t think logistically it made sense, plus it was a pretty straightforward piece. Sometimes chairs and pieces with more dimension are a better spray candidate. I probably wouldn’t spray a furniture piece inside unless I could fit it in my spray tent. It is a matter of personal preference though. I also always choose to spray wicker or rattan verses brushing.
Did you use interior or exterior paint ?Really like the color.
It is interior flat paint!
Hi. I love blue so much…have a very similar dresser that I have held onto since 1967…cannot part with it..maybe a paint job is in order???????? you did a great job..and made it look easy..those brushes are simply amazing ????
It really was easy, I was shocked. Good paint and good brushes really help!
Wow, I love that color. The dresser looks awesome. Also, love the way they designed the dresser. Different from the normal looking ones. Plus all wood! Can’t beat a good garage sales, Craigslist item
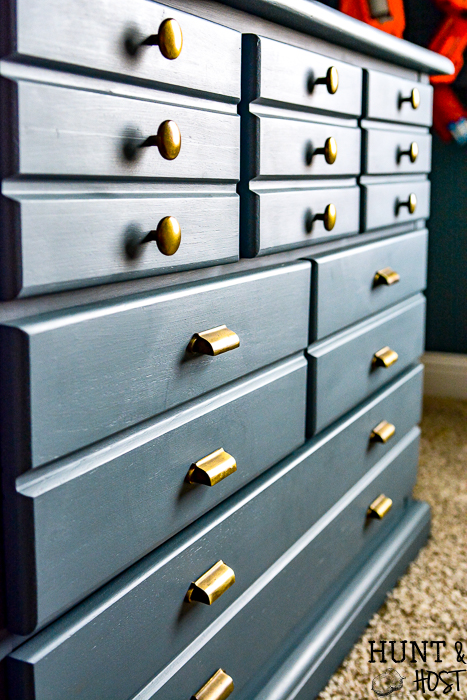
yes – i love a good find and was so lucky the hardware was nice on this one! One of the pulls was broke, but I was able to glue it back together and it works like a charm!
This has inspired me to tackle a big furniture project of an antique desk. Thanks!
yay – be sure and show me when you are done!
Oh my, if you could see the paint brush I having been using to paint my family room you would crack up! It is so stiff with hard paint that I can’t get off. I did take scissors to some of the hairs. Anyway The is a really cool dresser. Turned out beautiful!
lol – I have a few of those too, they may be getting tossed soon though!
Love the color. Also love the different paint brushes. New paint brushes make me smile.
it really is the little things right!?
I see why you used the Zibra brushes. The dresser looks fantastic!
thank you Laura
Wow! Love the color! I am inspired to redo a few pieces.
Thank you
It is a simple change with big impact – go for it!
This turned out beautifully! The pulls are the icing on the cake. I like chalk paint, but I’ve been using more milk paint on recent projects. My favorite milk paint right now is made by General Finishes.
I like General Finishes too, I have used it before with great results as well
This is absoluly gorgeous!!! I wish I knew about these brushes before also!!
Thanks – you’ll have to give them a try!
I have a dress from our family growing up it’s a smaller piece but as well
Don’t want to depart with it since it was my moms and she passed away 9 years ago. The color and look is fantastic. I was thinking of using chalk paint but now I think I’ll try this. I think you said flat correct? So is smoky pitch on the dresser as well as the walls. It gives such a different look on both of that is correct. I have am just begiinh to read your blogs even though I signed up a whole back. Either way you’ve inspired me! Thank you
I think that is a great idea and yes the paint is exactly the same on the walls and dresser, but doesn’t look a bit different on each and I love the way it looks in person! It is actually a satin sheen, I need to change my post, this is a link to the exact one I buy so you can see the can!!! https://www.lowes.com/pd/HGTV-HOME-by-Sherwin-Williams-Showcase-Satin-Tint-Base-Latex-Paint-Actual-Net-Contents-120-fl-oz/1000404465
I am interested in the fact taht you used house paint. Did you use a base coat or not and what if the piece is varnished ? I am wanting to paint doors to my rooms Advice please?
yes – house paint is great especially good quality paint. You want to make sure you don’t paint over oil based with latex if you are repainting something. I cleaned the surface really well and if it is a high gloss varnish you might want to sand it some for grip or perhaps use a primer. So many house paints come with a primer built in nowadays so it eliminates that step. For interior doors this would be a great paint to use. If you hired a painter to do it they would use an interior latex house paint to do the job! I suggest s sprayer for doors to get a nice even and smooth coat. I use a Wagner sprayer for stuff like that!
WHAT IS THE COLOR, BRANK AND FINISH FOR THE DREASSER AND WALLS PAINTED THE SAME COLOR
Here you go! https://www.lowes.com/pd/HGTV-HOME-by-Sherwin-Williams-Showcase-Satin-Tint-Base-Latex-Paint-Actual-Net-Contents-120-fl-oz/1000404465