How to Make a Personalized Monogram Stencil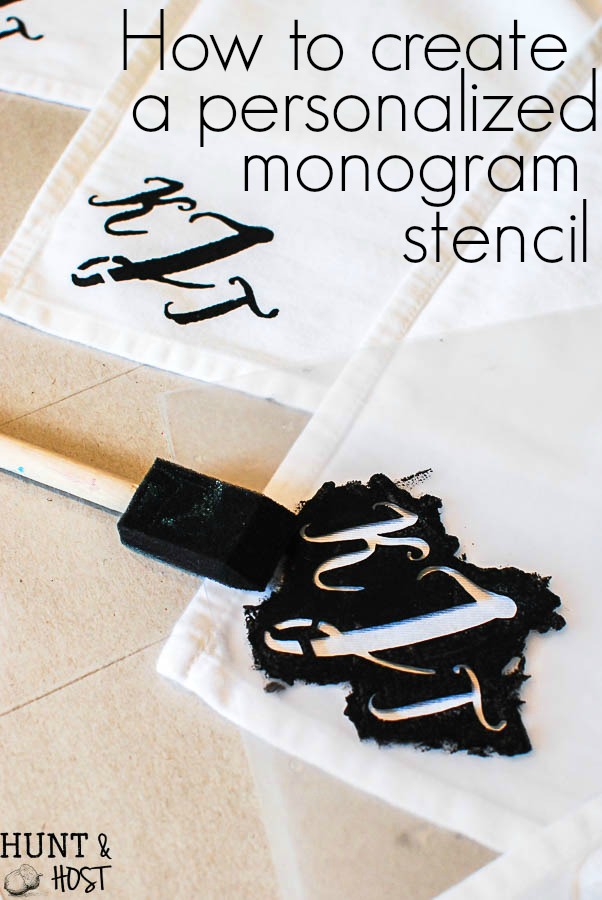
This is a step by step tutorial on how to design a personalized monogram stencil to cut out on your Cricut or by hand. You may wonder why a stencil versus just a regular cut file and I will tell you it’s because now you can mass produce and paint your monogram on anything that sits still!!! Like these precious DIY no sew monogrammed napkins. Once you make the stencil, paint is cheaper than vinyl and you can make more.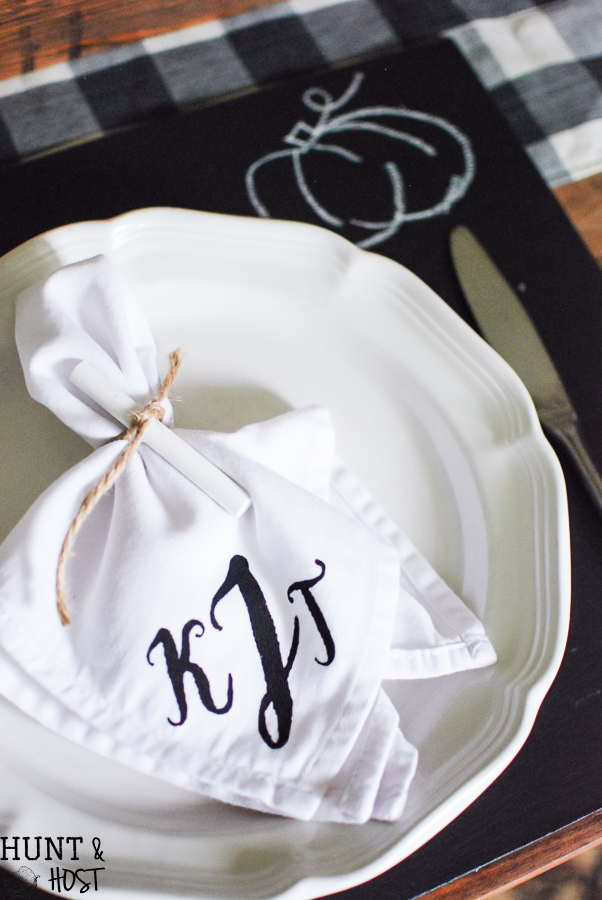 This post contains affiliate links so you can find the products I love and use. I appreciate your support! Full disclosure here.
I love a monogram on just about anything and with all the vinyl readily available these days you can add it to all kinds of products. However, this tutorial is not for cutting vinyl monograms, it is for a stencil you will use to paint personalized monograms! You will see how to get the stencil hashmarks on your monogram so you can cut the monogram, otherwise the middles would fall out of your A, B, D, etc..
- You will start in a free program called Picmonkey (there is an upgraded version with more font selections that I use and love). Open Picmonkey.com and on the drop down menu go to Design.
- You will start with a blank canvas. In the left hand menu select the Tt menu – it is the text menu.
- Scroll through the font choices, or you can use your own font. At the top of the menu there is an OURS / YOURS selection. Select the font you want and hit add text. When selecting font be careful not to pick anything to intricate or thin, it will be hard to cut and hard to paint. (PS – I will have a source guide at the bottom of this post!)
- I am assuming you are doing a three letter monogram for this tutorial with your last name in the center, larger than your first and middle initial. Type each initial into a new text box so they are separate.
- Highlight each letter individually and manipulate into the correct size proportion you like and the layout you want (all in a row, Last Name larger, etc) You will make all changes to each letter in the text menu box that pops up when you highlight a letter. If you have trouble moving between the letters select the letter you want to work on in the LAYERS menu. However the monogram looks here is how it will get cut later, you will be able to change the size but not the format so get it how you want it!
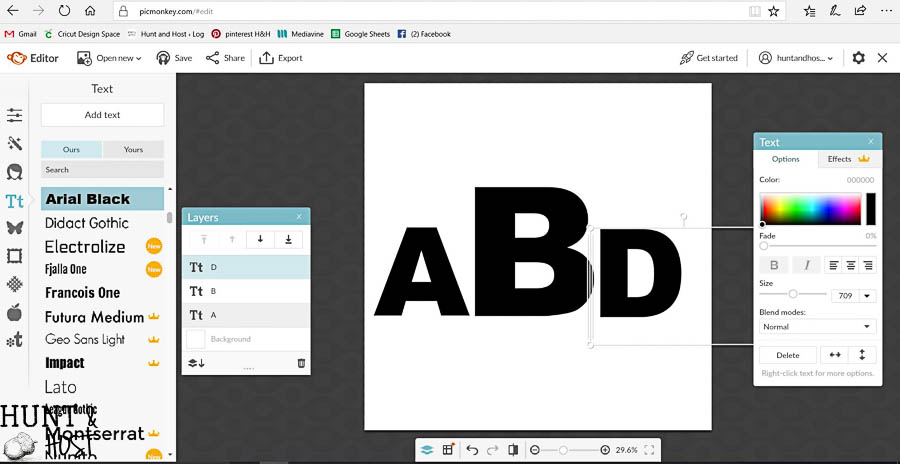
- Once your personalized monogram is laid out add one more text box, you will use a basic font like Francois One and type a capitol I in the box. While the letter I is highlighted go to the text menu and slide the color selector dot from black all the way up to white. (Picmonkey has line options you can select, but they are very long and harder to work with. I find the letter to be an easier choice.)
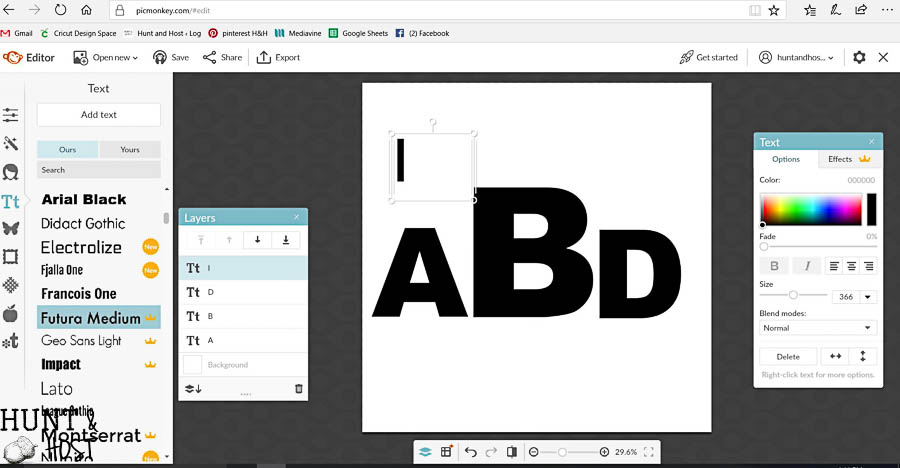
- You will drag and rotate the I to make the cross hatch marks in your stencil, anywhere you have an inner circle of a letter you will need one to two marks. I almost always use two marks to add stability to the stencil.
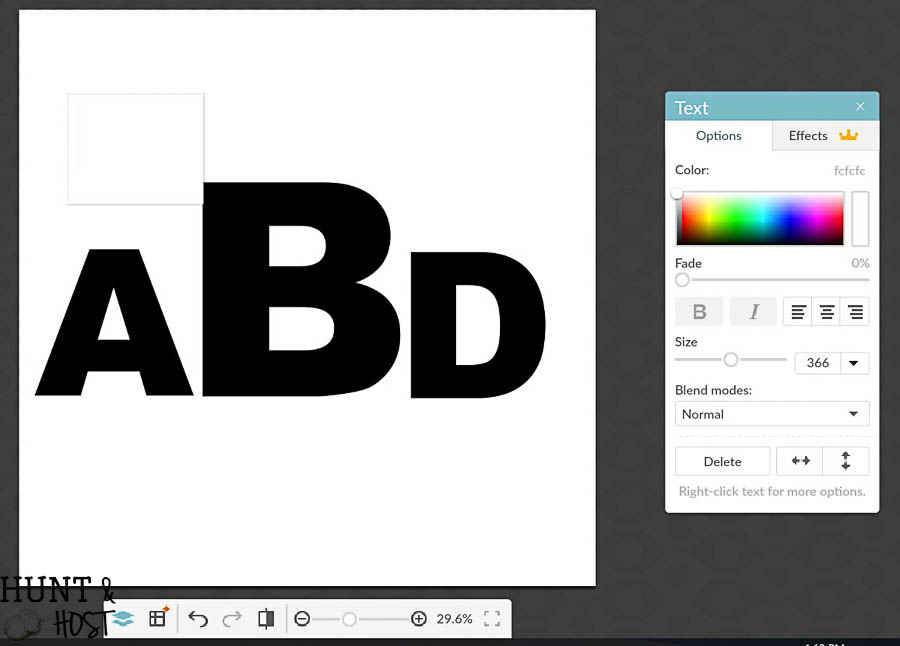
- Now you will duplicate this white letter I as many times as needed by right clicking and selecting duplicate text. Drag and place on all the areas needed. You really have to think backwards on this!
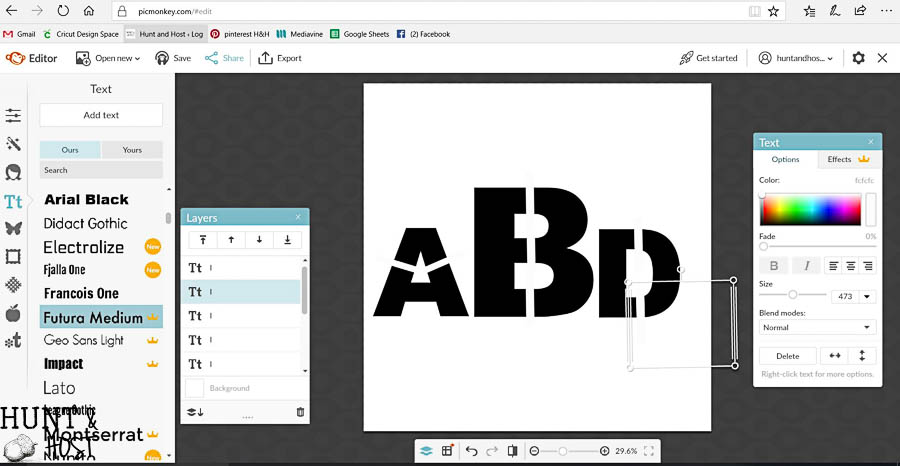
- You now have the cut guide for your stencil! It’s time to save it. Hit Export at the top of the screen. Name your monogram and select the Roger size (this is a smaller file which will be easier to upload to the Cricut site) You don’t have to, but I make the dimensions smaller to once again lower file size, I typically go to 600 X 600. Hit EXPORT to Computer. Make sure you save the file somewhere you can find it!
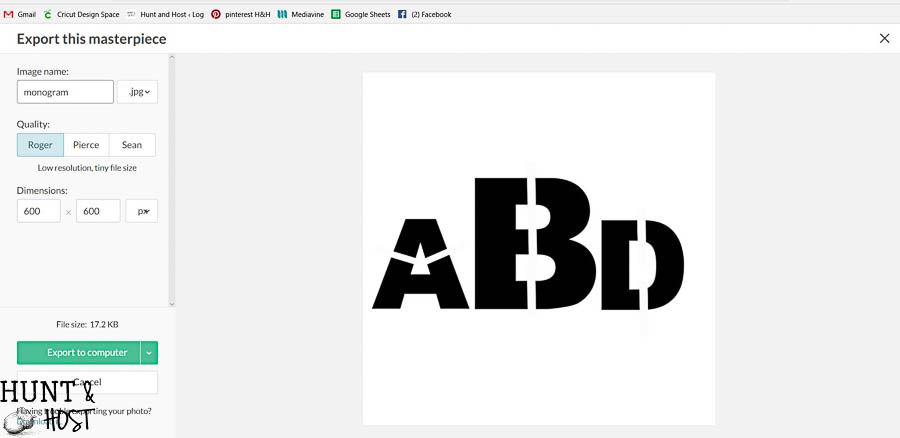
- If you want to hand cut this monogram stencil print it out and trace it onto stencil material then cut with an Exacto knife. If using your Cricut, go to the next step…
- Open the Cricut Design center and log in.
- Hit NEW PROJECT in the upper right hand corner.
- Select UPLOAD FILE in the left hand menu.
- Select UPLOAD IMAGE then BROWSE to find where you saved your monogram file from Picmonkey and select it.
- Select SIMPLE and then continue.
- In the Select & Erase menu, click on the white background of your image. It will turn to a blue plaid to indicate it has been selected to cut away. Hit continue.
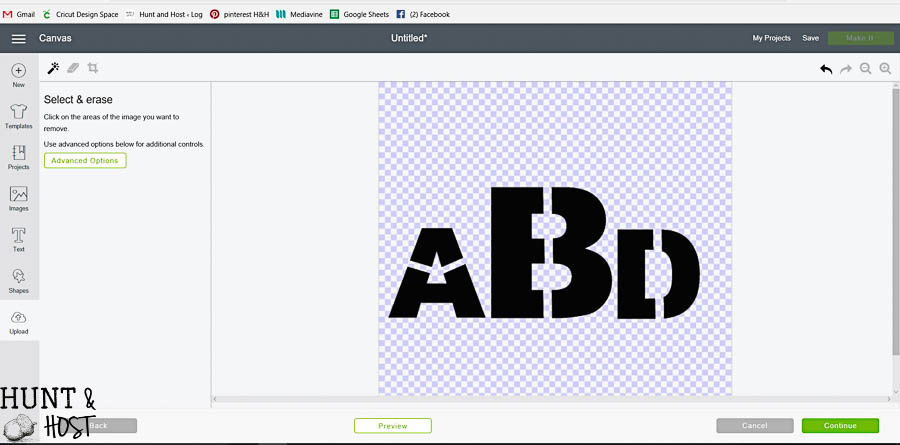
- Highlight the right design that says save as a cut image underneath it. You can rename your file here or it will be that same as you saved it from Picmonkey, hit save in the bottom right. Now the image will be in your image catalog!
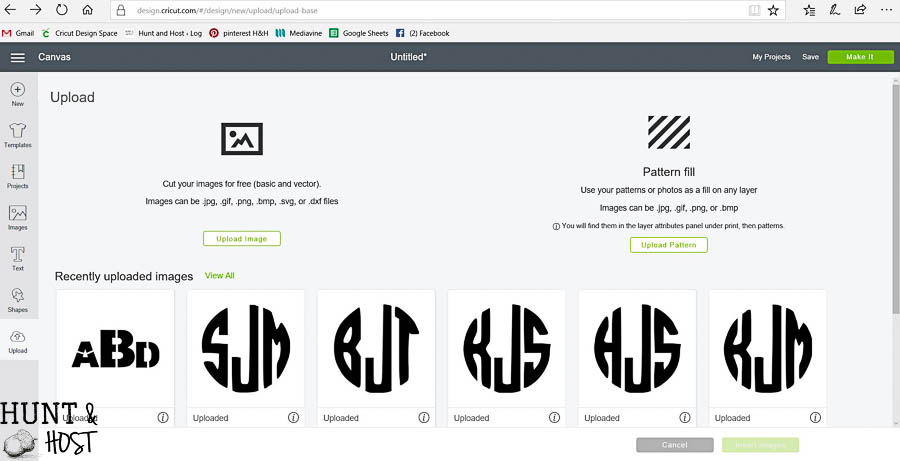
- Select the image and hit INSERT IMAGE in the bottom right.
- Now you will adjust the monogram to the size you would like to cut. Note that now that you have the stencil cut shape saved you can print it however large or small you want for various projects, just adjust in the Cricut design space!
- Cut the monogram into a plastic stencil material for multiple use purposes.
Personalized Monogram Stencil Supply List
Exacto Knife (if not using a Cricut)
Sponge Brush
Small Stiff Bristle Brush
Acrylic Craft Paint
You can see tips on cutting letters for large signs here and stenciling tips here. If you want to make these cute napkins you will simply use your new stencil to make them! I use acrylic craft paint and a sponge brush to paint the monogram. I like to lay out all my napkins flat and just move in an assembly line fashion. Dabing the paint all over the stencil for full coverage, careful not to move the stencil as I go. 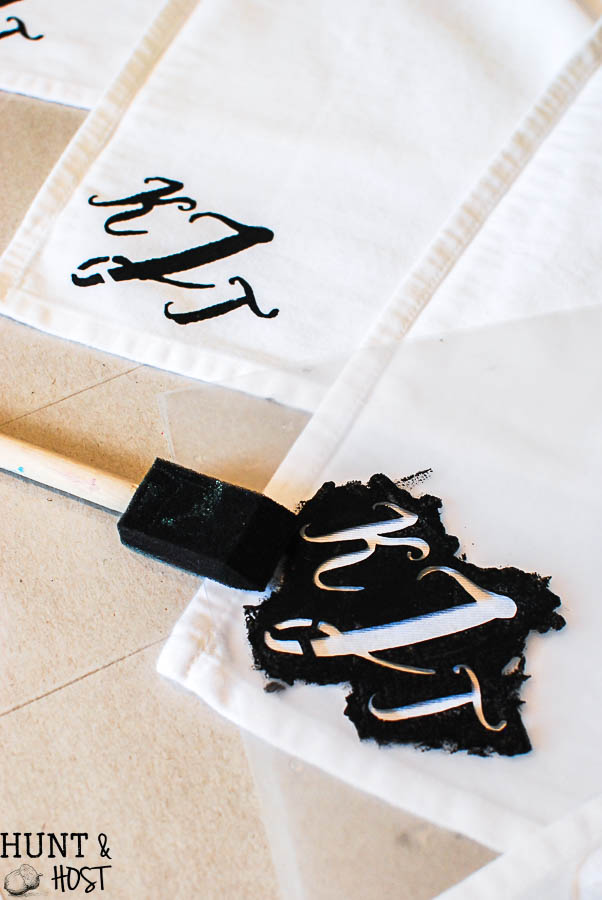
Once the paint is dry I go back with a small fine stiff brush and close up the stencil gaps so the letters look seamless.  You will be surprised how well the paint holds up under after washing in the washing machine and dryer. There will be a slight fade, but mine still look great! These personalized napkins would make a fantastic gift for weddings, house warming, birthdays or Christmas. l hope you will let me know if you have any questions or if I left anything out! I tried to get all the details I could. Let me know what you make with this fun technique and pin this so you have it for later!


Thanks Kim this will come in handy for all kinds of projects, better watch myself or every pillow and stool will have my initials on them, lol! I loved that last picture it is a lovely room.
once you know how to do it you kind of go crazy so watch out for sure 😉
Kim,
What font did you use for your napkins?
I am SO SORRY but I don’t remember!!! I will try to look it up and let you know.