We built a wire trellis on a brick wall in an afternoon!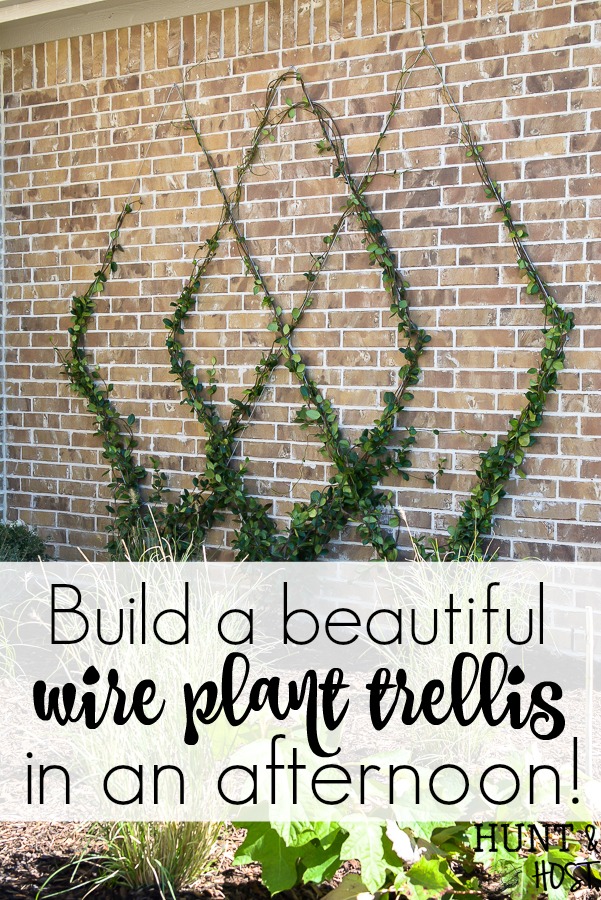
It’s fair to start off by saying that my man is handy. He actually holds a degree in landscape architecture and we used to own a landscape company, so he knows a thing or two about landscaping! HOWEVER – I was shocked at how easy this DIY wire trellis was to install! We had done similar ones for customers years ago, but I was never on site to see them go in. They look difficult and super professional and I am going to teach you how to build your very own!
The front of our house has an large open wall by the entryway. We could have done the normal thing and added large shrubs but I thought it was the perfect spot to add vertical interest and luckily my husband agreed! Here is how we brought the idea to life!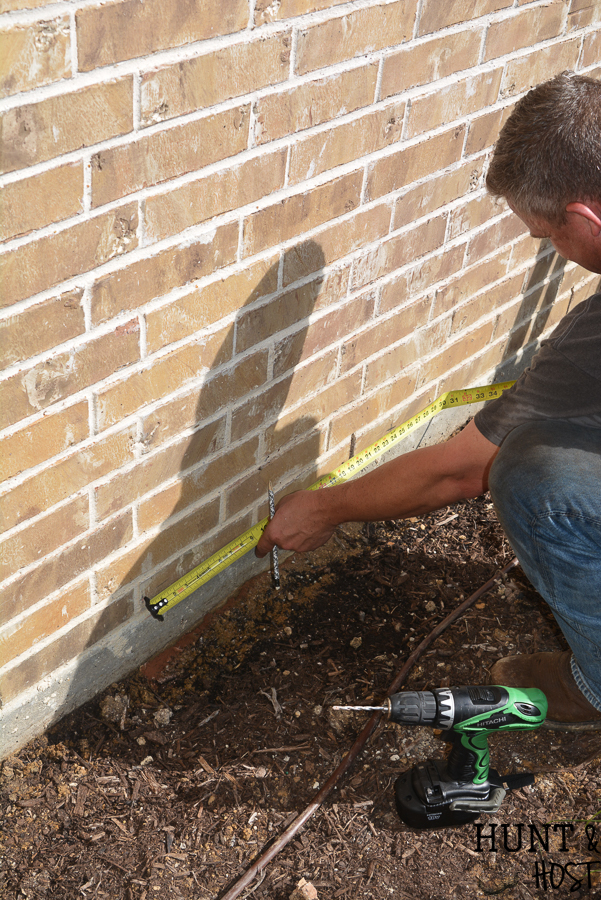
DIY Wire Trellis Supply List
Hammer
Wire cutters
Plants (see trellis plant selection suggestion list below)
How to install a wire trellis on a brick wall
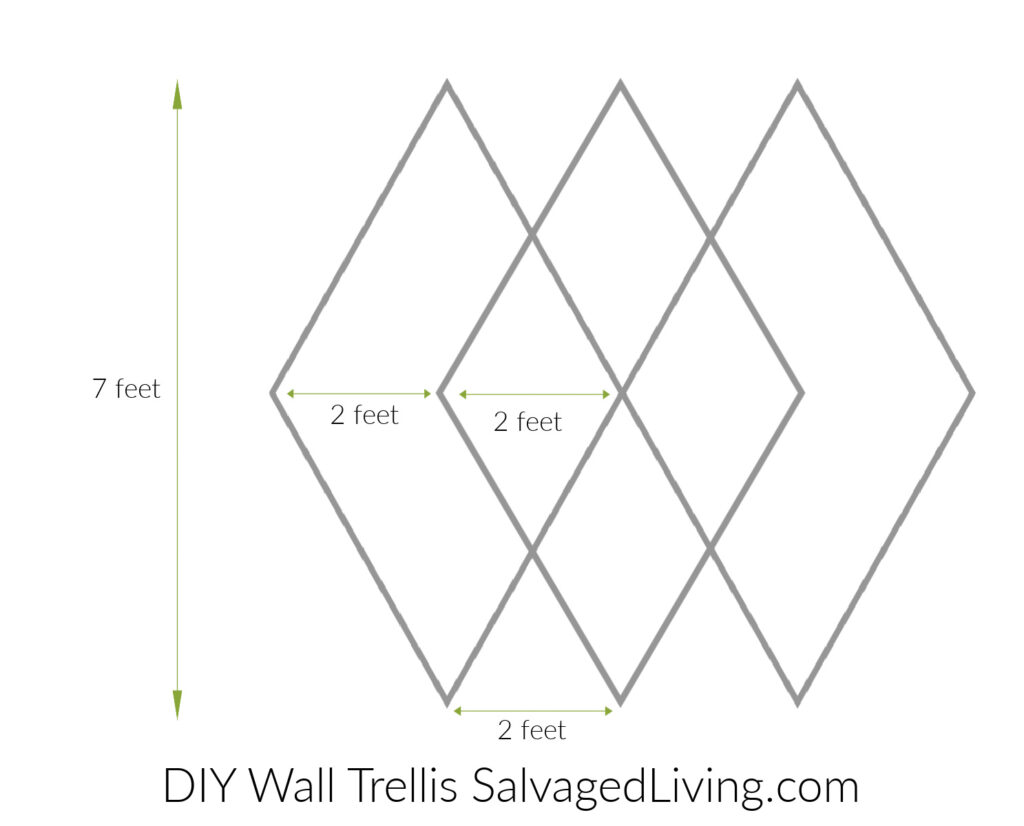
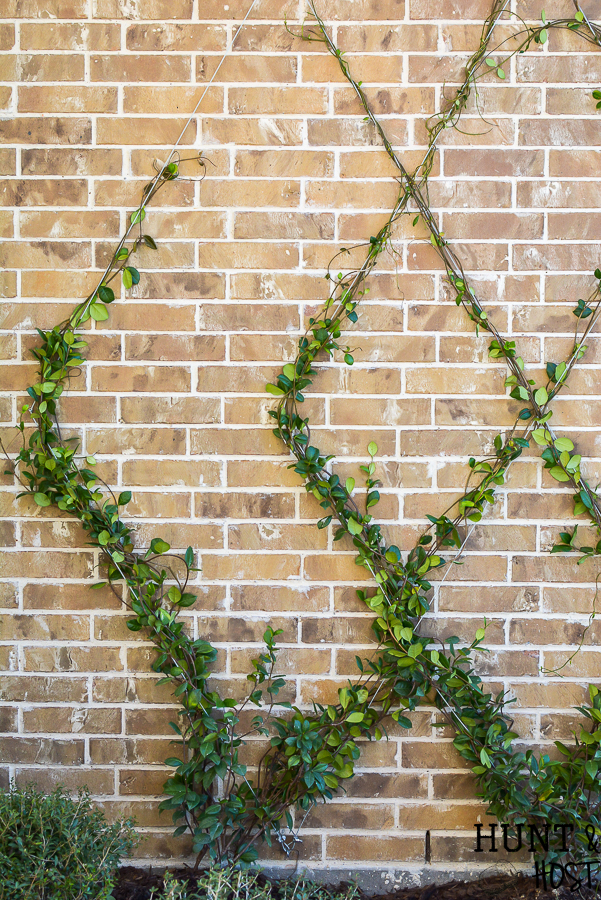
- Start by sketching your design on paper to help determine size and shape. Here are the measurements for our trellis, you can adapt to fit your space and needs.
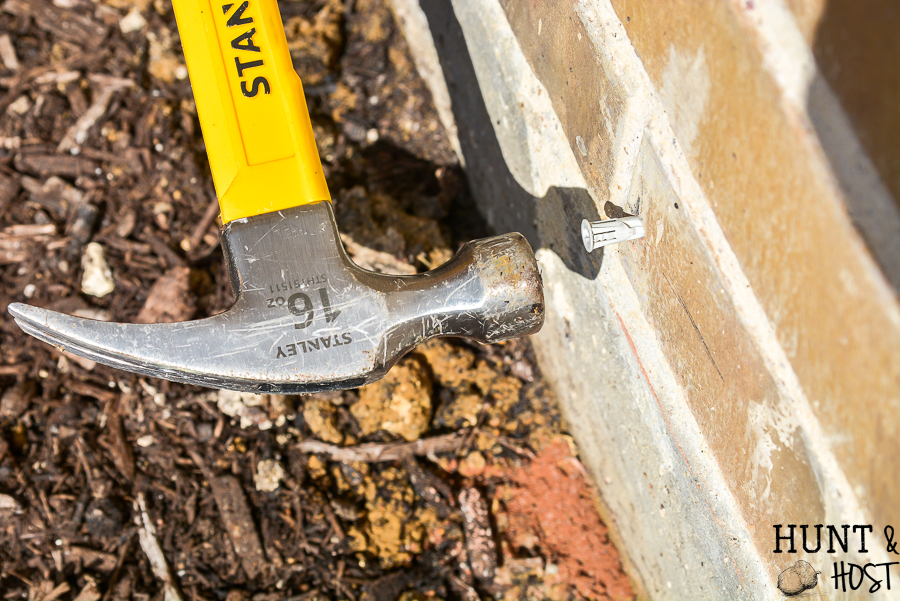
- Once you have your design down measure out your points and mark on the wall with a pencil.
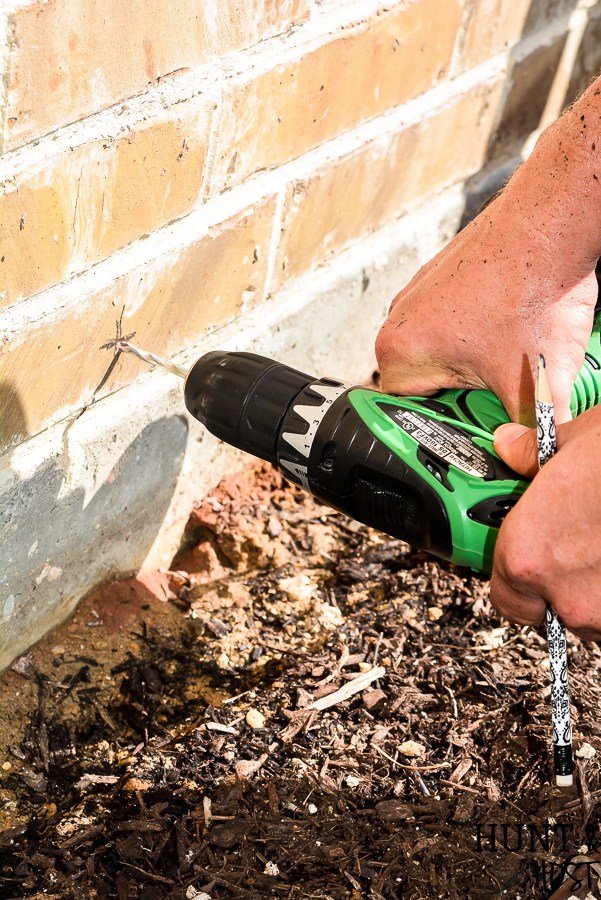
- Drill each point with a masonry bit, try and drill into the mortar. Our bricks were not straight so some points went in the mortar, some in the brick. If this was on a wooden fence you would pre-drill holes for the eye hooks, no anchors needed.
- Insert a masonry anchor into each hole.
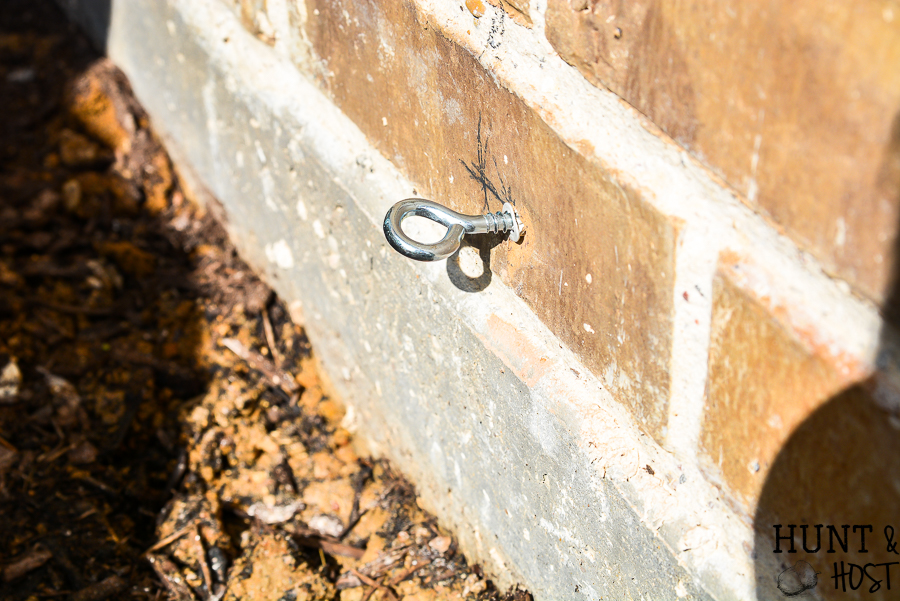
- Screw an eye hook large enough to accept two passes of your trellis wire into each masonry anchor.
- Determine the length of cable wire you will need to complete your trellis design.
- Decide the best path for your trellis wire, that will allow the least amount of connection points. Our design took two connecting points.
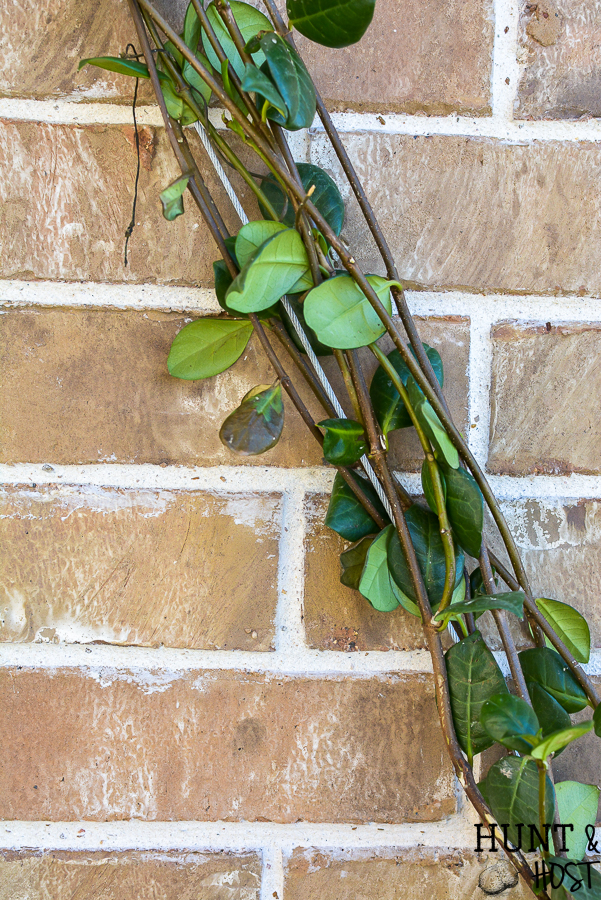
- Run your wire through the starting point and secure as follows.
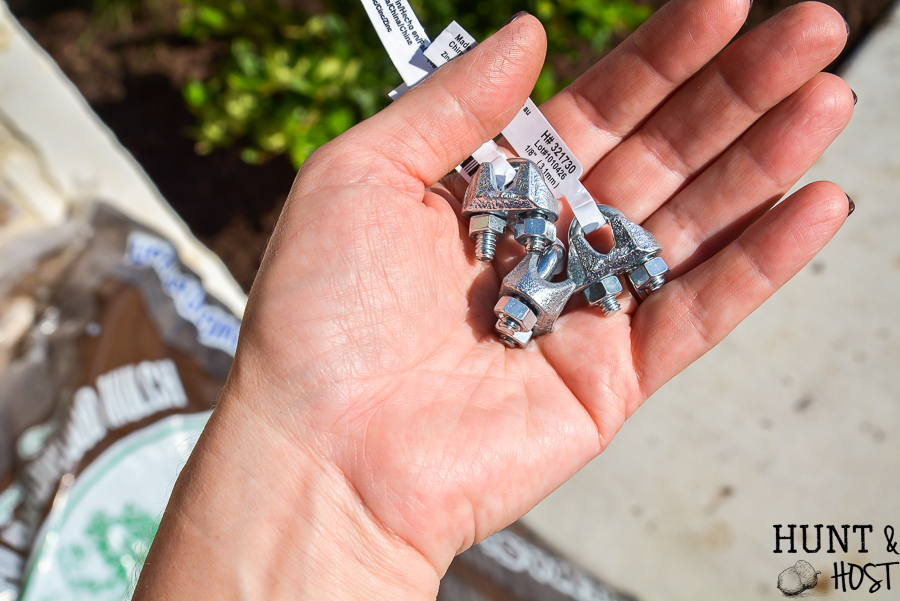
- You will want to use this type of wire rope clamp to secure the wire. There are other options, but most crimp type attachments require a special crimping tool, this one does not. See the pictures for details.
- Run wire cable through the other points in the design until you end back where you started.
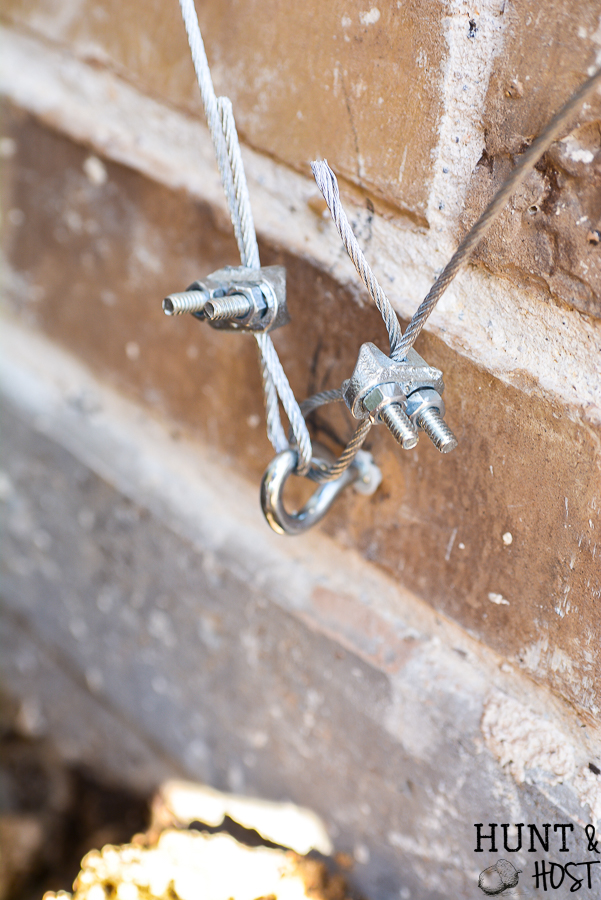
- Clamp the end the same as you did the first.
- Repeat as necessary to carry out design.
- Plant your shrub selection (Trellis plant selection list is below) at the base points.
- Train the growth to go on your trellis. You will have to monitor this as time passes and train your plant, trimming sometimes to teach it to cover the trellis.
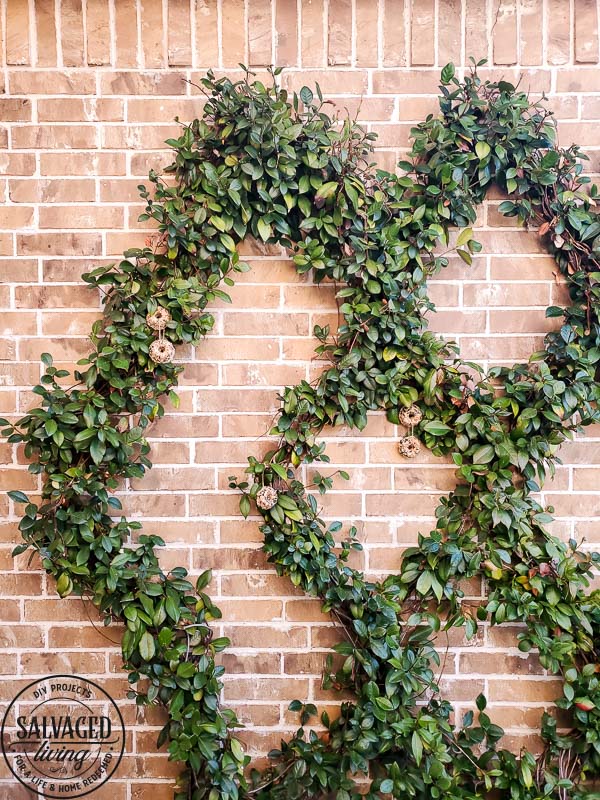
This simple landscape addition will stun the neighbors and add value to your home! We can see our beautiful vines through the dining room window and it makes me smile every time I see it, no more boring brick wall!
Here is an updated picture of the wall 2 years later!
Here are some plant ideas for your trellis, be sure to get things that grow well in your area. I always recommend buying from a local nursery/plant supplier over big box stores that may order things that don’t do well where you are. If you want a few more gardening tips check these winter lawn tips from my husband!
Plant Suggestions for A Trellis
Star Jasmine
Carolina Jessamine (not jasmine)
Coral Honey Suckle
Grapes
Cross-vine
Lady Banks Rose
Black Eyed Susan Vine
Bougainvillea
Morning Glory
Trumpet Vine
Wisteria
Clematis
Moonflower
I’d love to hear if you have any good ones to add to the list!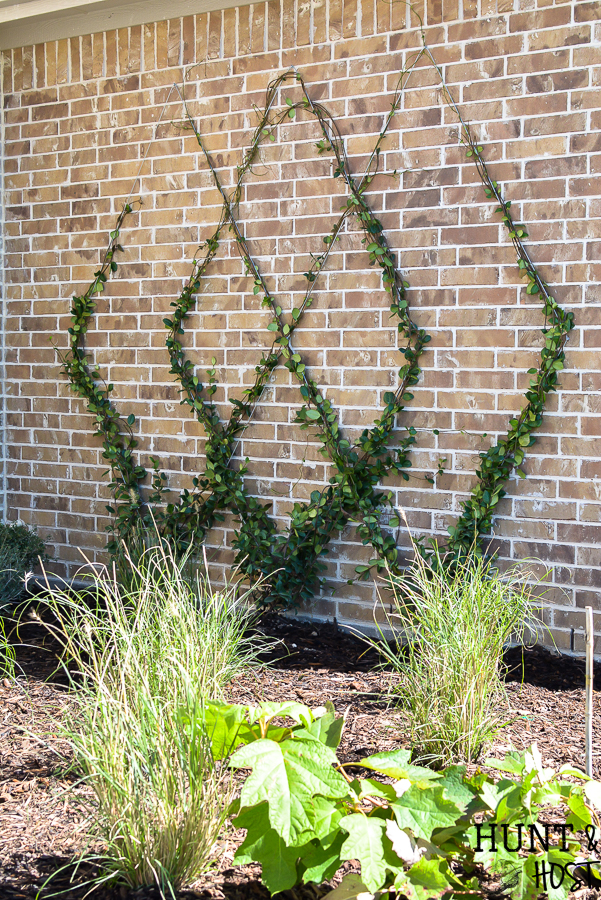


What plant dis you use for this?
If you keep reading in the post I have a list of plant options, I used jasmine on mine
This is fabulous, Kim! Pinning. ♡♡♡
you are the best thanks friend!
Absolutely love this Kim, pinning!
Thanks Roxanne!
How about boston ivy?
I am sure that would work as well!
What gauge wire did you use?
not sure exactly – but the one in the supply list will work, it doesn’t have to be too laege, but you want it to hold the weight of the vine, here is the link again: https://amzn.to/2Fq8luS
What a beautiful & creative way to cover a wall. Are any of the preferred listed plants suitable for a completely shaded area? We have a ugly cement wing wall under deck holding dirt back and would love to cover it up with something like this. Thank you!
I’m not 100% sure what to tell you on this, I would do some research on a few of the plants listed, make sure they grow in your area and check sun requirements.
Hi! What kind of jasmine did you use? I love the look of it.
thank you – it is Star Jasmine
How long after you planted did you see the shape you posted a photo of for this pin? We are doing this now and trying to see when we might see the vines creating the diamond pattern we made.
We bought larger plants to start with so this picture was taken right after we planted it. Its been up a while now and is completely grown in. It just depends on. The size you start with!
Hi Kim,
Thank you for the reply. My ugly brown concrete brick wall is in need of some attention. It is 23 feet by 6 feet high. I have been playing around with the design and was wondering how close your anchor points are? On paper mine are 24″ apart and while it looks good, my fear is that it will look too busy because I have such a large wall OR that once the plants grow in, it will be too close together to see the diamond pattern. Thoughts? Should I increase the space to 30″? Or stay at 24″? I tried doing 27″ spread and because my height is only 6 feet, the diamond pattern looked wonky.
We are hoping to start designing today and of course I woke up at 5 am with this fear. I’d love to hear your thoughts.
Thank you again.
Mary
Love this idea, I was toying around with doing a old recycled big cathedral wood window and wire within it for the trellis.
I have a gorgeous passion flower plant that desperately needs to be trellised.
I was thinking of mixing the passionflower with the star of Jasmine for multi dimensional appeal.
Can we see an updated picture and how long it has been? I don’t see a date stamp on the post.
HI – Thanks for asking, I’ve been meaning to add an updated picture so I just put one in the post! Hope it helps and enjoy, We LOVE our trellis!
Hello,
This is beautiful. Could you tell me what were your measurements?
Hi! I too am interested to hear how far apart your anchor points are? Yours turned out beautiful.
thank you Natalie – they are 2 feet apart horizontally and the whole thing is 7 feet tall. hope that helps I will add a diagram to the blog post!
Hi Kim, great idea. I’m ready to build one! My brick wall is adjacent to my deck (can’t easily plant vines in the ground)…do you think something like jasmine would thrive and grow from a pot?
yes! it absolutely will, you just need to stay on top of watering and cold weather protection in a freeze, the roots will be more vulnerable in a pot!
Just a quick note to say thanks for the detailed and clear instructions. Might have taken me two afternoons rather than one, but a random assortment of trellises supporting an expanding fig tree has now been replaced by some rather industrial (4mm!) wire trellis.
Thanks
That makes my day – so glad I could help. This is truly one of my favorite projects! Hope yours is beautiful for years to come!
This is really beautiful!! Did you seal the holes with anything to prevent water intrusion?
no, I didn’t and haven’t had any problems at all!