• Contact Kim
  • Stay Connected
  • Shop Printables
  • Nav Social Menu

    • Facebook
    • Instagram
    • Pinterest
    • Twitter

Salvaged Living

Easy DIY home decor and craft projects for budget home decor

  • Home
  • Meet Kim
    • About KIM
    • Get Kim’s Look
    • Kim’s Bookshelf
    • Kim’s Home Tour
    • Get The House Look
    • Disclosures
  • DIY Projects
  • Faith
  • Home Decor
  • Grow Your Creative Business
    • Grow Your Creative Business Course
    • One on One Business Consulting
  • Classes
Home » DIY Projects » Dollhouse Finishes, Trim and Mouldings: One Room Challenge Week 5

DIY Projects

Dollhouse Finishes, Trim and Mouldings: One Room Challenge Week 5

This post may contain affiliate links.

Trim, mouldings and finishes make a room, your dollhouse is no different!

The One Room Challenge is chugging along and they actually extended it to seven weeks because of all the disarray caused by those nasty hurricanes! You’d think with a little project like a dollhouse I would be done by now, but I’m not and the extra week was a welcome sight. I have really enjoyed working on my childhood dollhouse as I binge watch Call the Midwife on Netflix. I’m super immersed in my British roots! My Neena (grandmother) that made and gave me this dollhouse originally is a British war bride and a spot of tea and cookies was a regular occurrence at her house. If you haven’t seen the Midwife (set in 1950’s England) show on Netflix, check it out. I LOVE it, my husband thinks it’s like watching paint dry, lol!Dollhouse finishes, take a look at miniature trim, casing and mouldings plus DIY dental crown moulding installation. I also added little dollhouse open wood shelving in the kitchen!

This post is sponsored by miniatures.com and DecoArt. All opinions and ideas are 100% my own. This post also contains affiliate links so you can use the products I do. If you make a purchase I may receive a small commission, your price stays the same, thank you. 

Anyway, this week I also sawed trim while watching the Astros battle out the World Series and it was fun to sit with my family, watching sports, doing crafts all while the kids did puzzles and snuggled. It was one of those Norman Rockwell moments I will treasure always, having my baby birds all in the nest still wanting to hang out with mom and dad. Ahhh, full heart. On to the details of the dollhouse updates this week:

I ordered all the trim pieces from miniatures.com, they had quite a few finishes and styles to choose from. The dental crown moulding made my heart skip a beat, so I ordered that for a beautiful trim to the room. Crown moulding really completes a room and if you are looking for a subtle yet impactful update you may consider adding this feature to your living areas.

I used a miter box and saw to carefully cut the lengths of moulding to fit the living are. In the corners I cut the pieces at a 45° slant so the pieces would kiss in the corner and be super professional! I have to say I was kind of proud that I figured this bit out. It’s probably not hard, but it was my first go at crown moulding.Dollhouse finishes, take a look at miniature trim, casing and mouldings plus DIY dental crown moulding installation. I also added little dollhouse open wood shelving in the kitchen!

For the base boards I picked a thick board with shoe moulding already attached. The base boards finish out the floors and add forgiveness to the gaps and crevices where the wall and floor meet. I cut the base boards the same way as the crown.Dollhouse finishes, take a look at miniature trim, casing and mouldings plus DIY dental crown moulding installation. I also added little dollhouse open wood shelving in the kitchen!

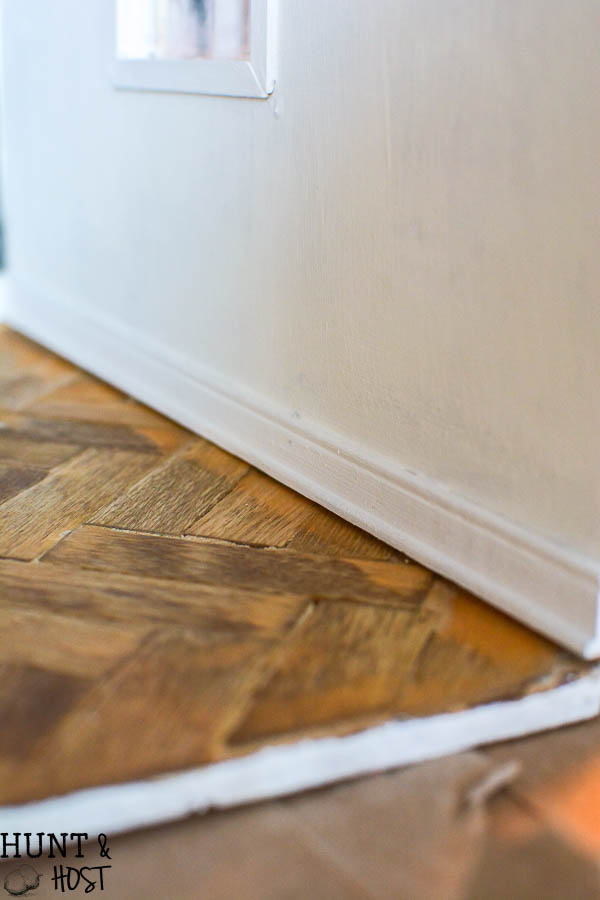
For the window frames I used a flat standard window casing and cut the corners on a 45° angle for a boxed look.Dollhouse finishes, take a look at miniature trim, casing and mouldings plus DIY dental crown moulding installation. I also added little dollhouse open wood shelving in the kitchen!

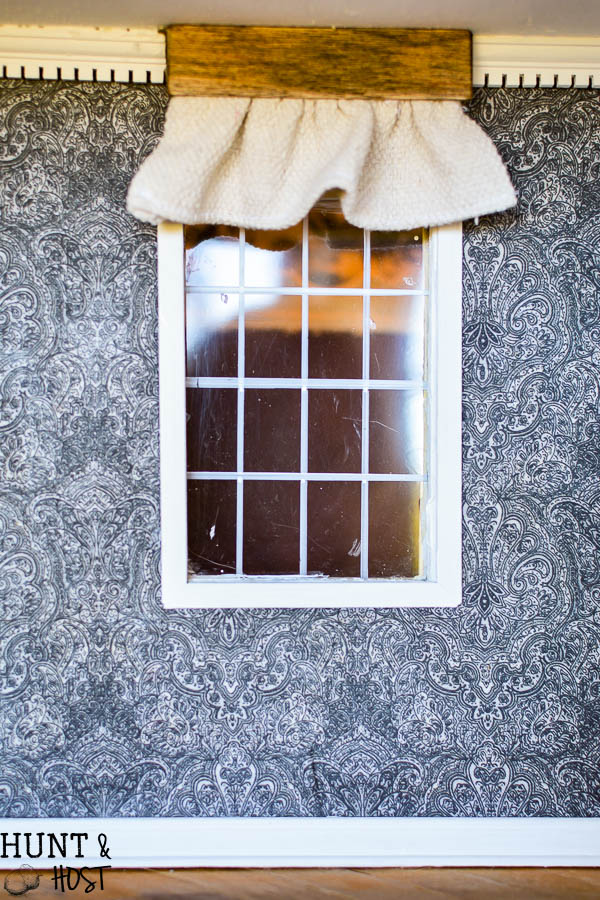
All the trim got painted Everlasting White Chalky Paint by DecoArt before getting installed.Dollhouse finishes, take a look at miniature trim, casing and mouldings plus DIY dental crown moulding installation. I also added little dollhouse open wood shelving in the kitchen!

To install I actually used two different types of glue. For the wood to wood areas I used Dap Rapid Fuse Wood Adhesive. For the wood to fabric (the back wall is wallpapered in fabric) I used fabric glue, it worked much better for this particular application. Glues really are different and can make the biggest difference in your project. You have to use the right one for the job, that is where blogs are a great forum to gather information before you attempt a project requiring glue! Let us do the testing for you. 😉Dollhouse finishes, take a look at miniature trim, casing and mouldings plus DIY dental crown moulding installation. I also added little dollhouse open wood shelving in the kitchen!

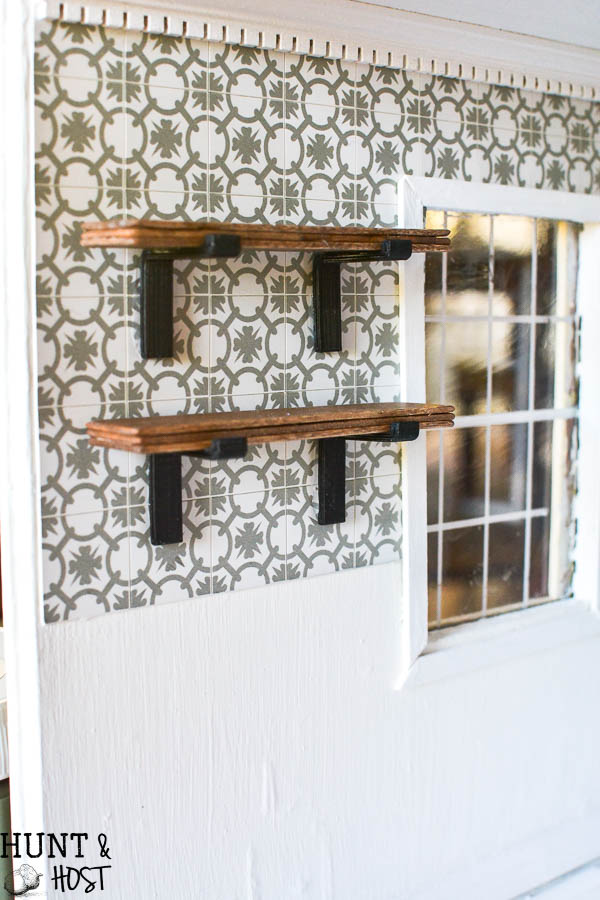
I installed kitchen shelves this week. These amazing brackets came from Minitures.com as well. How cute are they? I glued three popsicle sticks together to get a thick stack of wood for the shelf piece and stained them with the DecoArt Wood Stain in Walnut. I’m not sure I would want open shelving in my real house, I adore the look of it, but it seems like a lot to keep clean and tidy. That’s why it’s the perfect fit for the dollhouse, I can have open shelving here that I don’t have to clean, lol! Anyone have open shelves? How do you like the, I’d really like to know.

Next week I will reveal some wall art and small DIY’s before the BIG REVEAL and miniatures.com gift card giveaway! Thanks for following along with this fun little project! Let me know if you have any ideas I need to implement…You can see the previous weeks progress here:

Week 1

Week 2

Week 3

Week 4

Blessings, Kim from Hunt & HostConnect more here:

E-mail Subscription / Pinterest / Facebook / Instagram / Grow Your Creative Business


4 Comments

Stay connected

Don't miss out on the latest!

By being included in our newsletter delivery, you consent to receive new post updates and occasional promotional emails related to the Salvaged Living family. We promise not to over stuff your inbox!

Previous Post: « November Favorites Giveaway
Next Post: DIY Rain Chain Tutorial: Oui Yogurt Jar Craft »

Reader Interactions

Comments

  1. Julie Nichols says

    November 5, 2017 at 11:39 AM

    I love the tiles and the tiny rustic shelves there are so many great details. Your doll house looks amazing so far and I can’t wait to see the reveal!!.

    Reply
    • Kim at Hunt and Host says

      November 13, 2017 at 8:54 AM

      thanks Julie, it has been a load of fun, I think I did the easiest one room challenge ever, lol!

      Reply
  2. BPS says

    November 7, 2017 at 3:10 AM

    Cute cute cute! Is the wallpaper behind the open shelves the fabric you mentioned? I love it!
    And Call the Midwife is an absolute fave of mine too!

    Reply
    • Kim at Hunt and Host says

      November 13, 2017 at 8:56 AM

      behind the shelves is a sheet of “tile” and the black damask wall is fabric. That show…

      Reply

Leave a Reply Cancel reply

Your email address will not be published. Required fields are marked *

This site uses Akismet to reduce spam. Learn how your comment data is processed.

Primary Sidebar

  • Email
  • Facebook
  • Instagram
  • Pinterest
  • Twitter

Hi! I'm Kim. I believe getting your hands dirty can be a way to get your heart clean. This blog is a decorating and DIY guide to seeing God in the details of your day, hobby and home. Read more...

Learn to grow a creative business with Kim from Salvaged Living!

Check these out:

  • DIY Projects
  • Faith
  • Home Decor
  • Lifestyle

Stay Connected

Don't miss out on the latest.

By being included in our newsletter delivery, you consent to receive new post updates and occasional promotional emails related to the Salvaged Living family. We promise not to over stuff your inbox!

Stay connected

Don't miss out on the latest.

Footer

You might also like

Tips for easy DIY art you can freshen up your old picture frames with! Two ideas for DIY artwork on a budget.

Tips For DIY Art Using Old Frames

Grab a list of cozy vintage interior paint colors for your whole home here. These fresh color selections for 2020 will add deep, warmth, style and patina to your new or old home. They are bold colors with a worn feel, perfect for layering your vintage style, farmhouse style or cozy eclectic style on top of. #2020paintcolors #interiorpaintselection #sherwinwilliams #bestsherwinwilliamscolors #cozyhome

Interior Paint Colors From My Home

How to Make Paper Flowers with Old Sewing Patterns

A gorgeous vintage farmhouse Halloween can be achieved with even the tightest budget. See this finance friendly ideas to get your home decorated for Halloween with a trendy farmhouse style mixed with vintage age and patina. The 99 Cent Only Store is your all in one spot for the perfect Halloween decorating supplies. #dothe99 #99obsessed #vintageHalloween #budgetHalloweendecor #halloweentable #halloweendecoratingideas #halloweenmantel

Vintage Farmhouse Halloween On A Budget

Don't ruin the family heirloom, make this easy DIY no sew porch quilt to hang outside.

No Sew Porch Quilt DIY

© Kim Jones and Salvaged Living, 2019. Unauthorized use and/or duplication of this material without express and written permission from this blog’s author and/or owner is strictly prohibited. Excerpts and links may be used, provided that full and clear credit is given to Salvaged Living with appropriate and specific direction to the original content. Please only use one picture with a link back unless individual permission is given otherwise by Salvaged Living. Full disclosure here.

© 2021 Salvaged Living