These DIY stuffed fabric Christmas trees are ridiculously simple to make and the perfect way to add some fun to your Christmas decor stash. Plus they are a great NO SEW Christmas fabric project for anyone to make.
I have a ton of Christmas decorations. Really – I’m sure you suffer from the same affliction. Tubs and buckets and an attic busting at the seams with Christmas paraphernalia. But really, what’s a few more little fabric Christmas trees? There just a simple little addition that won’t take up much space.
That’s what I’m telling myself.
Seriously, these little guys have been so perfect to tuck into a multitude of spots for my holiday decor. I stinking love them. And I love that I was able to make a boatload of them at once, in the fabric of my choice, in the size that I wanted, for less that $10. That my friend is why I DIY all the Christmas crafts and such. Let me show you how to make these cuties real quick…
How to make Fabric Christmas Trees
- Make a pattern using some cardboard. (I use cereal box cardboard – easy to cut but still sturdy.)
- Draw half of a Christmas tree. I made a five bough tree to begin with.
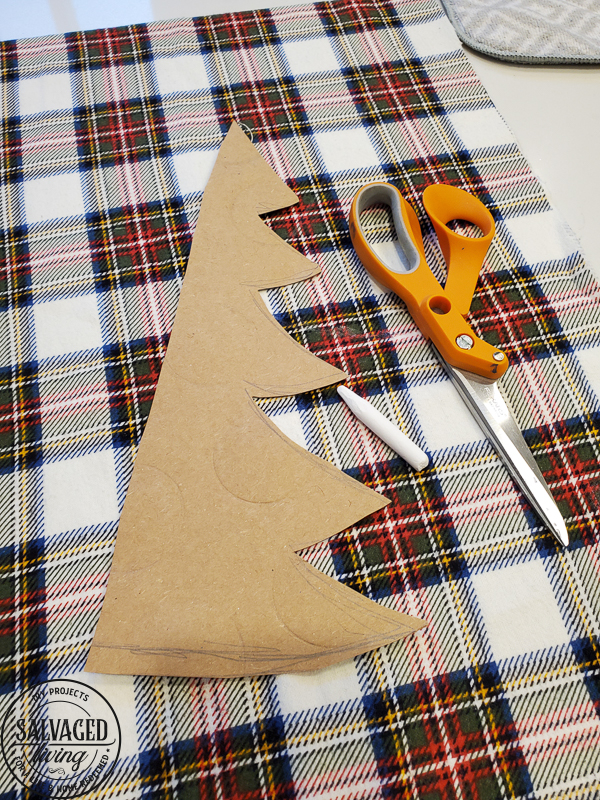
- Pick a precious holiday pattern fabric. I think slightly smaller patterns look better so you are able to see the whole pattern on the tree. I suggest tilting your fabric some so the pattern is not straight up or down.
- Double up your fabric, wrong sides facing each other.
- Trace the pattern onto the fabric. I used a piece of chalk or you can use a fabric pen if you have one.
- Flip the pattern and trace the second half of the tree. This way your tree is exactly even!

- TIP: You can cut multiple trees at once, just layer the fabric in pairs, wrong side facing. I cut three trees at a time with good quality fabric scissors.
- To create different size fabric trees, cut off a layer of your pattern for the next smallest size! I made 5, 4 and 3 bough trees.
- Hot glue the outer edge of your tree together, starting at the top and leave an opening along the bottom. (here is my favorite hot glue gun)
- Stuff your tree with stuffing.
- TIP: Use a pencil to help push the stuffing up and into the ends of the tree boughs.
- Re-glue any holes you might have missed. These finger guards will save your fingertips on this project!
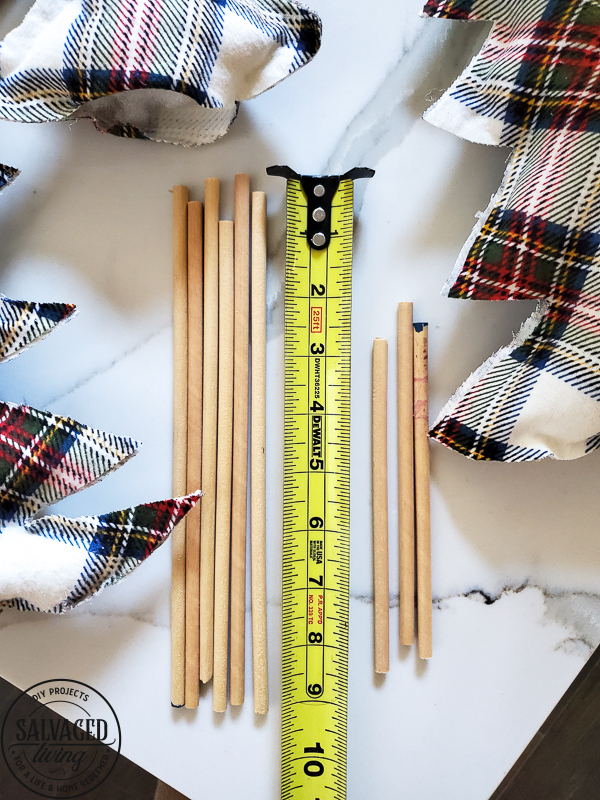
- Cut dowel rods long enough to go up into the tree for support and provide the height you desire from your fabric trees.
- Insert the dowel rod up the center of the tree, glue the bottom closed around the rod. Be sure to add glue all around the rod.

- Either cut a small scrap wood base or use wood rounds for the base support.
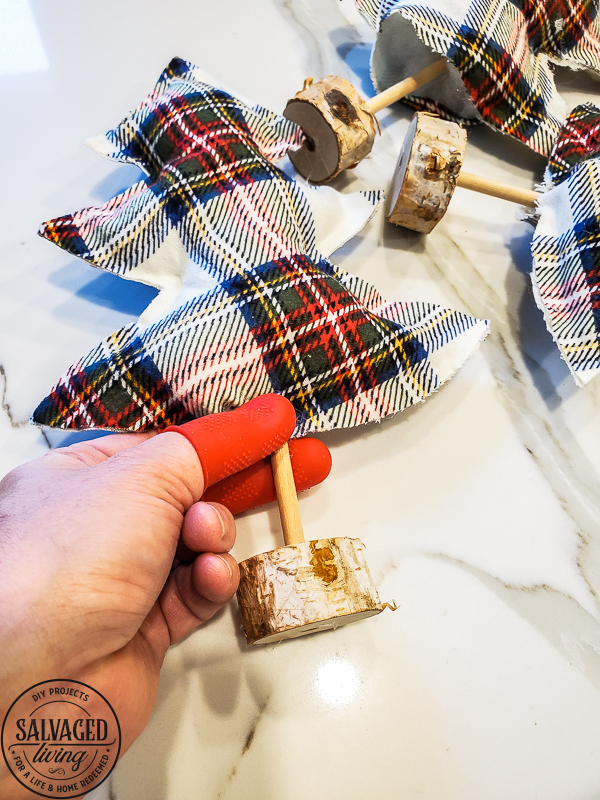
- Drill a hole to accept the dowel rod. (my favorite drill)
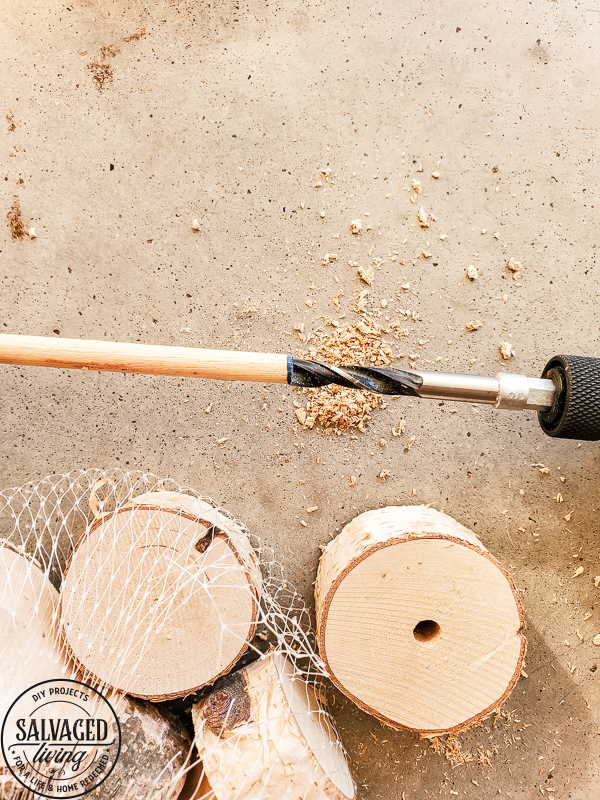
- Drip a tough of hot glue into the hole and insert the dowel rod.
- You can embellish your fabric trees with bows, bells or other holiday trimmings, but that are perfectly adorable just like this!
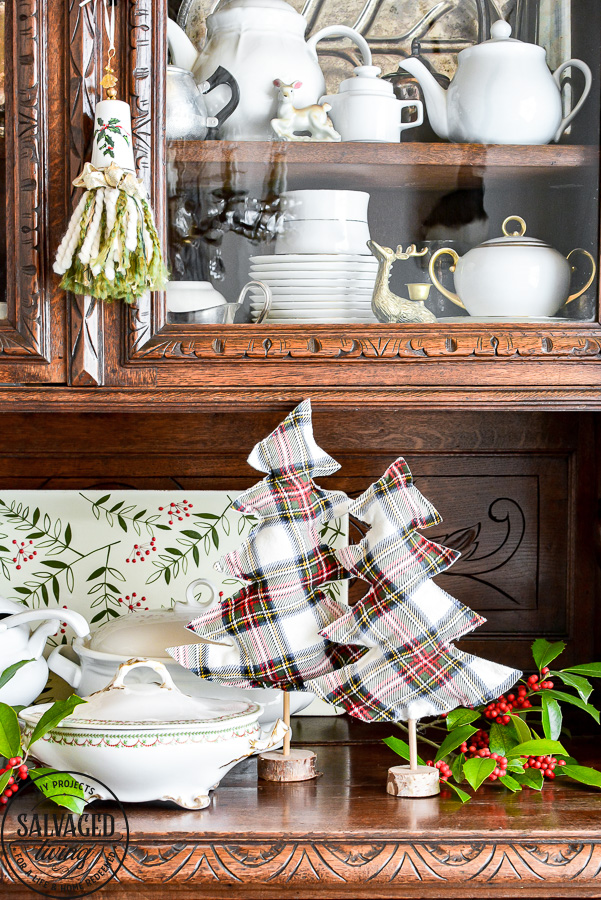
I tucked these little trees all over the house – on the hot chocolate bar, the side buffet in the dining room and on top of the fridge. They are the perfect little accent to any Christmas vignette. Plus they would make a great gift set. Wrap up a set of three different sized fabric trees to gift to a friend! 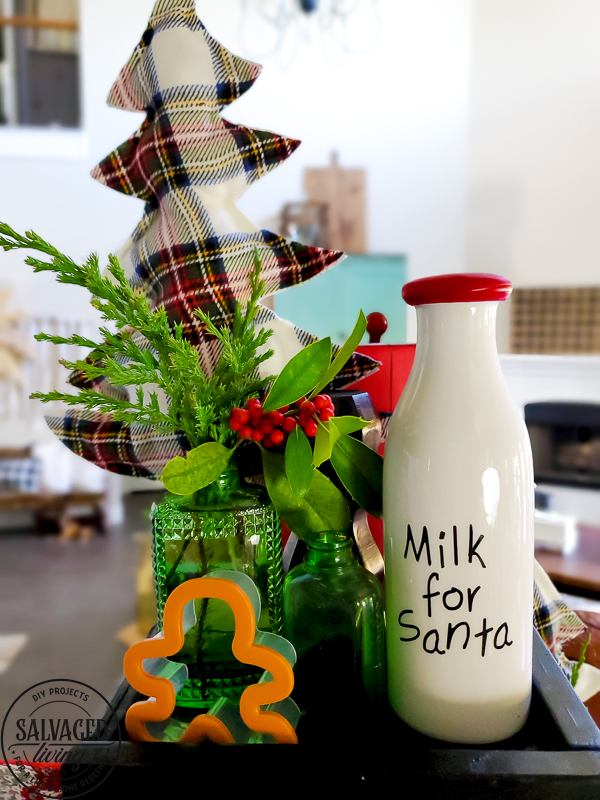


These are super cute. I am waiting to put up my Christmas decorations until next weekend. I think I’ll make some of these to tuck in everywhere. Thanks for the idea Kim. Have a wonderful Thanksgiving.
Cute! that plaid is my favorite!!!
What a beautiful idea. I’m going to make some this season but I have an idea. I think I will cut the fabric with my pinking shears to give the trees some “edge”!
These are adorable! Thank you for sharing this.
Such a great idea, Kim. I love the plaid fabric.
Thank you for sharing this adorable idea. A friend recently gave me some Christmas fabric remnants and we only need so many Christmas masks . This is a great idea for using some of the smaller and brighter pieces of fabric. I will probably sew them.
Have a blessed Thanksgiving.
Love these! Where can I get the bag of wood rounds I see in the photo?
I got mine at walmart!!
Wow!! I must say that great minds think alike!! Your trees look so perfect!
Thanks girl
Hi again. I made three trees. I sewed around the edge with a zigzag stitch and “potted” them in old play dough with a pencil stuck up the middle of the tree and the bottom of it into the play dough. I made tree skirts with plain ivory fabric trimmed in the same gold stitch. I used a lunch size plate as pattern for the tree skirt. I’d send a picture but I don’t know how to do that.
Amanda, those sound precious! What a fun way to make them. I’m so glad you shared!
The trees are cute but I LOVE the tassel in the first photo. Is that a salt/pepper shaker redo?
Thanks Lynette and yes, that is a salt shaker redo, here is the tutorial!
Thanks!