The heat of summer is in full swing at our house! Having the kids home all the time has really pushed me to tackle some organizing projects. There is stuff everywhere 24/7. This DIY baseball bat rack has been a great solution for our sporting goods arsenal.
When we bought our house it needed MAJOR renovations. We went ahead and converted the garage into a guest house (a decision we will never regret). I tell you this because without a garage for storage we get a little overrun with wayward scooters and sports equipment! I’m pretty sure even if we had a garage it would still be a tad crazy. Outdoor storage is high dollar real estate around here and I am on a constant quest to add more. 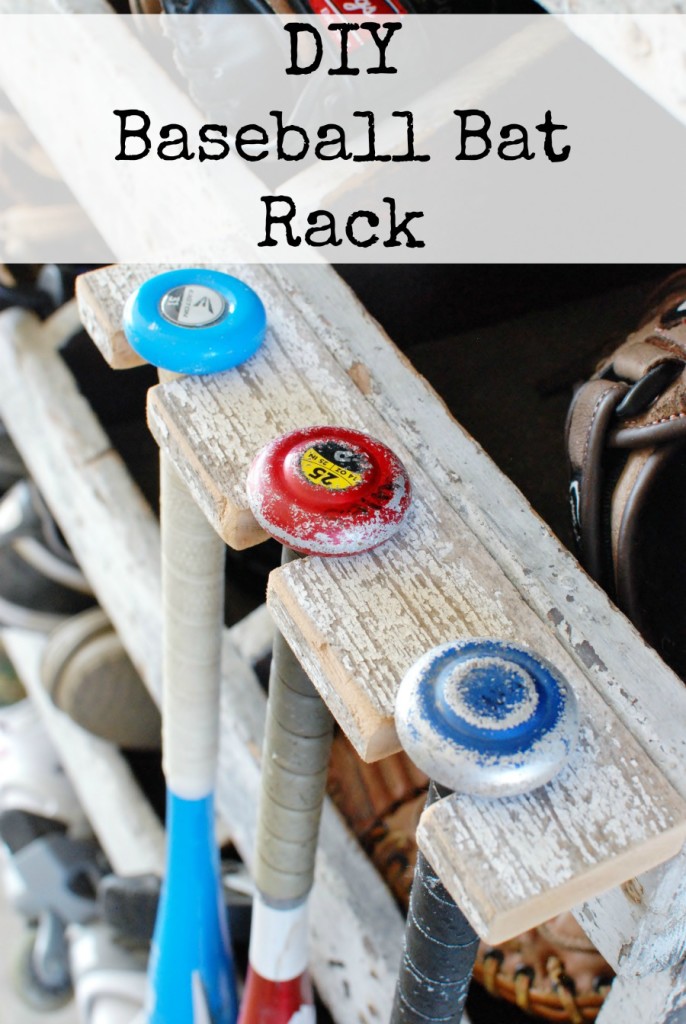
A few years back I managed to find the coolest old display case on one of my Round Top Antiques Week adventures. In it’s past life I think it was a tool organizer for a store, just my guess. For a long while it has helped reign in all our sporting goods. But…somehow our stuff has multiplied like mold on cheese. Three kids that all play sports = lots of equipment.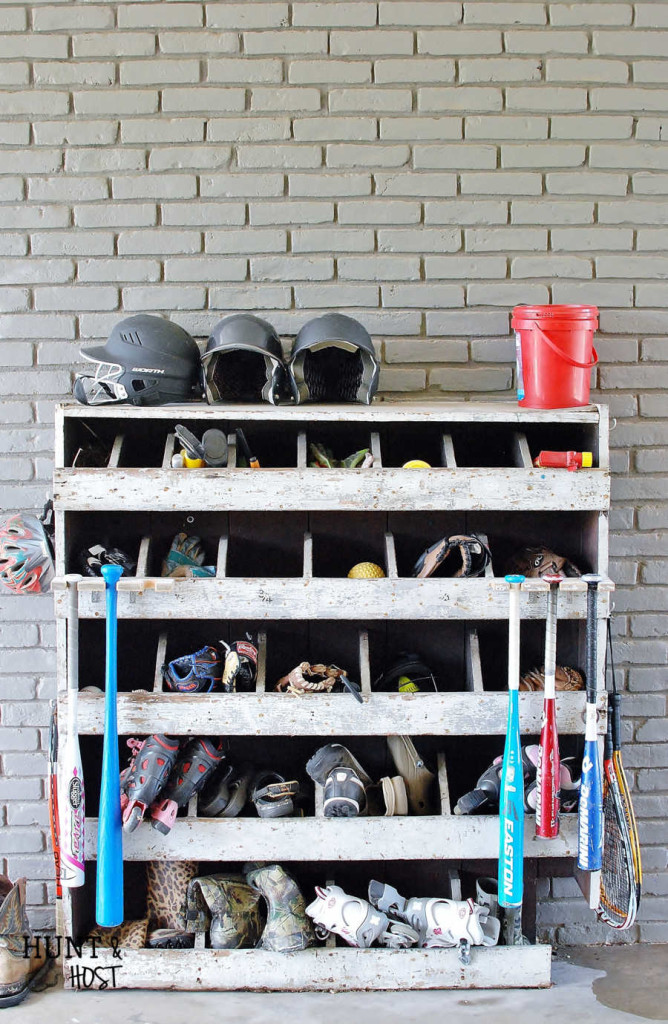
I’ve added hooks and more hooks to our cubby situation, but one problem remained. Those awkward, hard to store baseball bats. So I whipped up these DIY baseball bat racks. They would be a dream for any garage makeover you may be thinking about. You can build this rack to fit anywhere and hold as many bats as needed. Not to mention you can make it match your décor style with an inexpensive price tag.
In all honesty, making stuff myself just sparks a certain ‘I am woman hear me roar’ kind of thing inside. Learning how to use power tools is just plain old rewarding. I really encourage you to roll up your sleeves and make something! 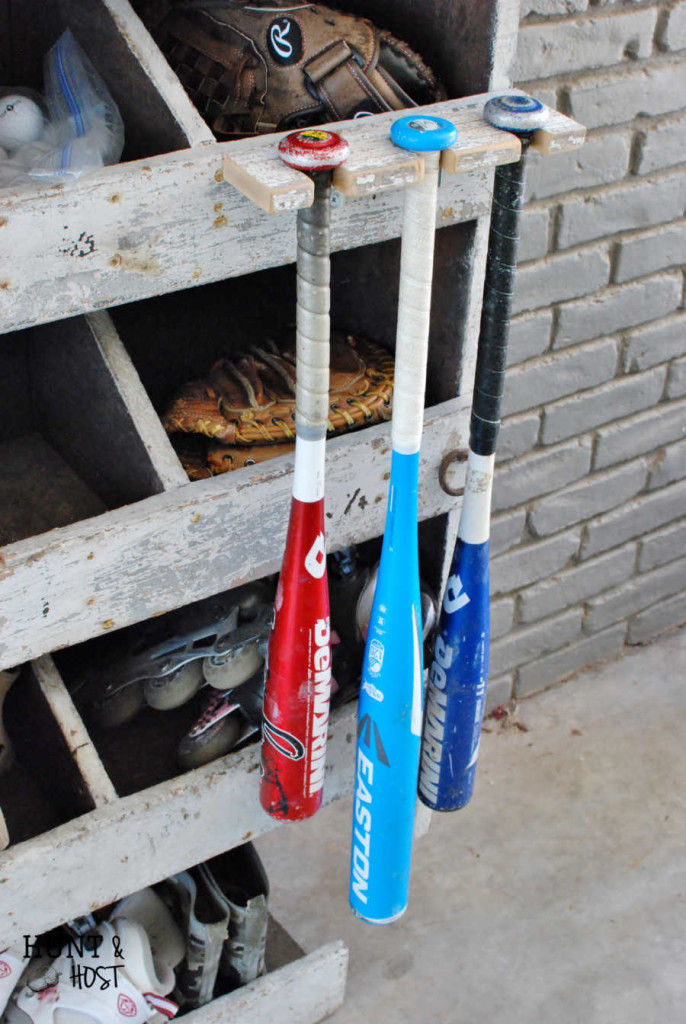
For this project you will need the following tools and materials. I added affiliate links* so you can click and buy if you are feeling handy!
Baseball Bat Rack Material List
Scrap wood for rack – 2 1/2″ wide by 3/4″ thick at your desired length. My racks are 11″ long each.
Extra scrap wood to use during construction
Two long screws
Pencil
Tape Measure
Sand Paper: 80 to 100 grit
Baseball Bat
The hardest part of using a paddle drill bit is getting the piece you are drilling to stay still. If you have a work bench and vice grips to hold your board then you could use that. If not, I made my own way to create leverage that I will share.
Start by measuring the center point for each baseball bat holder. Mark it with a pencil. Next, using a long screw drill through the center point you marked on the outside holes, securing the rack board to scrap wood as shown here: 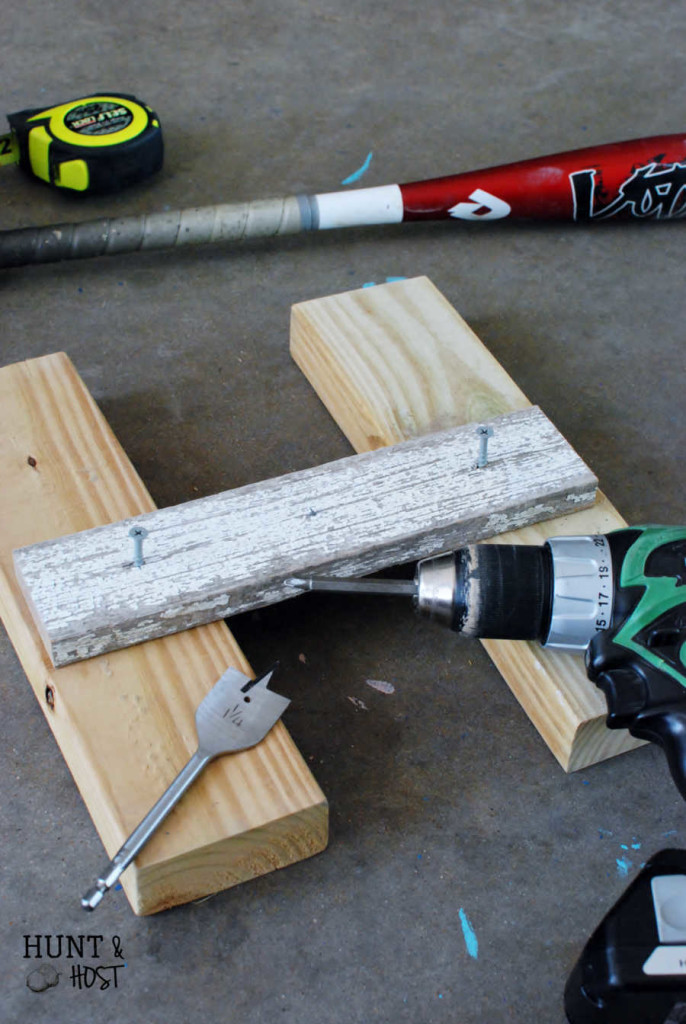
Using the paddle drill place it’s tip on your pencil mark in the center hole and start to drill. Let the paddle drill do the work, don’t force the drill, it will only lock up on you. It will take a minute to get through. By holding the base wood with my foot I was easily able to drill out the center hole with the paddle drill. Having the rack board elevated also allows you to drill all the way through the board.
Remove one long screw and then drill it directly into the base board. You can use this board to keep the rack board elevated and gain leverage to drill out the next hole. Repeat this for the last hole (or however many you decide to put in your holder).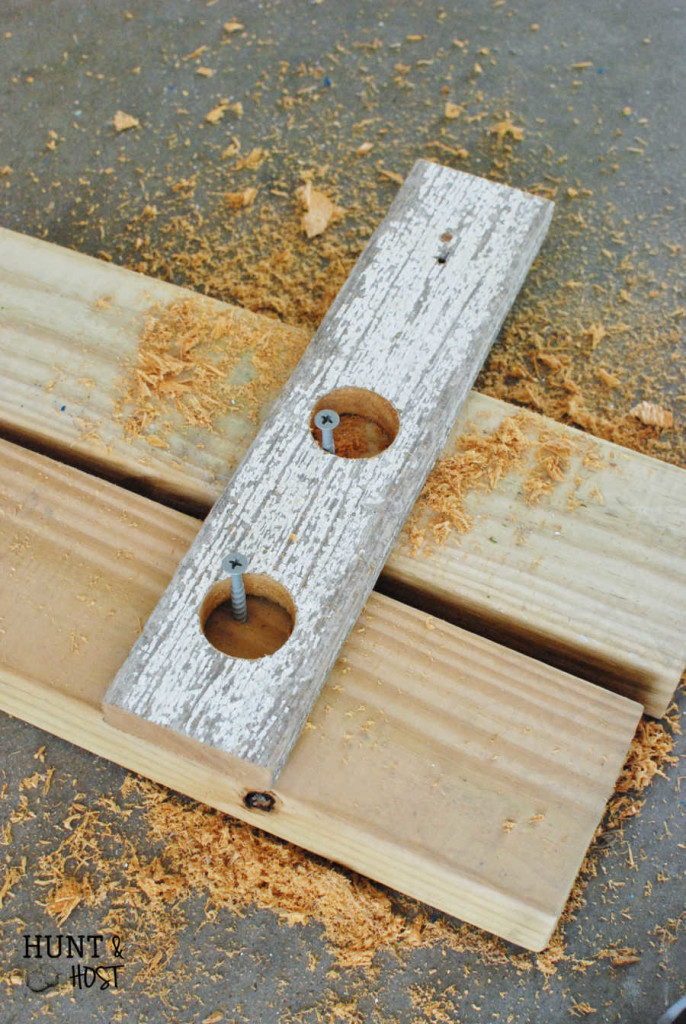
Once all the holes are drilled lay down a bat with it’s end in the center of your freshly drilled hole and mark off the bat thickness, marking slightly wider than the bat handle.
Use a jigsaw to cut the hole entry away. ALWAYS be careful and use safety glasses when working with power tools!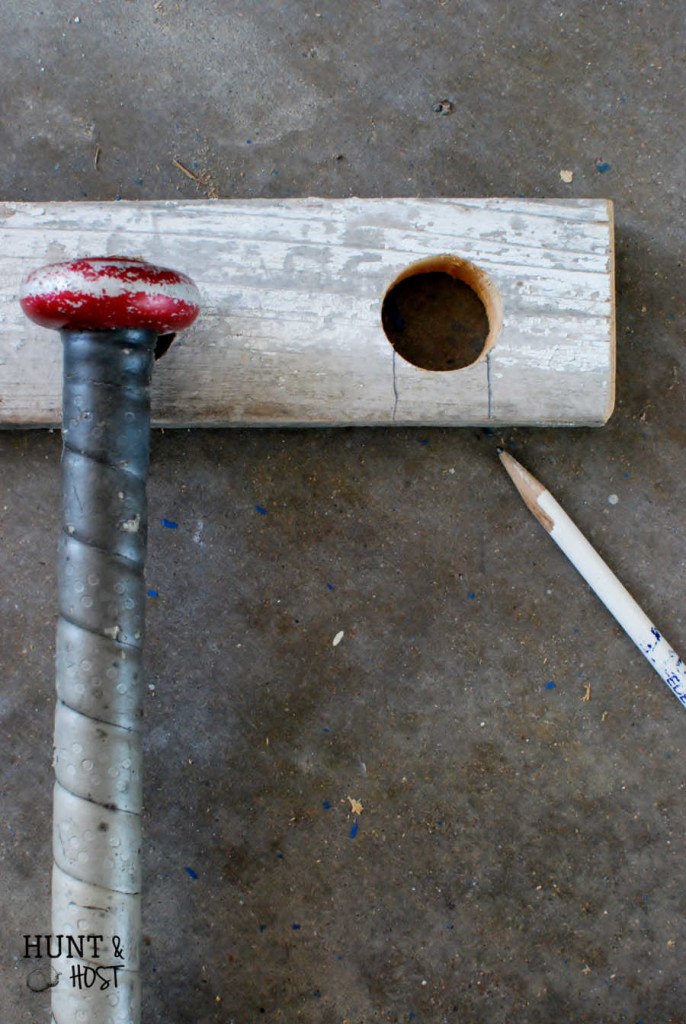
To complete the baseball bat holder sand the edges for a soft finish. Sanding helps hide any rough cuts you may have had too. 😉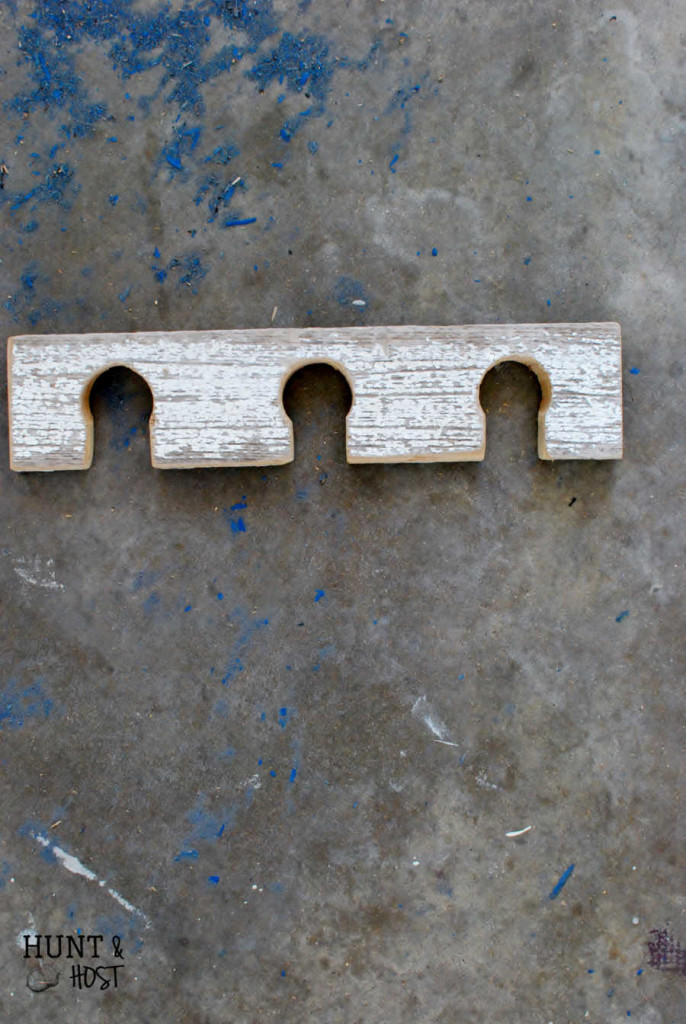
Using L brackets secure your new favorite organizing display wherever your little athlete will be sure to use it. This simple project has made a ton of difference in the look of our porte-cochere.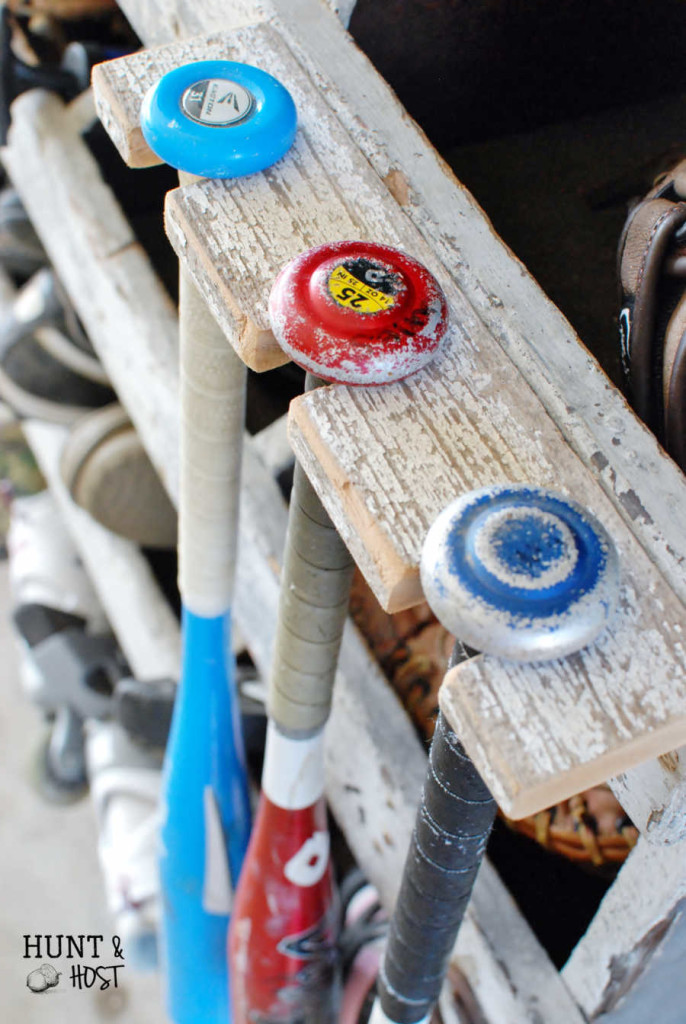
I hope it helps you out too! Be sure to pin this project for later.
Thanks for coming over today!
*Affiliate link simply mean if you chose to make a purchase I will get a small commission. Your cost doesn’t change a bit. I appreciate you supporting my blog in this little way!


Leave a Reply