I’m a messy painter. It’s a fact. It doesn’t mean I’m a bad painter, I just get it everywhere. My artist friend says that’s a sign of creative people. I’m sticking with her theory 🙂 I got a new toy that has helped me wrangle in splatters and spills, over-spray and oops moments and it has been a blast to play with. Thanks to my friends at Wagner for sponsoring this post and sending me the greatest product for messy folks like me…a new paint spray tent! (there are affiliate links in this post, that just means if you make a purchase I may receive a small commission, thank you for the support!) We don’t have a garage at our house, when we remodeled we turned the existing garage into a guest house. The guest house has been awesome, but it leaves me and all the junk I haul home spread out under our porte-cochere. Every project I work on leaves a little reminder. A drop of paint here, a smear of stain there. My husband is typically unamused by my messiness, but is very sweet about it. Not to mention the extra time I spend cleaning up after myself. Ugh…that’s the worst part. Is anyone else a messy crafter?
Bar Stool Makeover Supplies
Paint Sprayer – this is my favorite one!
Spray Tent
Stools – these are the ones I used
Painter’s Tape
Stain
Painter
Sandpaper
 The time had come for me to replace our bar stools. We broke the seat off one and had cracked another. Since my kiddos use these stools every single day for breakfast they are kind of important in our house. The original ones were from Ikea, they lasted a good four years and were relatively inexpensive ($40/each). I didn’t want to spend that much this go round. Y’all…have you shopped for bar stools lately? They are expensive! It was hard to find anything attractive in a lower price range, so of course I decided some crafty creativity was in order. Watch out, there’s cheap to chic makeover coming your way! I found these stools for $16/each. Budget friendly score!
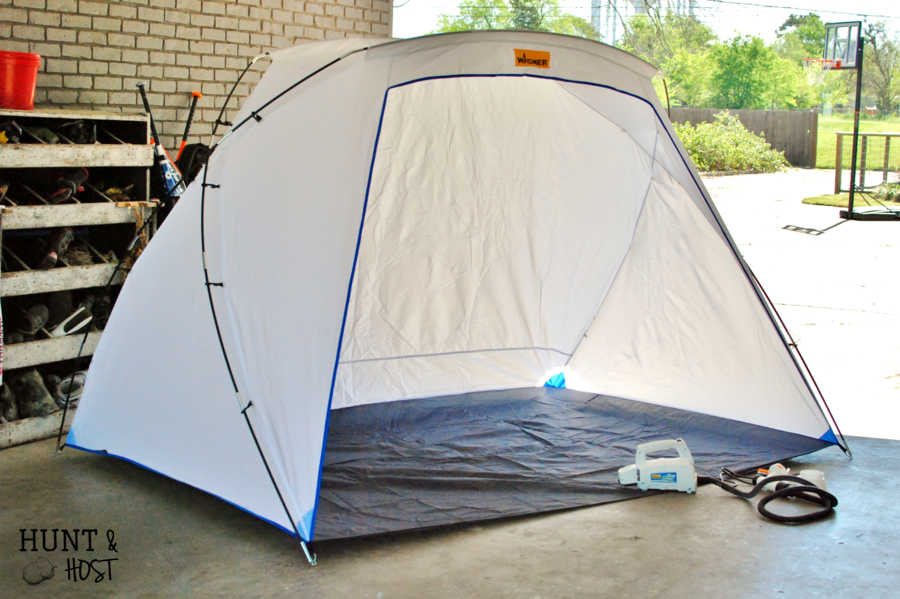
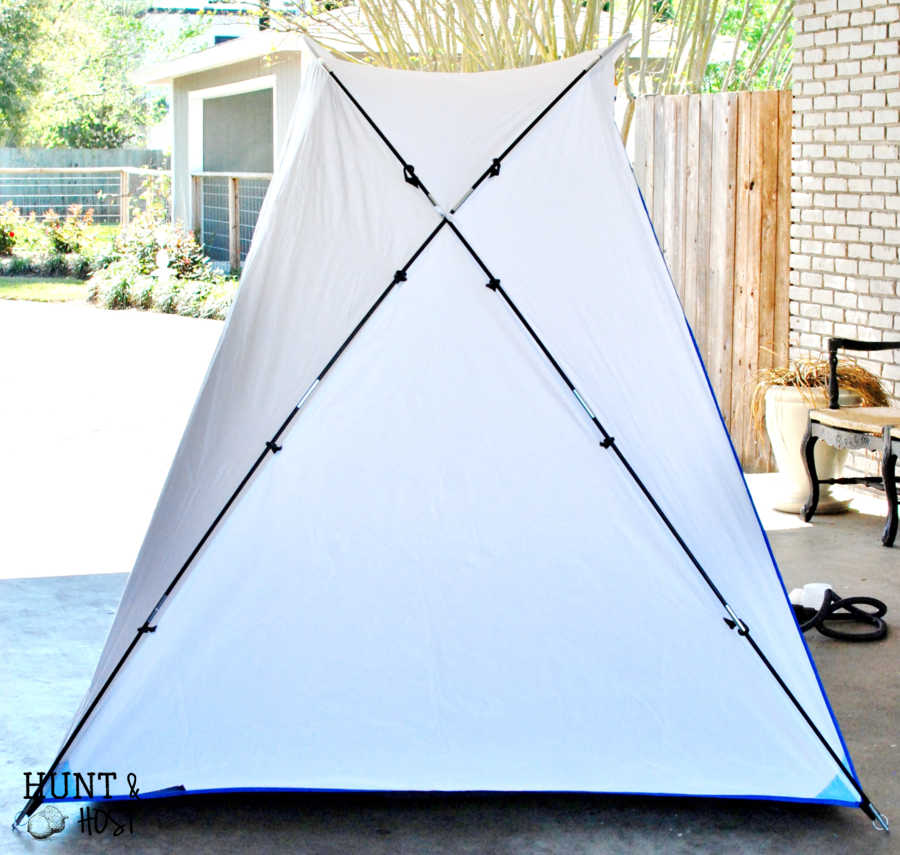
  Anytime you have multiple pieces to paint a sprayer is much faster, this was my chance to test out the new tent. It took me a few minutes to understand how to put the thing together, but I think these pictures will help you get it up faster should you get one too. Once I figured out what went where it was really easy to put up and take down. My paint tent is sitting on concrete, but it comes with anchors to stick in the ground if you are working in a dirt or grassy area. It was really windy the day I painted so I added some bricks on the corners to hold it down.
  I would suggest adding a drop cloth or some kind of added floor protection in front of the tent. I got a little over zealous a few times and sprayed the wrong way. 🙂 It was still 100 times better than before without the tent. If you have a small space, live in an apartment or need to complete projects indoors, this tent would be great for you. Even if you want to paint in your garage, but need to protect your work area the tent would be helpful.
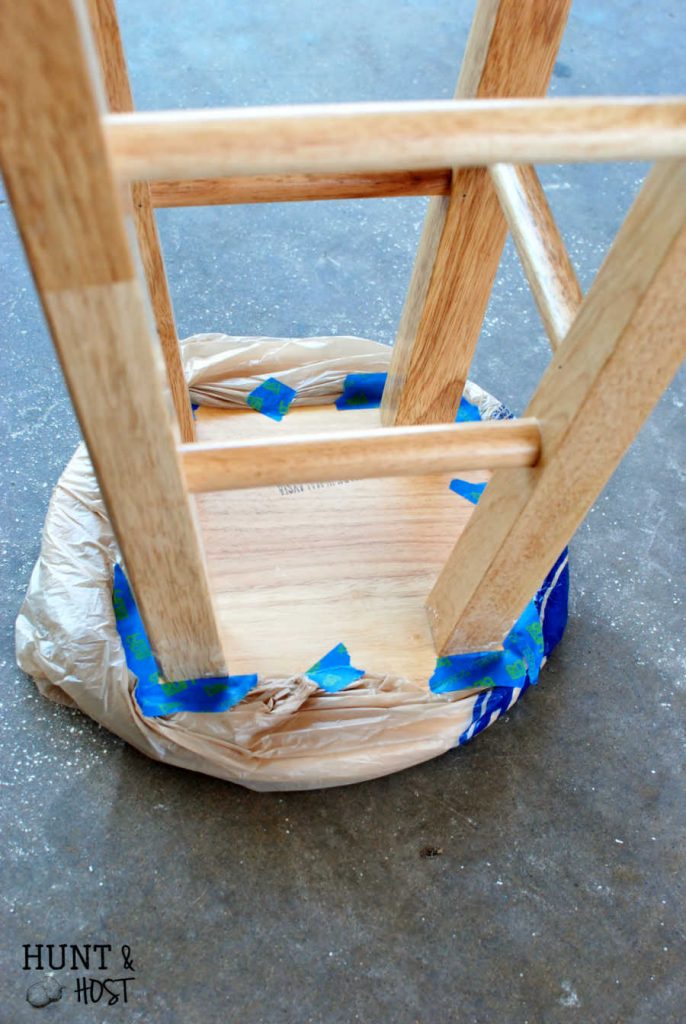
I prepped the stools by sanding down the high gloss top coat on the stool seats and slightly roughing up the legs. Use an electric sander for the top. I wrapped the tops in plastic bags, secured with painters tape and put them in the tent. This video will show you how the pieces go together, but especially how quickly you can complete painting projects with a tent and sprayer.
It took me 16 minutes of spraying time, not counting a little dry time in between moving the stools around. I will note that if you stop spraying for a few minutes it’s a good idea to rinse out the spray nozzle, the paint dries quickly and then the sprayer either won’t shoot or sputters some. It only take a minute to rinse the nozzle under warm water and clean.  After the stools were completely dried I went back and painted a few extra coats on the bar area where the kid’s feet will rest since this will be a high traffic area it needed an extra coat. I distressed with 100 grit sandpaper, waxed and dark waxed for an aged feel. The seat got a dark stain from Ebony Minwax Stain, the color is so much better for my home décor than the original blonde look. It’s hard to tell these stools only cost $48 for all three!
 The next time you drive by and it looks like we’ve taken to camping in our driveway don’t come knocking for S’mores…I am just up to another painting project! So you have all the details…for this project I used my homemade chalky paint in the sprayer, the color used is Sherwin Williams Pearly White. If you want tips on how to use a paint sprayer you can find them here. Do you have any projects waiting to be painted? Here is a great combo deal for the sprayer and tent if you want to start tackling those DIY projects you’ve been waiting on… combo deal. I’d love to hear about them! Let me know if you try the tent out and be sure to save this project for later. So glad you stopped by today, thanks friend!


I saw this tent about 6 months ago on Amazon and its in my wish list. I am so happy you shared this with us so I can make up my mind now that I should definitely get one. I too have no garage or outdoor “workshop” so the grass is multi colored during much of spring and summer! I can’t wait now to try it out. Thanks for sharing!
You will love it, especially in your situation! Let me know what you think!
So I got this tent for use inside my concrete floor garage…and I CANNOT get it to stand up properly on the cement. It looks just like your picture….I’m not sure what I’m doing wrong. Any tips other than the bricks? Thanks so much! And your bar stools look adorable!
Are you sure the poles are through the pocket all the way and are crisscrossed pole in front to back holes pole in back to front holes? Tell me exactly what it’s doing? The bricks were only because of the massive wind, it stands alone just fine…
They look very good and what a good price. I am a messy painter too, i have an old shower curtain that i use out in the yard,but sometimes i paint the grass. Ha ha!
lol, I did stuff like that too, but let’s me work in the shade and in Texas that’s HUGE!
I CAN SO RELATE TO THIS, I’M A MESSY CRAFTER AND WE ALSO CONVERTED OUR GARAGE TO USABLE SPACE. I REALLY NEED TO INVEST IN ONE OF THESE!
You will love it!
Wow, amazed at how big the tent is. Thanks for sharing. Blessings and smiles????
I know right?! You can fit a large piece of furniture in it for sure!
I FINALLY had a chance to compare my tent set up to yours…and thanks to your pictures, I now have a perfectly free-standing tent! YAY! I didn’t have the pins up inside the rods, but your pictures saved the day. Thanks so much!!
this makes my day!!! So glad the pictures helped and now you can paint your heart out!
YES! The shelter is such a great tool for keeping that overspray in-check! And, even though I got the large one, it’s still compact enough to keep assembled in my garage to pull out when needed, and I even park my car in there, too :-). Thanks again!
The stools look very high end now – I love them!
thank you Angie, they are super sturdy too, which is great for the kiddos!
Thanks for the tutorial! I’ve been looking at stools for many years and can’t justify spending $400 on 4 places to sit. We have 4 stools that were hand me downs and one broke the day after I refinished it. sigh. I saw these Walmart stools in person and the legs look thick and sturdy. I’m excited to get the stools and give them a make over.
so happy you found a solution because YES the price of stools is CRAZY. They are very sturdy and we have been super happy with them. Hope you like them too!
what wax did you use to finish the look? color, brand.etc?
I used Annie Sloan clear wax and dark wax. It’s what I use most of the time because it is great and a can lasts a long time!!!
Did you have any problems with the stain taking well? I have the same walmart stools. I sanded them, used minwax wood conditioner and then minwax stain but it came out very blotchy. This is the first time I stain something that comes out super blotchy.
not at all, you may not have sanded enough to start with, if you don’t get all the original sealer/stain off the new one won’t take, it has to be down to the raw wood. I would try sanding down and re-staining…probably not what you want to hear 🙁
It looks like you distressed these a little. What was your technique?
yes – I used a clear wax and then a touch of dark wax to age them a bit! hope that helps 🙂
Did you sandpaper the edges of the legs first? Then used the dark wax? Also, did you use a finishing coat on this?
Hi! I was wondering what brand the stain was? I’m interested in doing this but not sure what stain or poly coat to use. I’m worried about the stain coming off on khakis and white pants and stuff. We would be sitting on these everyday! If you have any other tips I’d love to hear! Thanks so much!
HI – I pretty much always use Minwax stains that you can find at your local hardware store. You want to spread the stain sparingly and wipe of excess. After you apply it, buff with a clean rag, which will remove excess as well. You might want to be sure and let it dry completely before use, but should not have any problem after that. You could always seal your stain if you are super concerned. I recomend a soft paste wax finish or you could paint a polyurethane finish as well. Hope this helps, good luck!
You will definitely want to use a sealer, even if you were only sanding. This will help protect the wood from wear and the stain from wear as well as from staining your pants. There are many options but for a stool that will get lots of use and is stained with an oil based stain, I would use a polyurethane.
An exception might be if you used Minwax Polyshades rather than stain and a sealer, as it’s a kind of 2 in 1, but it creates a very different look. I prefer stain myself. Minwax has great colors and makes a really popular polyurethane.
I used an old tent we had and then added a small clothing rack too hang projects from i use wire hangers to suspend my project so much faster
That is a great idea!
What kind of paint did you use? Can most paint be used?
I used a chalk based paint for this, it hardens over time and helps hold up, but many paints on the market now would work – milk, mineral, chalk!