I couldn’t leave our little lady out of the picket fence crafting craze happening at our house! Our greyhound Gigi needed a little piece of the picket action so I hooked her up this week!
You guys might be getting tired of this pile of old fence pickets I inherited, but they are a constant source of inspiration for me and I’m afraid until my supply is depleted y’all are in for it! 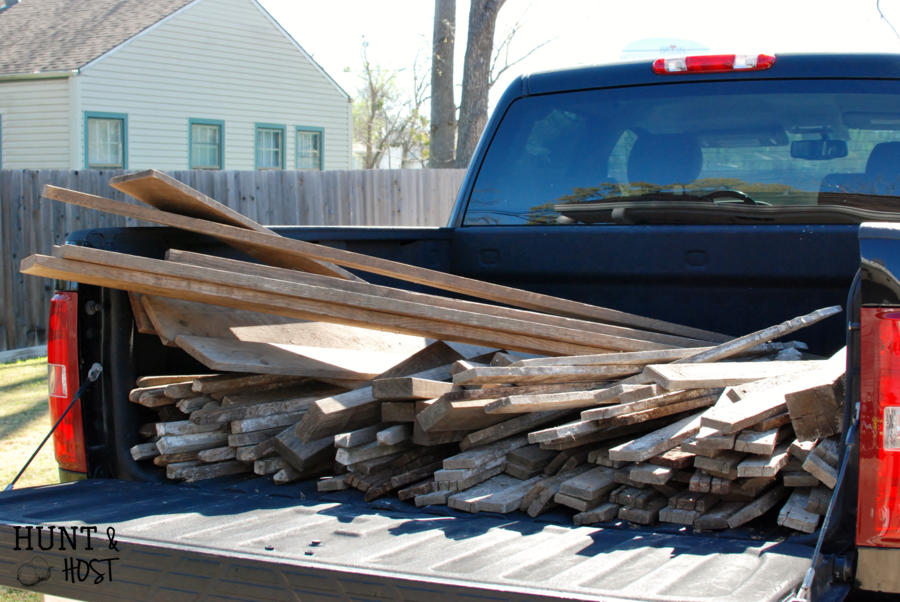
Let’s be real. Most dog bowl/toys/beds/paraphernalia is not that attractive. Luckily there are a ton of creative ideas on the internet and I simply took some examples I have seen before and made them into my own. 
Gigi’s a tall girl, so her dog bowls need to sit up high. It helps her digest better. The plastic contraption we’ve used for years works fine, but isn’t much on the eyes. Plus it’s big, so it’s not like it fades into the background! I decided to glam our girl up a bit and make her a new eating station out of the glorious old fence pickets a friend gave me. 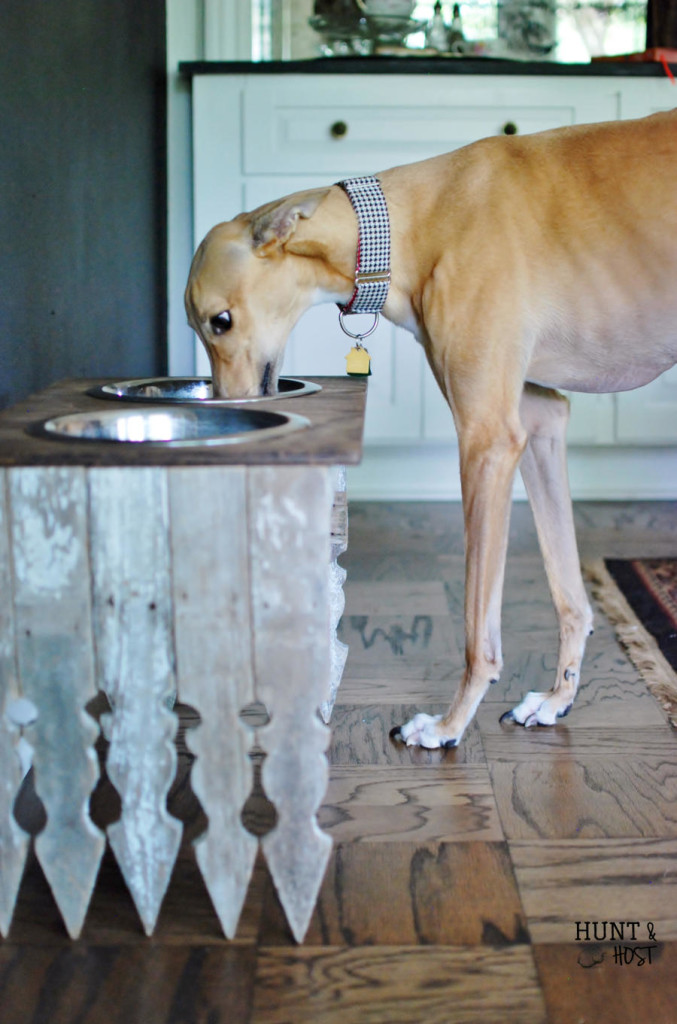
Using the old bowl stand I modeled the new one after it’s height and width. 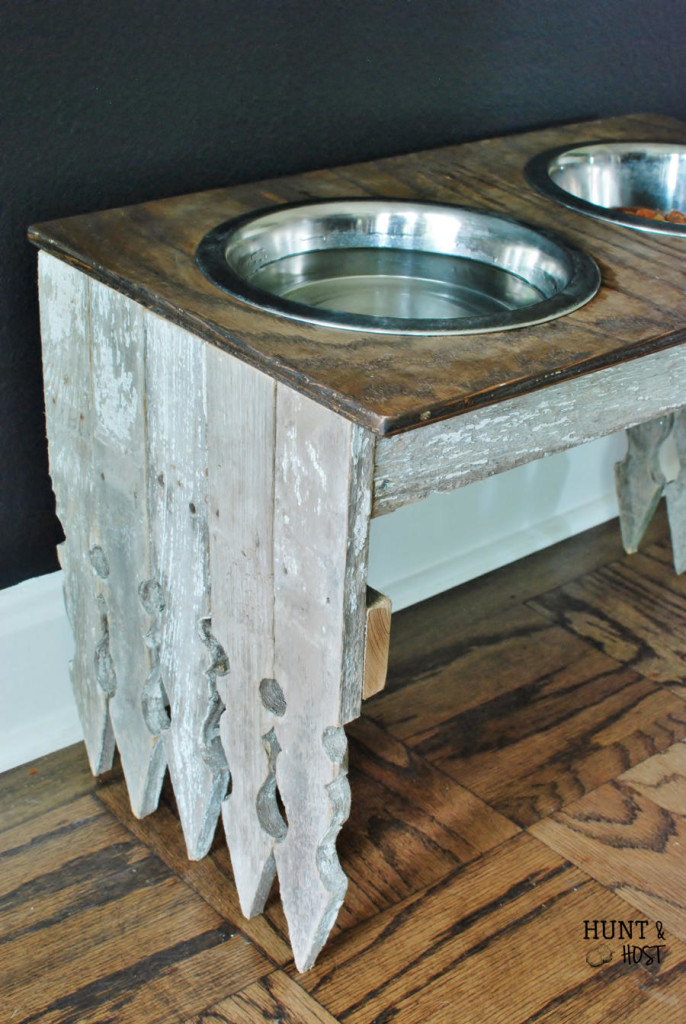
I cut down the fence pickets to the right length for the legs.
I used the salvaged part to build a box frame for the top. I let the front and the back of the box frame serve as the front piece of the station. I may go back and paint her name on it later.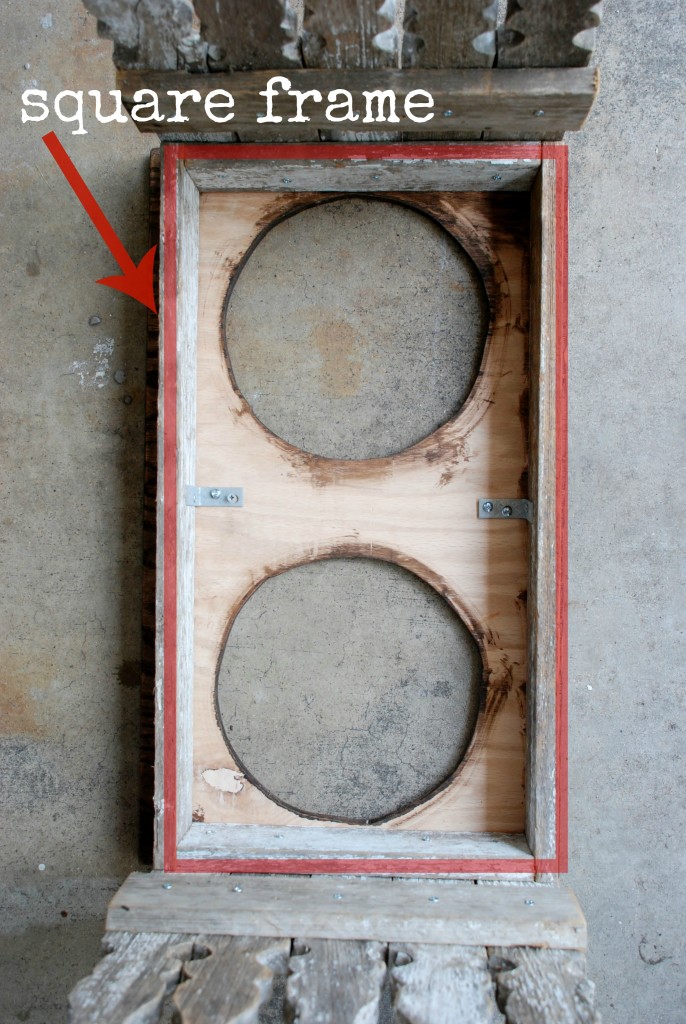
Next I attached the picket legs to the sides and used an extra piece of wood across the center as a brace. I used wood screws to secure all. 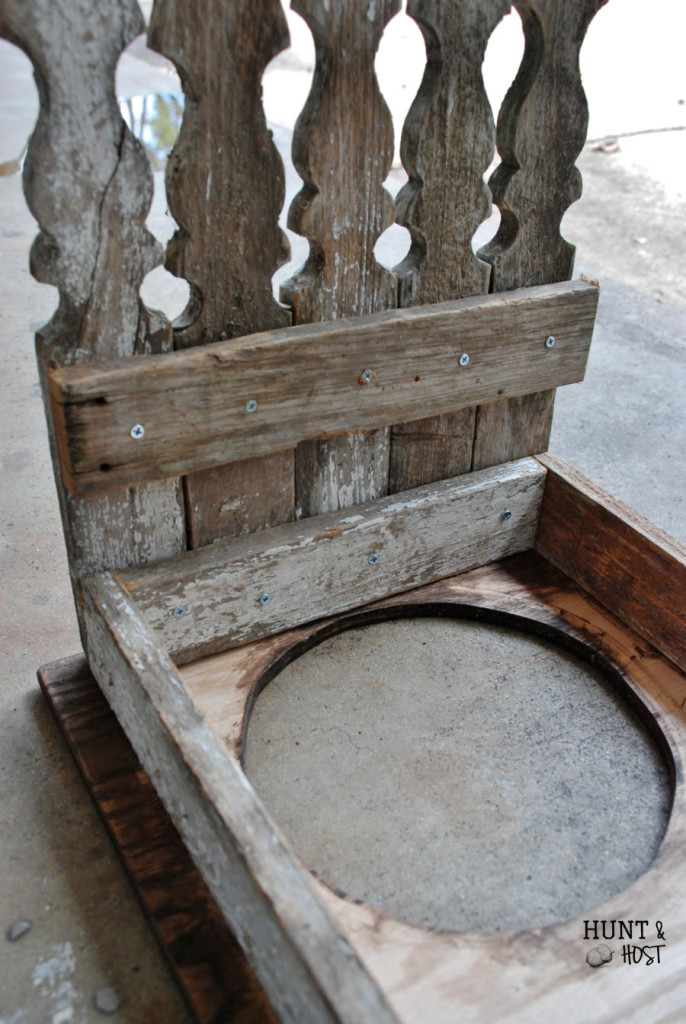
I bought a thin piece of wood and cut it to fit over the top, with a little hangover. Using Gigi’s existing bowls (in the picture I used a pan because she was using her bowls at the time) I traced them on the wood as a cutting guide. 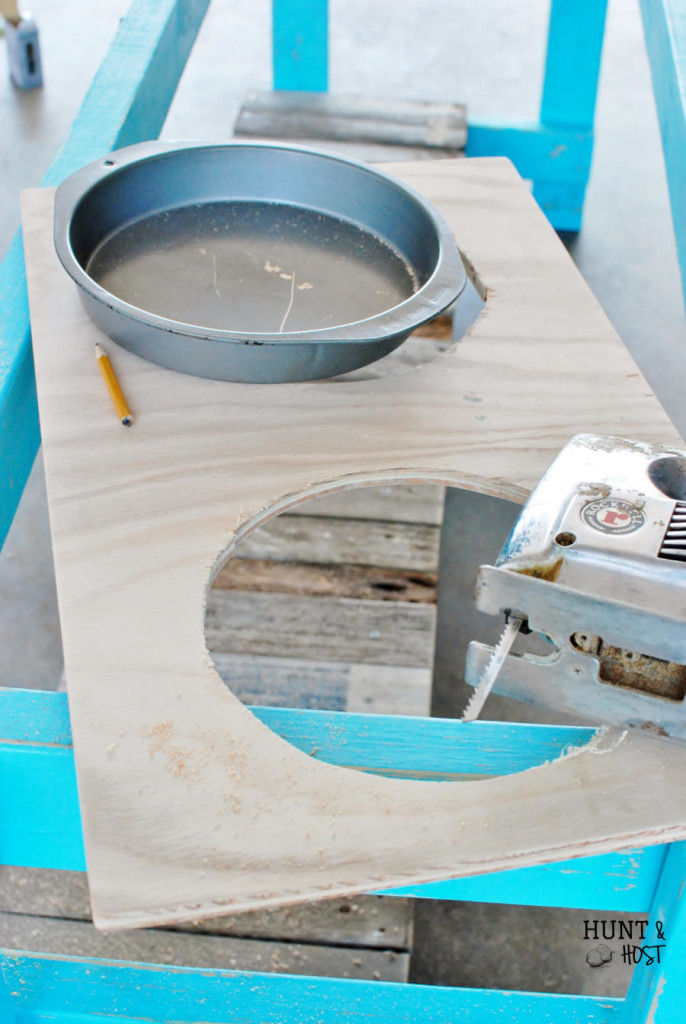
I used a jigsaw to cut the circles out. Tip: To easily cut a circle into wood start with a large drill bit and on the inside of the circle drill a hole large enough to accept your jigsaw blade. This hole gives you a start point to insert your jigsaw blade. You don’t have to be an expert saw person for this, the hole won’t be seen and you are going to sand down the edges. You just need to make it the right size! Be careful whenever using saws, get help if you aren’t comfortable!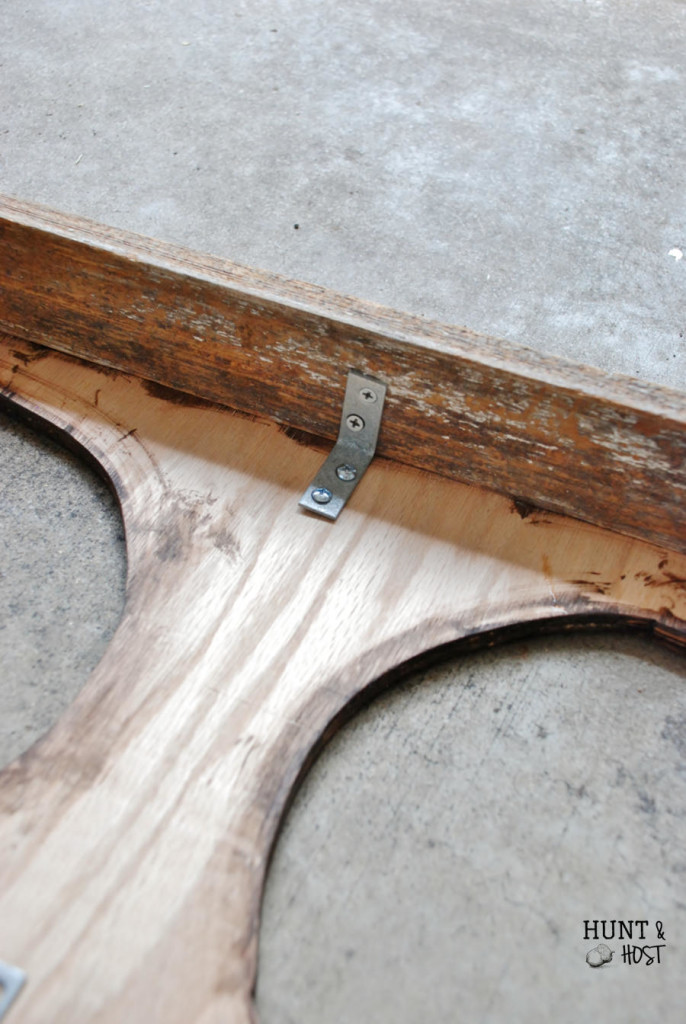
Sand to a smooth finish on all edges. After staining the wood piece I attached it to the base with L brackets. 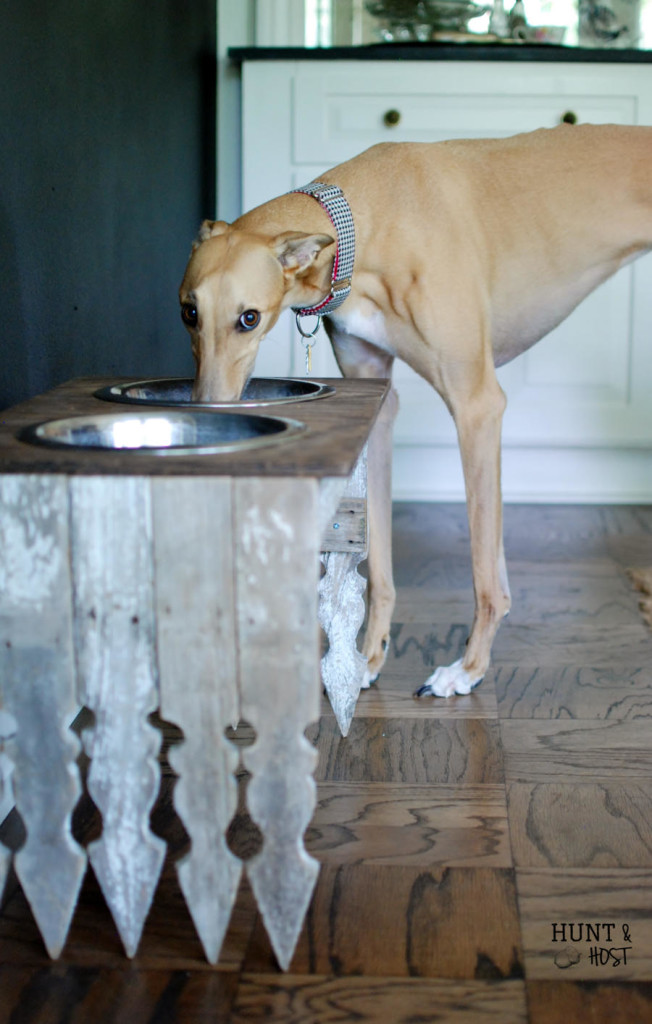
All done! Now our girl has a pretty dining room table for herself and she loves it! She told me so. 😉 Do you have a furry friend you can make one for? Let me know about your pet! I love to hear about fur babies. Please feel free to pin and share!
Here are some other fence picket projects for you to check out: bud vase, kitchen message board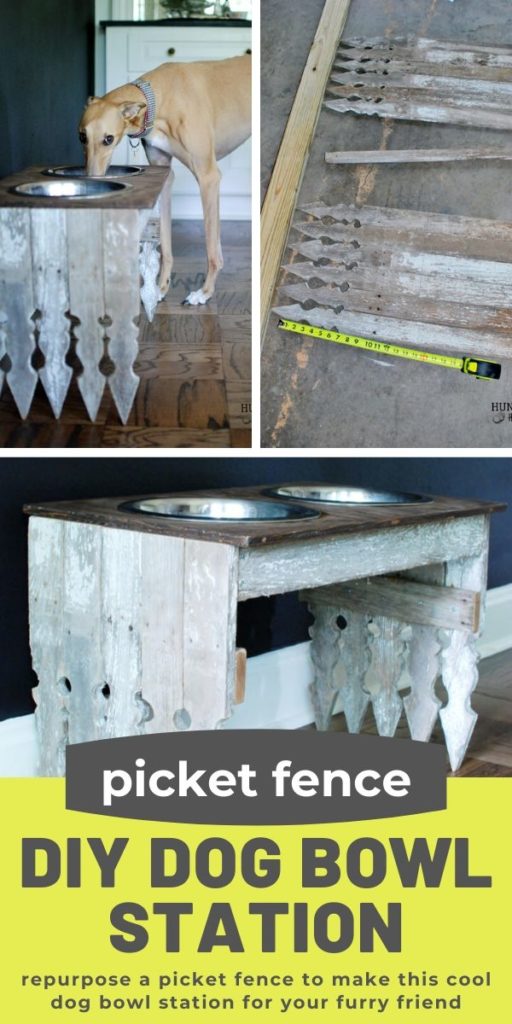


Love it! I’ve got a tall, fur baby too, great idea!
Love a tall fur baby!!!!
Amazing! You’re a whiz!
Thanks Anne 🙂
So cute! Much better looking than any plastic feeder could be!
That big clunky plastic job was yuck, I need to add a before pic!
My cats are giving me a look like “why haven’t you made us something like that?” Seriously, this is so adorable! Great job!
lol, you better get on it mama!!!
L-brackets are such a lifesaver! I don’t have any pets but I love this idea!
Love an L bracket, so many uses!!!
I love this! My rescue dog Lexi needs this!! Great project I bet your pooch feels extra loved and pampered 🙂
Today is her birthday, or at least what we call her birthday, not certain when it really is. She was loved on extra today! Hope you furry friend gets loved on too!
Just fantastic! And that pic of her looking at the camera while she’s eating- dying!! Thank you for linking up to Talk of the Town!
Isn’t she sweet? I’m partial but we’ve got a precious girl on our hands!!! thanks!
What a clever idea, Gigi looks so happy and comfortable with her new feeding station. Thanks for sharing your tutorial with Talk of the Town. I’ll never get tired of seeing what you do with your load of fabulous old wood.
Thanks Betsy…I just need time to churn out all the ideas lol!!
That’s one lucky dog… and a super clever hack on something we have to have around. ADORE this look! Featured you on DIY Savaged Junk 333 this weekend. Thanks for linking up! 🙂
If we have to have it why not make it pretty right? Thank you for the love, It means a lot to me 🙂
This is great! I have a great pyrenees mountain dog comes in at about 160 lbs. and he is only 8 months old.This idea would be great for him as he wouldn’t have to try and bend over those plastic bowls. Looks great too! Thanks!
This would be perfect. I have read it is hard for them to digest food when they have to bend over to eat so big dogs really need the elevated bowls. Hope this inspires you!
I need to make one of these for my “granddogs” that are at my house quite frequently. I have been setting the bowls on a step stool, but this would be more attractive. Thank you, and Merry Christmas.
I just adopted a dog that I think is either part greyhound or whippet, mixed with probably pittbull. She’s not especially tall, but she has to hunch down to eat when the bowl is on the floor, so something like this is going to be on my project list for the near future. Very cute project!