There is something so special and fun about a DIY handmade Christmas ornament. Every year you pull it out it just means more to you and your loved ones than a store bought variety. Don’t get me wrong, we have TONS of purchased Christmas decor but those handmade ones hold a special place in our hearts. Today I am sharing some easy fabric ornaments you will cherish for years to come!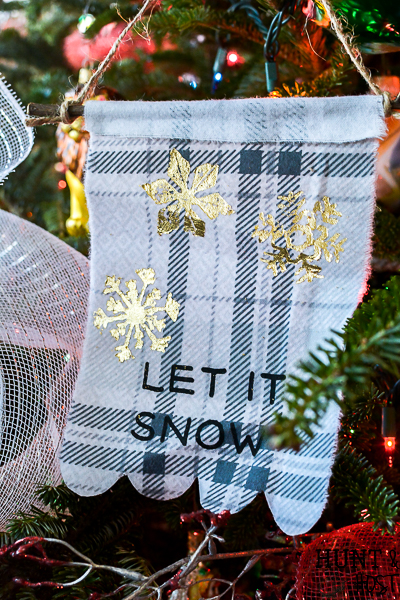
Here is a quick supply list for the DIY ornaments!
Handmade Fabric Christmas Ornaments Supply List
This list contains affiliate links, should you make a purchase I might receive a small commission, your price stays the same.
Fabric to match your Christmas style. I used about 1/2 a yard of various fabrics to make a bunch of ornaments.
Christmas Stencils – pick your favorites!
Font Stencils – this is the one I used, there are others
Twigs from the yard
Scissors
Optional: Ribbons, super fine glitter
I did a Facebook LIVE showing how to make a few of these if you want a video tutorial, you can view it here. This is how you make the gold leaf portion of the Christmas ornament. Remember – you can use this technique on other home decor items besides holiday decor!
Start by selecting your stencil and placing it on the fabric. Have your gilding size and gold leaf ready.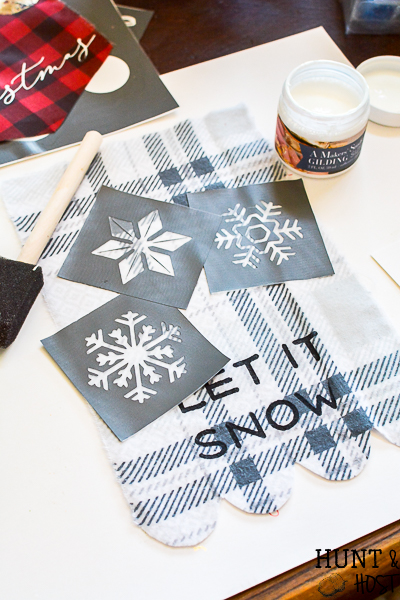
Next use a sponge brush to put the gilding size on the stencil, spread to make sure you cover the entire stencil opening. Remove the stencil and let the sizing come to tack, this means it dries slightly and is sticky when you touch it. I find that on fabric this happens pretty quick. Make sure your hands are completely dry and free of glue then get a sheet of gold leaf and gently place over the stenciled area. Rub the gold leaf gently onto the sized areas using your finger or the tissue paper that the gold leaf comes with. 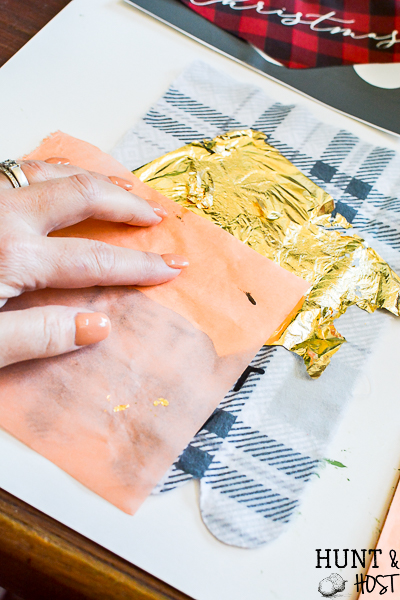
Once you have covered all the areas use a dry sponge brush or dry chip brush and brush away the excess gold leaf to reveal your newly gilded design! 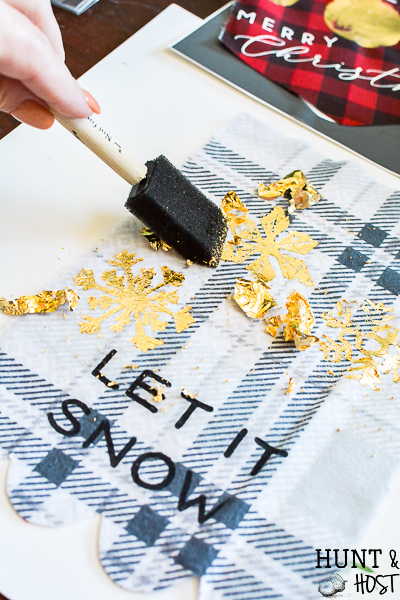
You can learn all the basics of working with these stencils and Chalkart paint here. Here are a few more fun handmade Christmas ornaments I created using the holiday stencils from A Maker’s Studio. You can use your imagination to design others or copy these! This one is so gorgeous! Gather small branches from your yard to wrap the top of the fabric around and glue it with fabric glue. 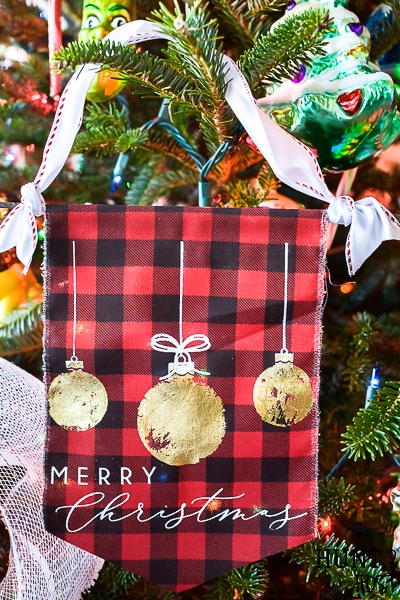
To make a the bottom of your fabric ornament like a banner simply fold in half and cut a short V. If you want to make scallops fold in half once and then again, then cut a round edge to the end! I suggest using Gel Art INK for the fabric ornaments, it is permanent and washable! You will need to use it on the stencil, allow a few hours to dry and then heat set it with an iron.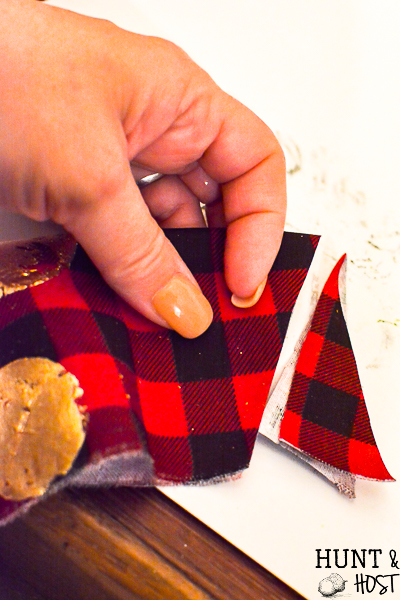 If you want a little more sparkle in the mix try this…Use your stencils to make the base design. Once the ink is dry use a small brush and add the gilding size to select spots on your ornament. Sprinkle super fine glitter over the sizing for a special, glittery touch to your handmade ornaments.
 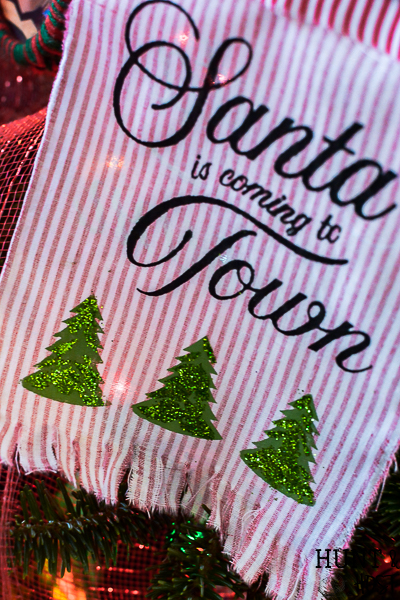 Cut a simple little fringe bottom.
  For this one I cut longer fringe at the top and tied it around the wood stick.
 You can use jute twine or ribbon to tie on the hanger!
 Here is one more cute on! Hang them on your tree, on a cabinet, door knob or wreath! Be sure to share this project on Pinterest!
 Most of all have a VERY MERRY CHRISTMAS!


Seeing your ornament designs has inspired me to make some with the tons of sheet music I have! I believe your ornament designs would work well on the sheet music. I’m a new crafter, but I’m going to try this! Thank you for sharing this with us.
That will be so pretty and YOU CAN DO IT!!!! You’ve got this friend!