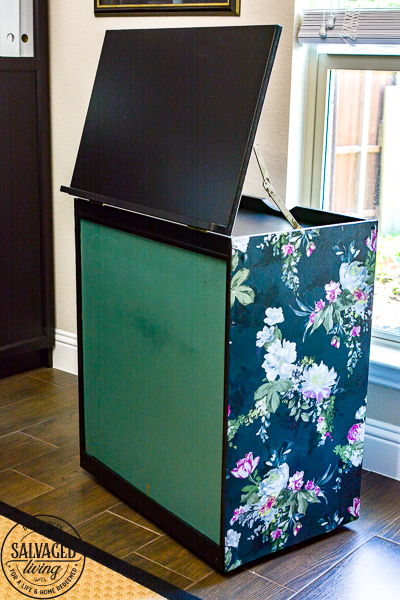
I can’t believe this craft cart looks so good. You are going to want one. Don’t say I didn’t warn you! I’ve painted a lot of furniture in my day, but this one. This one turned out different. It turned out dreamy and like something I bought for a million bucks. And I’m gonna show you how to do it too. It’s really pretty easy, but don’t tell anyone. They’d never guess. Now on to the floral painted furniture tutorial. This post is sponsored by Wagner Spraytech, all ideas and opinions are my own.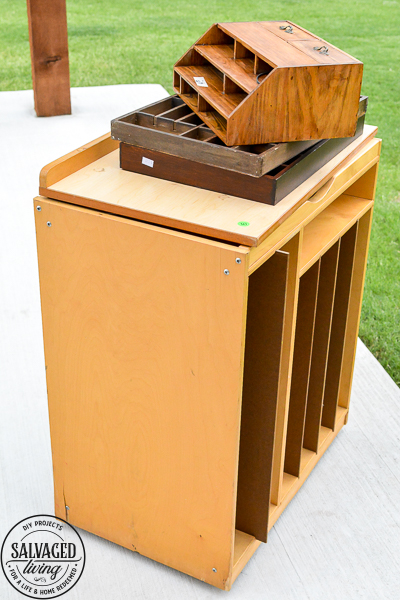
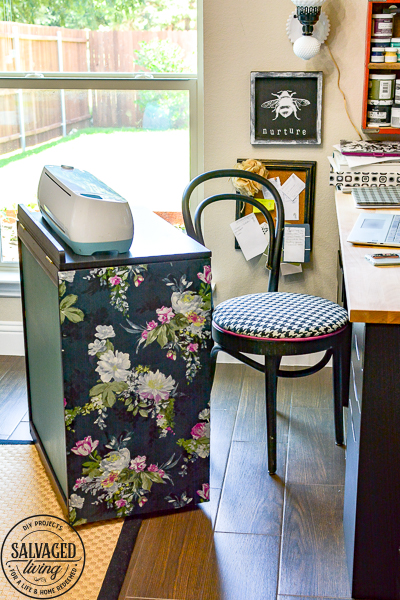
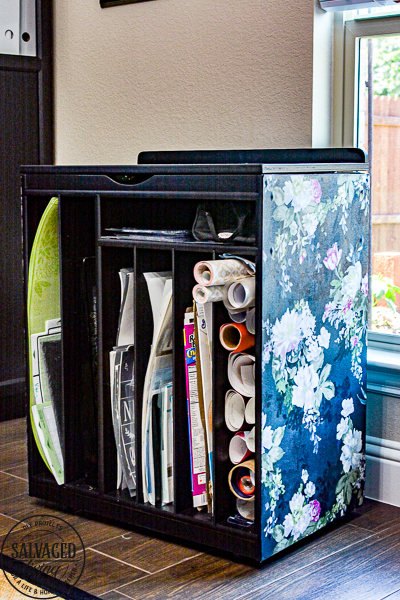
This cart was FIVE DOLLARS at a garage sale. It has elementary school written all over it with that laminate wood and yellowish color. There are awesome storage slots and a chalkboard on the back. I knew it would be perfect to hold all my stencils and Cricut vinyl. But don’t worry if you don’t have a cool craft cart like this, you can do this technique on just about any furniture you want to flip to fabulousness. Watch the video here:
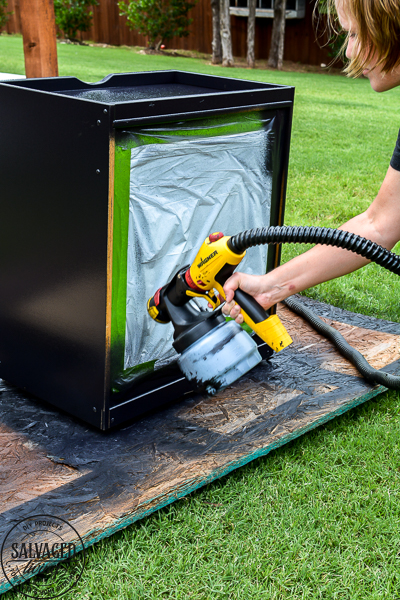
I started off by using my Wagner FLEXiO 500 sprayer to tackle the paint job on this craft cart. Will all the slots and pockets this cart is the perfect candidate for a paint job with a sprayer. It was ridiculous how quick I was able to spray this furniture piece. I covered the chalkboard with a plastic trash bag and painter’s tape and that took longer to get ready than to spray it lol. You can read my paint spraying tips here.The sprayer gives a smooth paint finish that looks super duper professional. (I have a supply list down below for you with all the details)
Once the piece was dry I brought it inside for the extra special treatment. This is the part you don’t want to miss. This is the silly easy idea to take your plain furniture into a floral painted furniture dream. You can do this. I believe in you.
DIY Floral Furniture Tutorial
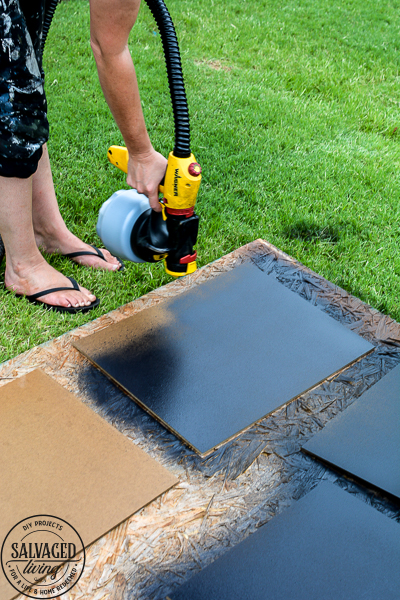
- Paint your furniture a solid cover using your Wagner paint sprayer.
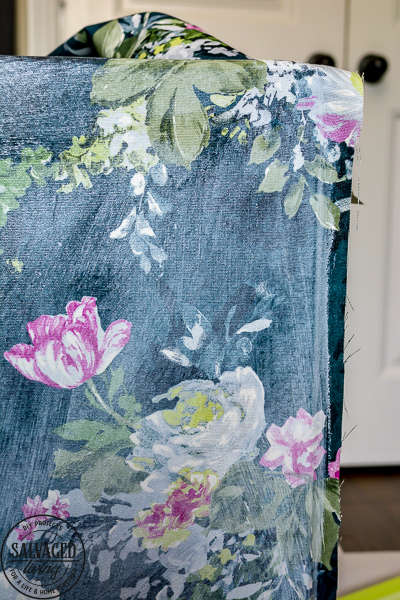
- Find some amazing floral fabric. I got mine at Joann Fabrics, 40% off coupon for the win! Pro Tip: Shop ALL the fabric aisle in the store, not just decorator fabrics!!! This application is best for a cotton or firmer, non stretchy kind of fabric.
- If you use a dark colored fabric on dark paint you are good to go, if you use a light colored fabric on a light paint you are good to go. If you have a light color fabric that might show the color beneath it and you used dark paint consider painting the under surface a light color where your fabric will be placed. Otherwise the look and color of your fabric might change.
- Cut your fabric slightly larger than the area you want to cover.
- Use Mod Podge and working in small sections paint the furniture where you want to apply the floral decor. Smooth the fabric onto the surface, make sure you are laying the fabric on straight. Continue until entire surface is covered and wrinkles or bubbles are smooth.
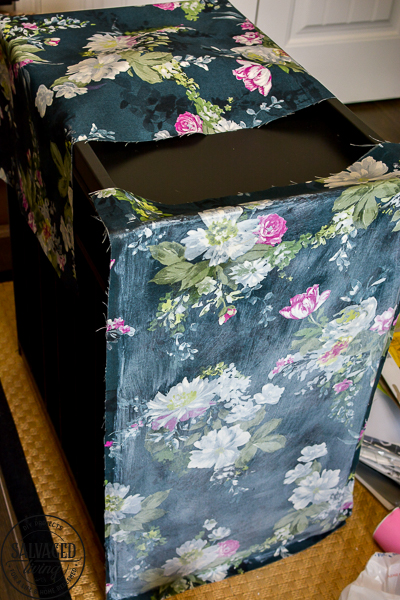
- Paint Mod Podge on top of the fabric you just glued down. BE SURE to paint the fabric with Mod Podge a little past the edge of your furniture so the fabric dries hard. Your fabric will look cloudy when you do this step and that is OK, it will dry clear.
- Allow to dry completely.
- Using a sharp Exacto knife trim the excess fabric from the furniture. The dried Mod Podge will make the fabric easy to glide the knife through.
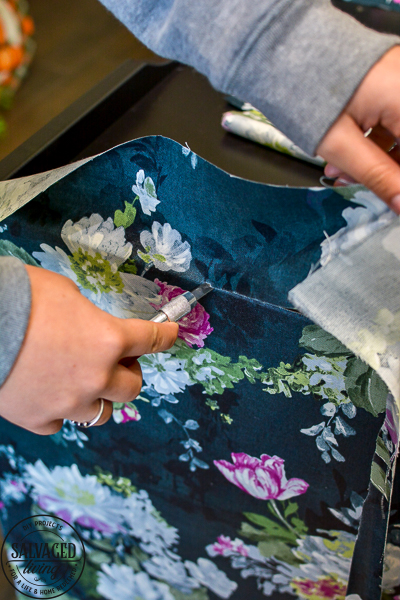
- You may have to touch up a few spots along the edged with a paint brush if you scrap them with the knife, so do that and you are done!!! Floral furniture gorgeousness is all your for the bragging rights.
Floral Painted Furniture Supply List
- Wagner Paint Sprayer – I use the FLEXiO 5000, you could use a lower # model though and still get amazing results!
- Paint – HGTV Home by Sherwin Williams available at Lowe’s in Caviar
- Floral fabric
- Mod Podge – this is exactly what I use
- Exacto Knife
- Sponge Brush
- Small paint brush for touch ups
Pin this for that day that is coming for you. That day when the perfect piece of furniture falls in your lap and begs to be pretty! 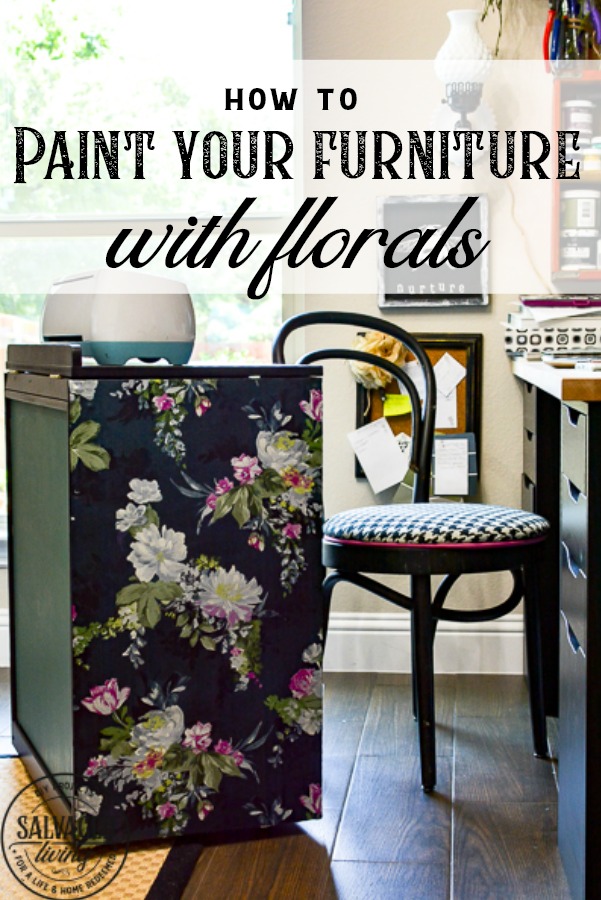


What a great idea! Finished cabinet is beautiful. I’ve used Mod Podge and fabric to make floor cloths, and I know it holds up quite well.
Hmmm, wish I could find this type of cabinet for MY Cricut supplies….maybe I should go garage sale-ing in your neighborhood.
lol – that is an awesome idea for the floor cloth,never thought of that!!
This is so GORGEOUS! I absolutely love it! Great job, color and fabric choices!
thanks a bunch. It is such a functional piece, meant for a classroom but great for crafts!!!
This turned out beautifully.
thank you Debbie!
That looks amazing! Love how it came out. =)
thank you Shelley – I think it looks better in person too! wish y’all could see it!
That is beautiful! I need to be in the lookout for one of those. Maybe one of the teachers I worked with had one.
Shut the front door. I love it!
thanks girl. It is easy to do and makes a huge change!
I love having a specific area for different crafts. Yours works perfectly to house your Cricut and supplies. And it looks really nice. Two thumbs up!
this piece is really the best thing!!!