Everywhere you look aged chippy wood is the farmhouse rage. But we don’t all live in the country, with easy access to old barns full of beautifully aged barnwood. I have a solution for you! 
This summer I had so much fun attending the Haven conference in Atlanta. Haven is a weekend packed to the brim with creative classes and education for DIY bloggers…plus it’s just a fun way for all of us to get together in real life. It is made clear if you’re headed to Haven you should bring an extra bag…empty. They give away so many amazing products from the vendors you can hardly carry all your new swag home!
One of my blogging buddies had the brilliant idea for us to join together and share how we all used various products from our Haven swag bag. A swag bag is the ultimate grown up’s goody bag, just like the kiddos tote home from a birthday party, only better. Many of the products we receive are new on the market, so you are getting a first peek at some really cool stuff!
One class I attended was with Amy Howard of Amy Howard home. Her products are some of my favorite. Like this antique mirror or aged stool. Her latest product line is the Vintage Wood Mercantile. It’s what let’s you DIY your very own aged barnwood. And it’s so easy.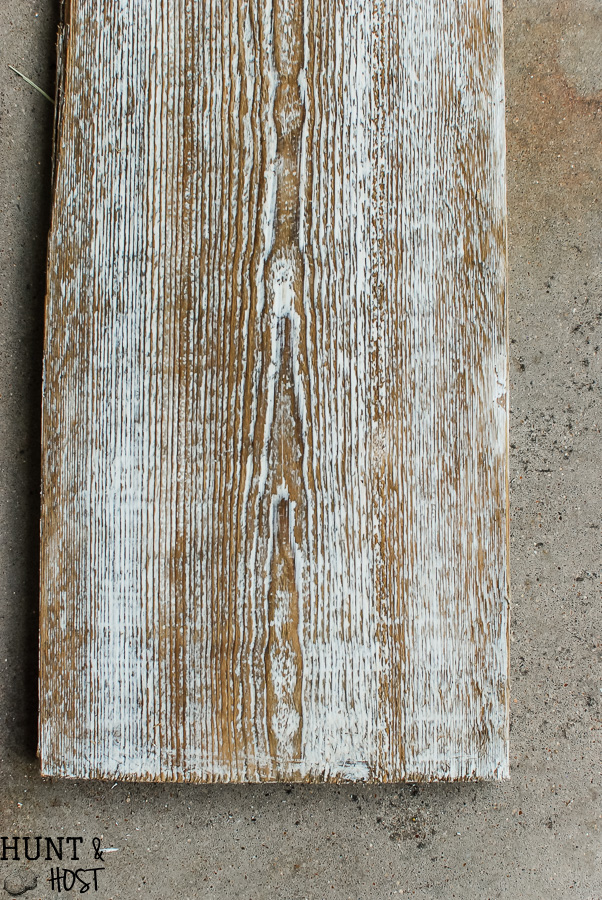
The island in my kitchen is large and I wanted a long board/tray to use on it while decorating for fall (You can check out my fall décor here). Instead of buying one I used my new swag to create my own aged barnwood tray. Here is what you will need: 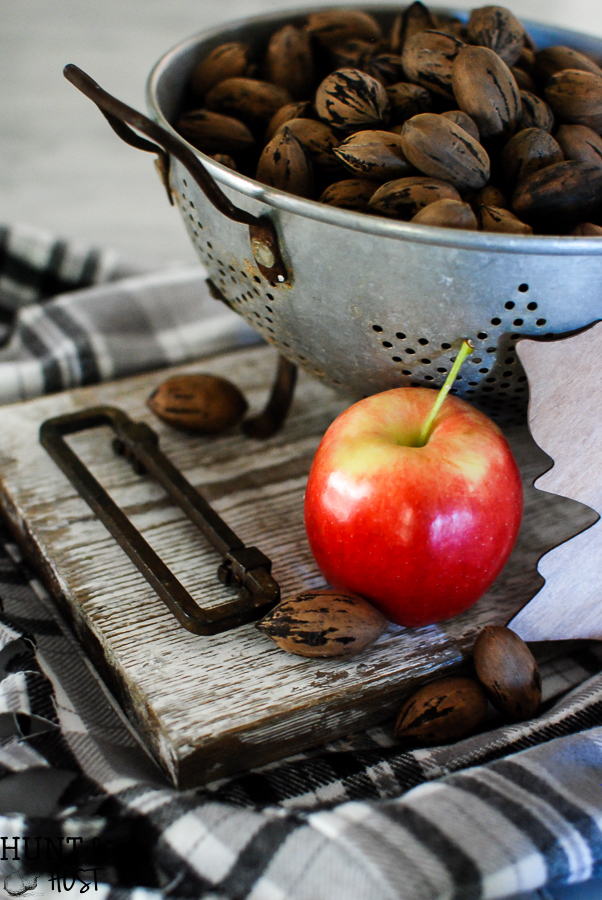
DIY Aged Barnwood Tray Materials
(I have added affiliate links for your convenience, this means should you purchase an item I would get a small commission, the product costs you the same)
Wood – size is your choice.
Optional (depends on wood you use): Better With Age
Sponge brush
Water
Hardware (similar to mine)
Old rag or paper towels
Sandpaper
Wax – this is the one I use on just about everything
I started with an older piece of wood I had in my stash. If you use new wood, get something that is rough and grainy, like fence board. You can age it using the Better With Age product to quickly get that left to the elements feel. I skipped that step and went straight to the weathered painted wood step. By the way – I’d love to have you follow along with other fun tutorials and DIY décor, join the e-mail list here:
The form you have selected does not exist.

- Mix the
Vintage PlasterPlaster of Paris with water until a runny paste is formed, a little looser than sour cream consistency is good. - Using a sponge brush spread plaster over board.
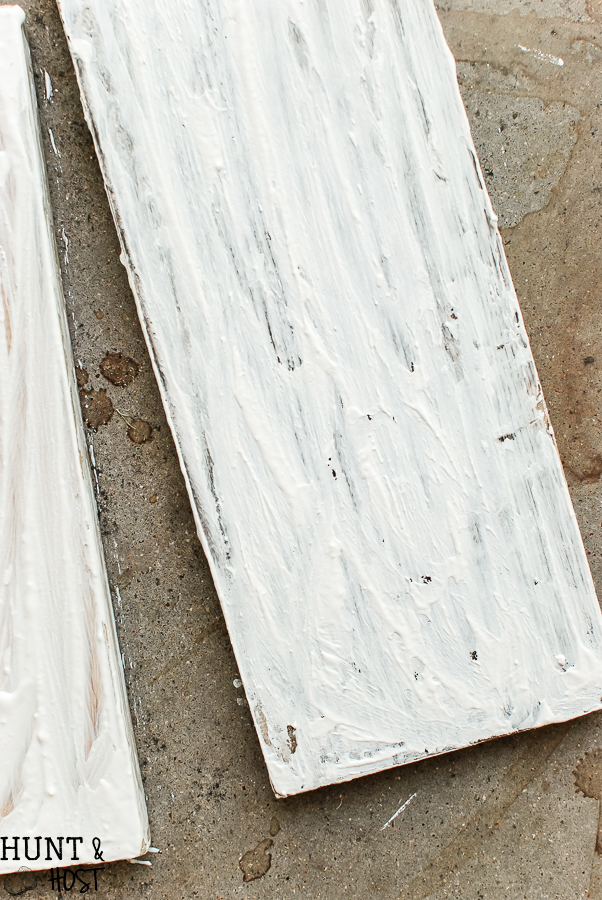
- Allow to set a few minutes until slightly tacky.
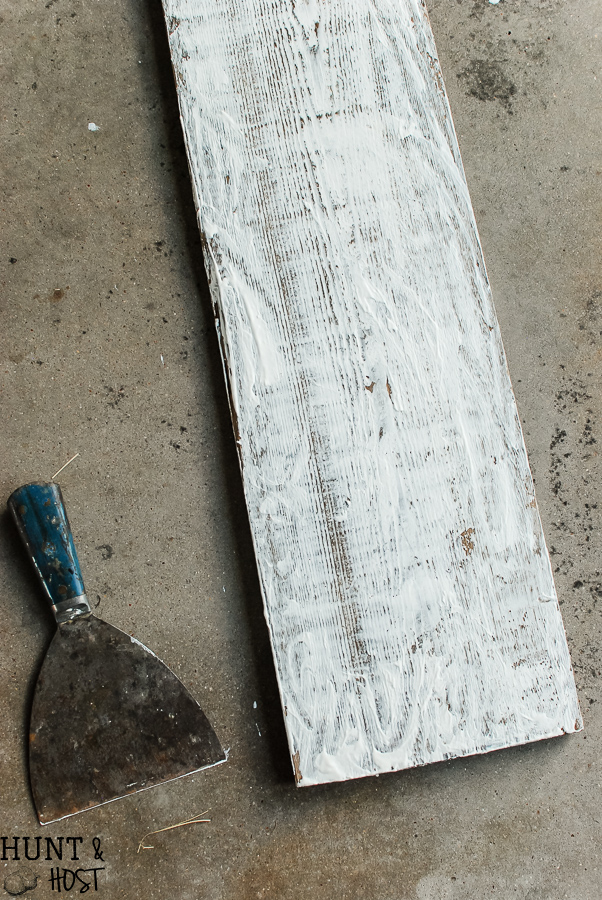
- Start scraping plaster off wood with putty knife. Wipe knife with rag or paper towels in between scrapes.
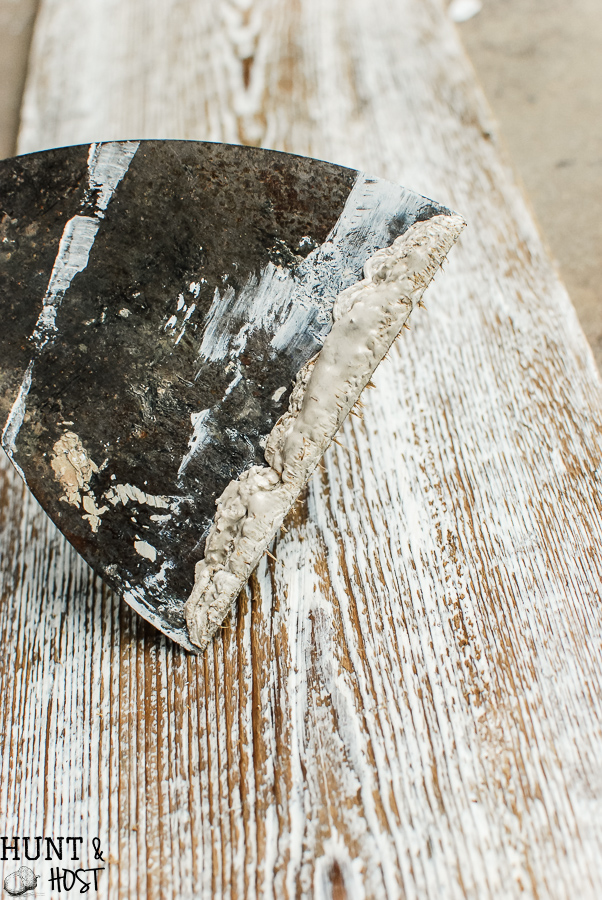
- Press knife firmly down at an angle and drag across board surface to remove desired amount of plaster. You can remove as much or as little as you like, depending on the look you are going for.

- Allow to dry completely. Then wax with a soft paste clear furniture wax to seal the chalk. (tutorial here)

- Add hardware to end of board by drilling holes to allow for handles. Here is a neat trick if you need to drill two exact holes like I did. Use a pencil to color the end of the hardware. Press into place on board and it will leave a mark for perfect hole location!

This board will definitely get some mileage around my house in different spots as the seasons pass! This product is easy to use and has a ton of potential for some amazing projects. Please be sure to pin this project for later.
See other DIY projects from Hunt & Host here: 
Now check out what my friends have come up with!
If you’d like to see last year’s fall décor, check it out here: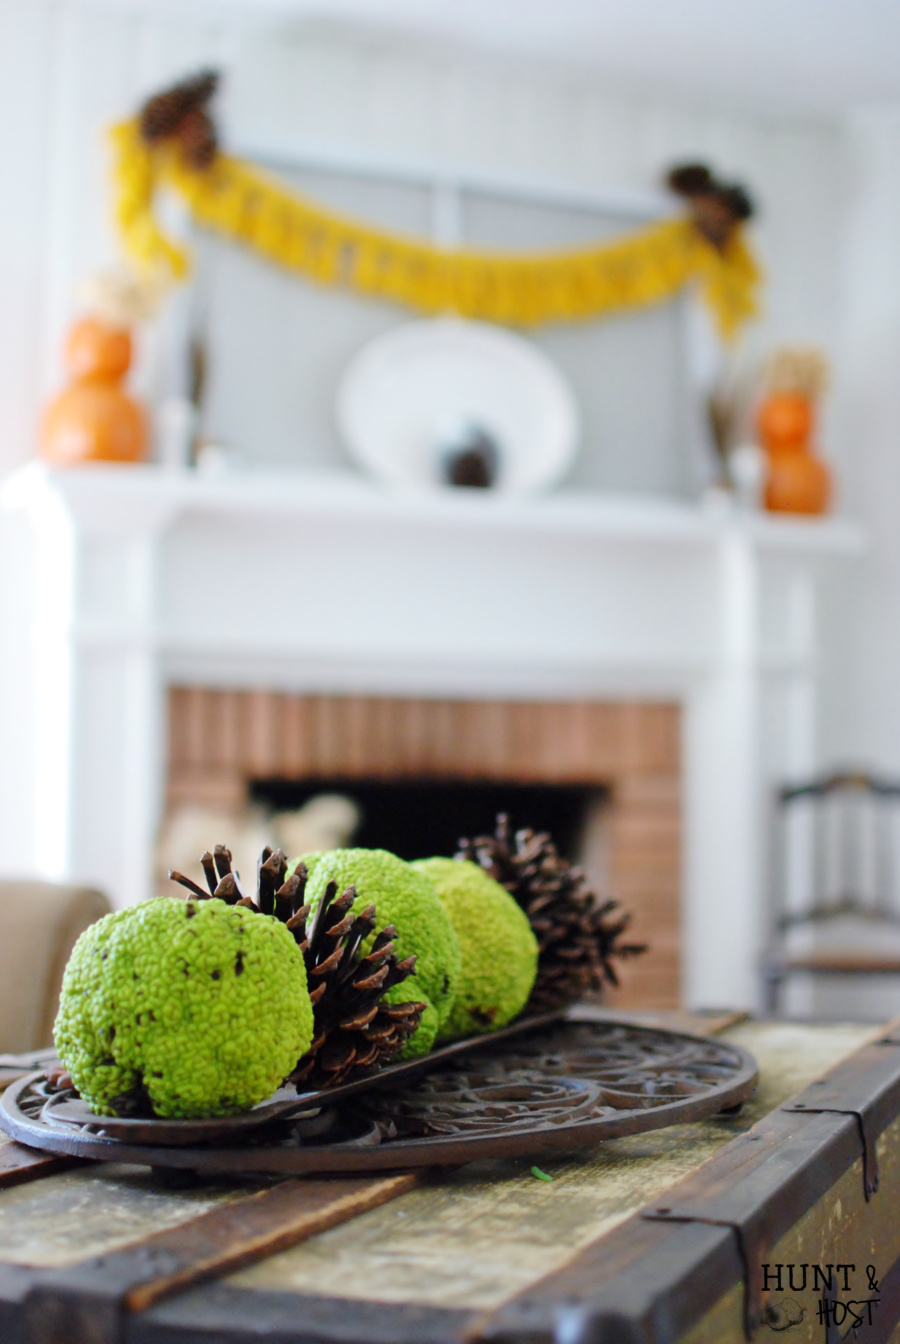


FABULOUS centerpiece! Your lovely photos caught my eye right away. I have a long island that this set-up would look fantastic on. And thankfully I have scrap wood for miles.
Thanks friend! Such an easy project that would cost a ton to buy!
I love your tray made with an “old” board. Thanks so much for taking the time to send the link. . I’m so sorry that your mom has been ill. I am praying for her to have a good recovery.
Thank you for the prayers, she has turned the corner, but it was a rough week!!!
could you tell me where you found that fabulous piece of hardware. I am going to try it
I wish I could, but I either took it off an old piece of furniture or bought it in a bag full of old furniture! I hoard hardware, lol!
Your DIY came just in time because I am going to make a farmhouse sign out of old bard wood, so I am going to give this method a try. Thank you
It is very simple and I think you will love the results!
Kim,
You chose the perfect board for this project. I love, love, love how it turned out.
It has been fun visiting everyone to hear about the items they got at Haven.
gail
It has been so fun! Such great imaginations all around! Thanks for stopping by
That looks fabulous! I love seeing all the different ideas everyone is coming up with!
It’s fun to see how everyone’s minds work
I will certainly pray for your mothers fast recovery. I would never have thought to make wood look older like this. Never too old to learn. lol!
Thanks for the prayers and I am learning all the time too…makes it fun!
So, I already have the real thing–barn wood, that is–from my very own barn that was at the farm home I grew up in! Mine has just a little of the old red barn paint left on it, and I don’t want to lose that, however, it definitely needs “something” to actually make it look and smell better. I brushed it vigorously with a medium bristle cleaning brush and the old memories of being IN the haymow came back to me! SO it is definitely full of age-old spores just waiting to attack my allergies. What do you propose I do to make it look, smell and age better? This wood is likely almost 100 years old. I need to ask my dad if he knows when that part of the barn was last updated.
Wow – that sounds amazing! I would probably try some bleach water and sunshine. Get it clean with a bleach solution and then let it dry out in the sun and see how that works! Then I would seal it with wax or poly in the finish you would like. I would probably go with a matte finish, but it’s a personal choice! I bet it will be amazing.
I would use Baking Soda to remove the mustiness of the Wood and sunlight
That is a great idea!
Such a great, easy project! Thanks for linking up to the Talk of the Town link party–you are my featured pick for this upcoming week!
THANK YOU! I sincerely appreciate that!
Brilliant and gorgeous! Such a smart thing to do–I love the look of barn wood, but have no source for it. Thanks very much for the tutorial!
And thanks so much for joining the Grace at Home party at Imparting Grace! I’m featuring you this week.
Super thanks for the feature, this is such a simple project. Gratitude for days here!
This is awesome! I just discovered the vinegar/steel wool trick for “aging” wood last week- but this looks pretty cool too! (also could have used that pencil trick with the hardware yesterday, but I’ll pin away for future reference!) Love your blog header! Happy Fall Kim! Going to poke around your site some more!! ♥
I haven’t tried the vinegar yet, but want to. Thanks for sharing and I do hope you’ll hang out here!
Kim, that is one beautiful barn board look! I did think it was the authentic finish! The entire centrepiece is just gorgeous! Featured you this weekend on DIY Salvaged Junk 349. Thanks for linking up! 🙂
Thank you so much Donna!!! It is SO easy! I appreciate the feature!
Tried your plaster technique – so easy and such an amazing finish – Love it 🙂
Thanks so much!!
Isn’t it crazy how simple this is!!!
Love it, great technique with gorgeous results! Thanks so much for sharing on craft schooling Sunday!
Thanks – it is such a simple project, my favorite!
Great tips for those without access to natural barn wood. Thanks for sharing on Family Joy Blog Link-up. Please come back and join us again! Remember to leave your host a comment to increase the chance of being featured.
Love this! I’ve never heard of this product. Your board turned out perfect!
Would you consider sharing them at our weekly Dishing It & Digging It Link Party? We are live every Sunday @ 4pm.
http://www.thestonybrookhouse.com/2016/10/dishing-it-digging-it-link-party-120.html
SO glad you like and the party sounds fun, thanks for letting me know about it!
Sadly I didn’t go to Haven this year. I want to try the product that produced such fantastic results. Thank you for sharing at the Snickerdoodle Create Bake Make link party!
Haven was great, I love finding new products like this, it is SO easy
Love the diy aged barnwood! Thanks for sharing at the Inspiration Spotlight party @dearcreatives Pinned & Shared
Does the plaster harden enough that you could wipe down or put outside in the weather?
I have been wondering the same question! I haven’t tried it outside yet, but I will do a test run and let you know! I think it will though…
I don’t know if this is still an active site but I thought you should know that the plaster aging is not a good idea if you intend to cut the wood with a power saw as it will dull the blade very rapidly. So if your plan is aged picture frames I wouldn’t use this method unless you are okay with dull saw, router or what ever other blades and drill bits you use.
Thanks Roger, this is a great tip! I actually just used this wood as a tray, but this is good to know for future reference. You could always age the wood after you have made whatever cuts necessary for the intended project. Thanks for letting me know!
Hi Kim….great post! One question….where do you purchase the “plaster”? Many Thanks Robert…
HI Robert you can purchase these products through the links I provided to the Amy Howard at home website! Hope that helps, please let me know if you have other questions!
The vintage plaster link is no longer working, would love to get some too!
I’ve sent an e-mail asking about this – they must be temporarily out. I will let you know what I hear, so sorry about that!
Great tips here. I have a very old tiny farmhouse and am currently re-doing my bathroom floors. I had hoped to find more of the century old plank flooring under the ugly tile but was not so lucky..I am in the midst of trying to figure out a cost effective farmhouse floor project. If I had this product on hand my floors would be finished by tomorrow. Thanks for the inspiration. Nice blog.
good luck – I am sure they will be amazing!!!
Love the look! Thank you for the tips. About how many square feet will the bag of plaster cover?
you know, I am not exactly sure, the Amy Howard people could probably tell you for sure, they are super nice. I’m so sorry, I’ve just done a piece here and there, but it would make a great wall or look good on a large area
Do you have to put a sealer on the bar wood tray?
you certainly can, I would use a matte spray paint, polyurethane or a wax finish. I would not put food directly on the tray and serve from there.
Hello! I recently tried this out and loved the result. I made a headboard. I went to put a clear coat on it and obviously the plaster was soaked up from the clear coat. Do you have any recommendations so the plaster won’t rub off?
I finish mine of with a soft wax and it seems to work perfect, maybe you could try that!? hope that helps!
Instead of a wax sealer, will a urethane work over the plaster of Paris ?
I haven’t tried it myself, but I don’t see why it wouldn’t work great!
I’ve just received a set of wood tables from a neighbor. They’ve been in her garage for about 15 years, so I’d say they’re pretty aged. Can I use this technique?
The wood would need to be pretty open and you would have to seal it for sure once you were done. I would test a small section first to be sure! Hard to say without seeing it!
Will Plaster of Paris from a craft store work just as well as the Vintage Plaster?
I have tried it and not got the same results. The finish is different, but if you seal it you can try it.
They changed the name to Venetian plaster. But does plaster of Paris work as well? What’s the difference?
You can use plaster of Paris, but it does come out a little different. I have tried both and the Venetian plaster gives a better finish, less chalky.
Love this look on my painted floors. Any suggestions?
I’m not sure this would work on floors, but it sounds awesome…sorry I don’t have a good answer for you.